From Indoors to Outdoors: Maximizing Summer Blooms with Early Spring Bulb Planting
Planting spring bulbs indoors before transferring them outdoors can be a smart strategy for gardeners aiming to enjoy earlier blooms of spring planted bulbs in summer. As the weather warms up, transitioning these pre-planted bulbs outside can expedite the growth process, leading to vibrant and colorful flowers.
Embracing Early Spring Bulb Planting
The Importance of Early Spring Bulb Planting
Planting spring bulbs at the right time is crucial for gardeners who want to see their garden flourish. Starting early, particularly in the spring, gives bulbs a significant advantage. It allows them to establish their root systems when the ground is still too cold. This early start to planting spring-planted bulbs, can lead to blooms earlier in the summer.
Indoor Preparation: Starting Your Bulbs Inside
Beginning the growth process indoors is a strategic move for cultivating a successful flower garden. Starting bulbs inside allows you to manage the conditions closely, providing consistent temperatures and controlled watering that might be challenging to maintain outdoors. This protects the bulbs from late frosts and other unpredictable weather patterns that could hinder their development.
For indoor preparation, select a well-draining potting mix and containers with adequate drainage holes to prevent waterlogging, which can cause bulb rot. Place the bulbs with their tips upward and give them enough space to grow without overcrowding. It’s essential to keep the soil moist but not waterlogged. By providing these optimal conditions, you can expect a robust root system and sprouts ready to thrive once they’re moved to the garden. This head start is invaluable for gardeners aiming for an early and prolonged display of spring planted flowers.
Successfully Transitioning Bulbs from Indoors to Outdoors
When the risk of frost has passed, it’s time to transition your sprouted bulbs outdoors to benefit from the natural elements. This process, known as “hardening off,” involves gradually introducing indoor-started plants to the outside environment. Begin by placing the bulbs outdoors for a few hours each day in a sheltered area, gradually increasing their time outside over a week or so. This helps the plants acclimatize to the sun, wind, and temperatures they will face in the garden.
Before planting, choose a spot in your garden that receives adequate sunlight and has good soil drainage. Carefully remove the bulbs from their indoor containers, being mindful not to damage the roots or shoots. Plant them at the same depth they were growing indoors, and water them well after planting to help settle the soil around the roots. With careful attention during this critical phase, your bulbs will seamlessly adapt to their new outdoor home, setting the stage for a bountiful flower garden.
Ensuring Summer Blooms: Caring for Transplanted Bulbs
After transitioning your bulbs to the outdoor garden, ongoing care is essential to ensure a beautiful bloom in the summer. Regular watering is important, especially during dry spells, to keep the soil moist and encourage continued growth. However, avoid overwatering, which can lead to bulb rot.
Fertilization is another key component of care. A balanced, slow-release fertilizer, like Bulb Tone by Epsoma, applied at planting and again during the growing season according to the instructions. Additionally, mulching around the plants can help retain moisture, suppress weeds, and keep the root zone cool.
A Gardeners Guide to Spring Planted Flowers Varieties
Choosing the right varieties is crucial for a gardener looking to create a diverse and vibrant flower garden. Among the popular spring bulbs are dahlias, lilies, and gladiolus, which come in a range of colors and sizes. Note that some spring planted bulbs do need to be dug up in the fall after blooming as they are not cold hardy in our zone. If you are looking to start a cut-flower garden, spring planted bulb flowers are some of the popular choices for their long-lasting blooms.
By selecting a mix of varieties that bloom at different times, you can create a succession of color that lasts throughout early to late summer months, keeping your garden lively and dynamic.
Maximizing Blooms with Fall Bulbs: An Additional Tip for Gardeners
For gardeners looking to extend their blooming season, incorporating fall bulbs into their planting strategy is a wise move. Fall-planted bulbs such as tulips, daffodils, and alliums are planted in autumn but bloom in spring, offering an early burst of color. By planting these in conjunction with spring-planted flowers, you can create a seamless transition of blooms in your garden.
When planting fall bulbs, choose a sunny location with good drainage to prevent water from pooling around the bulbs, which can cause rot. Plant the bulbs at a depth three times their height, and water them thoroughly after planting to encourage root growth before the ground freezes. With the addition of fall bulbs, you can enjoy an extended display of color that begins in early spring and lasts through the summer months, ensuring your garden remains a vibrant and inviting space.
The Tip Often Forgotten: Explore Pottery for Optimal Houseplant Health
Types of Pottery for Houseplants
Terra Cotta: Nature’s Gift to Plants
Terra cotta has long been favored by gardeners for its classic look and natural properties. This porous clay material allows air and water to pass through the walls, promoting healthy root systems by preventing waterlogging and facilitating root aeration. These pots are ideal for plants that thrive in a dry environment, such as succulents and cacti. The earthy tone of terra cotta complements the green hues of houseplants, creating a natural and warm aesthetic. Some really love the look of terra cotta that has been used and has water marks and mineral deposits! Moreover, the weight of terra cotta pots provides stability, which is particularly useful for top-heavy plants. Although they’re prone to cracking in freezing temperatures, for indoor use, terra cotta remains a durable and timeless choice that can enhance the growth and appearance of your indoor plants.
Glazed Pots: A Colorful Option
Glazed pots offer a vibrant alternative to the natural look of terra cotta. Their glossy or matte finish, available in a multitude of colors, can brighten up any space and add a touch of personal style to your indoor plant collection. Beyond aesthetics, the glaze on these pots creates a non-porous layer that helps retain soil moisture, which is beneficial for plants that require a more consistently moist environment. While this is a plus for hydration-loving plants, it’s important to ensure these pots have drainage holes to prevent overwatering. Glazed pottery is also less susceptible to weather-related wear, making it a durable choice for both indoor and outdoor settings. When choosing glazed pots for your houseplants, consider the moisture needs of your plants and select a pot that will cater to those requirements while also satisfying your decorative preferences.
Exploring Unconventional Materials: Plastic and Bamboo Pots
Plastic and bamboo pots stand out as unconventional choices that bring unique benefits to the table. Plastic containers are lightweight, affordable, and come in an array of designs. Their non-porous nature keeps soil moist, which can be advantageous for plants needing consistent hydration. However, it’s crucial to ensure they have proper drainage to avoid waterlogging. On the sustainability front, bamboo pots are gaining popularity. Made from renewable resources, they offer an eco-friendly option for gardeners who are environmentally conscious. Bamboo pots are typically biodegradable and can add a contemporary, natural look to your indoor garden. Both plastic and bamboo pots are versatile and practical for a variety of houseplants. When selecting pots made from these materials, consider the environmental impact, the watering needs of your plants, and the style that best fits your living space.
The Right Pot for Your Plant: Tailored Solutions
Choosing the right pot for your plant is not just about matching styles; it’s about understanding the specific needs of each plant species. Different plants require different moisture levels, soil types, and temperature conditions. A tailored solution involves selecting a container that will optimize your plant’s health and growth and your watering habits. For example, orchids thrive in pots that offer plenty of drainage and airflow, making mesh pots or specialized orchid containers ideal. Similarly, moisture-loving tropical plants may benefit from self-watering pots that help maintain consistent soil moisture levels. When selecting a pot, consider the plant’s root system size and growth pattern. A pot that’s too small can restrict growth, while one that’s too large can cause the soil to dry unevenly. Tailored pot solutions ensure that your indoor plants have the best possible environment to flourish and you don’t feel burdened by caring for them.
All Shapes and Sizes: Mix and Match Strategies
The shape and size of pottery are just as critical to the health of your houseplants as the material from which the pot is made. Plants with compact root systems or like to be root bound, such as succulents, cacti, and snake plants are best suited to shallow or smaller containers that align with their minimal root depth, simplifying maintenance and care. Conversely, as many houseplants enter a period of rapid growth in the spring, they often require transitioning to larger pots to accommodate expanding root systems. Indications that it’s time to upgrade to a more spacious pot include water swiftly exiting through the drainage hole upon watering and a noticeable increase in the frequency of necessary watering. These signs reflect the root system’s reduced capacity to retain moisture in the soil, signaling the need for a larger living space to sustain healthy growth. If you notice these signs you should up pot your plant into a pot that is 1″-2″ larger in diameter. Don’t pot up too big or you run the risk of over-watering and causing root rot.
Taking Care: Ensuring Plant Health
The health of your houseplants can be closely link to the type of pottery you choose. Proper care starts with selecting a pot that facilitates the right balance of moisture, nutrients, and breathability for the soil and roots. Terra cotta’s porous nature helps prevent overwatering, but plants in these pots may require more frequent watering. Conversely, plastic and glazed pots retain more moisture, which can be beneficial or detrimental depending on the plant’s needs. Regularly check the drainage to ensure that excess water isn’t causing root rot. It’s also important to consider the weight and stability of the pot when caring for larger plants that might be top-heavy. A comprehensive approach to plant care, considering all these factors, will help your indoor plants thrive.
What Works: Learning from Experience
Experience is an invaluable teacher when it comes to selecting the right pottery for your houseplants. Over time, gardeners and plant lovers learn which materials work best for their specific indoor climate and plant varieties. Observing your plants’ responses to different pots is key—healthy growth, robust color, and strong root systems are indicators of a good match. Take notes on what works and what doesn’t for future reference, and don’t hesitate to repot a plant if it’s not thriving. Sharing experiences with fellow plant enthusiasts and with our staff can also provide new insights and ideas.
Knowledge is Power: Empower Your Green Thumb
Researching and learning about the specific requirements of your houseplants will enable you to choose pots that not only look great but also contribute to the health and longevity of your plants. Attend workshops, read gardening books, or join online communities to expand your knowledge. Remember, the more you know about the materials and their impact on plant growth, the better equipped you’ll be to select the right containers. This knowledge ultimately translates into a greener thumb, healthier plants, and a more beautiful indoor garden.
Digging Into the World of Spring Planted Vegetables: Potatoes and Onions
Whether you are a beginner looking to start your gardening journey or an enthusiast seeking to expand your knowledge, this informative guide will walk you through different potato varieties, onion options, and essential tips for a fruitful vegetable garden this spring. See the potato and onion varieties we commonly carry at the end of the article!
Introduction to Spring Vegetable Gardening
Understanding the Importance of Early Spring Planting
Early spring presents a unique opportunity for gardeners. It’s a time when the soil begins to warm up, offering ideal conditions to plant certain vegetables, like potatoes and onions. Starting your vegetable garden early can lead to stronger root development, fulfill required growing time, and a more robust harvest. Potatoes and onions, in particular, are hardy crops that can withstand the cooler temperatures of early spring. By understanding the importance of early spring planting, you increase the chances of enjoying a successful and productive garden.
Unearthing the Potential of Potatoes
Exploring Diverse Potato Varieties
Potatoes come in an array of varieties, each with its unique flavor, texture, and culinary use. Understanding the differences is key to choosing the right types for your garden. The most common categories are russets, reds, yellows, and whites. Russets, like Burbank, are known for their thick skin and starchy interior, making them perfect for baking and frying. Red potatoes have a smooth, thin skin and are excellent for soups and salads due to their firm texture. Yellow varieties, like the Yukon Gold, offer a buttery flavor, creamy texture and are versatile in the kitchen, suitable for roasting and mashing. White potatoes are less starchy and hold their shape well, making them ideal for boiling. Additionally, there are fingerling and purple potatoes, like Purple Majesty. which can add a gourmet touch to your dishes. By exploring diverse potato varieties, you can enrich your garden and kitchen with a range of flavors and textures.
Fundamentals of Planting Potatoes
Planting potatoes requires attention to detail to ensure a bountiful harvest. Cut larger seed potatoes into chunks with at least one or two eyes per piece. Before planting, some gardeners prefer to let the cut pieces cure for a day or two, which can help prevent rot. When it’s time to plant, prepare a sunny spot in your garden with well-drained, loose and fertile soil. Plant the potato pieces about three to four inches deep and twelve inches apart, with rows spaced roughly three feet apart. As the potatoes grow, mound soil around the base of the plants to cover the stems and support new tuber development. This process, called hilling, is crucial as it prevents the potatoes from being exposed to sunlight, which can cause them to turn green and become toxic. Regular watering, once the top few inches of soil are dry, particularly during tuber formation, is essential for a healthy potato crop.
Harvesting and Storing Potatoes
Harvesting potatoes at the right time is important for both taste and storage longevity. New potatoes can be harvested early when the plants begin to flower, while maincrop varieties should be left until the foliage starts to yellow and die back. To harvest, gently dig around the plants with a garden fork, being careful not to pierce the tubers. After removing the potatoes from the soil, let them dry for a few hours before cleaning off any dirt. For long-term storage, cure the potatoes for about two weeks in a cool, humid place away from direct sunlight to toughen up their skin. Once cured, store them in a dark, cool, and well-ventilated area. Properly stored, most potato varieties can last several months. Avoid storing potatoes near onions or fruits that produce ethylene gas, as this can cause them to spoil quicker. With these steps, your potatoes will be well-preserved for future use.
Understanding the Intricate World of Onions
Discovering Different Onion Varieties
Onions vary widely in shape, color, and flavor, with each type lending itself to different culinary uses. Yellow onions, like Texas Legend, are the most common and boast a balance of astringency and sweet flavor when cooked, making them highly versatile for both raw and cooked dishes. Red onions, like Red Candy Apple, with their vibrant color and mild flavor, are perfect for fresh salads and salsas. White onions, like Ringmaster, are often used in Mexican cuisine, have a sharper, more pungent flavor and are ideal for grilling and sautéing.
Apart from these, there are specialty onions like shallots and leeks. Shallots are favored for their delicate, slightly sweet flavor, and are a staple in fine dining recipes. Leeks, offer a fresh, mild taste and are commonly used in soups. Exploring these different onion varieties can enhance the flavors of your dishes and add diversity to your vegetable garden.
Vital Steps in Planting Onions
Successful onion cultivation begins with selecting the right variety for your region. Onions are day-length sensitive, so choose between short-day, intermediate-day, or long-day varieties based on your geographic location. Start with onion sets or plants for the best results. Plant the onions in a well-drained garden bed that receives plenty of sunlight. The soil should be rich in organic matter, with a slightly acidic to neutral pH.
Plant the bulbs or plants about an inch deep into the soil, spacing them about 4 to 6 inches apart to give them room to expand. If you’re planting rows, keep them about 12 to 18 inches apart. Water the onions regularly, especially during the drier periods, as consistent moisture is crucial for onion development and a full flavor. Be mindful of weeds, as onions don’t compete well with them. With these steps, your onions will be well on their way to a healthy growing season.
Tips for Harvesting and Storing Onions
When onions start to mature, their tops will begin to fall over. At this point, reduce watering to encourage drying. Once most of the tops are down, you can harvest by gently pulling or digging the onions from the ground on a sunny day. Allow them to dry in the sun for a day or two to cure, turning them to ensure even drying. If the weather isn’t cooperating, cure them under cover in a well-ventilated area.
After the outer skins have dried and the necks are tight, trim the roots and cut back the tops to about an inch above the bulb. Store the onions in a cool, dry place with good air circulation. Avoid storing them in plastic bags as moisture can accumulate and promote rot. Mesh bags or crates work well for storage. With proper care, your onions can last for several months, providing you with a long-lasting supply for your culinary needs.
Embrace Vegetable Gardening This Spring
Cultivating a Thriving Vegetable Garden
To cultivate a thriving vegetable garden, start by planning your space wisely. Consider the amount of sunlight, the type of soil, and the water drainage of your plot. Amend the soil with organic matter like compost to provide the nutrients your vegetables will need. When designing your garden, group plants with similar needs together and practice crop rotation to prevent soil depletion and reduce the risk of disease.
Be mindful of the spacing between plants to ensure they have room to grow without competing for resources. Regularly check for pests and diseases and address any issues promptly to protect your garden. Water your plants consistently, particularly during dry spells, and mulch to retain soil moisture and suppress weeds. With these simple yet effective steps, your vegetable garden can flourish, providing fresh produce and the satisfaction of growing your own food, with tasty results!
Potato Varieties We Commonly Carry: Red: Red Lasoda Red Pontiac Red Norland Viking
Specialty: Alisa Craig (Yellow) Patterson (Yellow) Red Zeppelin (Red) Leeks
Aster Yellows
As with most disease and pest problems, accurate diagnosis is the important part of controlling a problem and doing so responsibly.
In this case, the image shows aster yellows disease on a purple coneflower. Aster yellows is a disease that is spread through insects that suck on the sap of plants. In most cases, it’s the aster leafhopper that is the carrier of the pathogen.
Aster yellows creates distorted flowers with green tufts, chlorosis of the leaves, stunted growth, and green flower petals. Different species may exhibit slightly different symptoms.
It can spread among plants in the Aster family as well as hundreds of other plant species outside of the Asteraceae family. Including lettuce, garlic, carrot, tomato, chrysanthrmum, petunia, zinnia, coreopsis, and perennial weeds like dandelions.
Unfortunately, if you see signs of aster yellows the entire plant needs to be disposed of to avoid spreading the disease. There is no treatment since it becomes a systemic issue and travels down into the roots. Burn your plant or bury it in your compost so it’s completely covered. The disease will not survive once the plant is dead.
You can plant something else as a replacement as it will not transfer through the root system.
Dry and hot summers slow the spread of the aster yellows disease, while cool and moist summers may accelerate transmission.
*Note for MN residents. It is illegal to dispose of plant material in your trash bin. Especially noxious weeds. Letting them die on site is the best way to mitigate further spread. Choose an area, above ground to pile weeds and pull weeds that germinate.
In this Elements of Landscape Design Series post we are focusing on landscape design using perennials to accomplish your landscape vision.
Incorporating perennials into a garden is a wonderful way to add beauty, diversity, and longevity to your outdoor space. Perennials are plants that live for more than two years, returning year-after-year, and they come in a wide variety of colors, sizes, and textures. Here are some steps to help you successfully incorporate perennials into your garden:
Assess your garden
Before choosing perennials, take a close look at your garden to determine its conditions. Observe the amount of sunlight different areas receive, the soil type, the moisture levels, and area dimensions. This information will help you select perennials that are well-suited to your specific garden conditions and have the best outcome.
Determine your design goals
Consider the overall aesthetic you want to achieve in your garden. Are you aiming for a cottage garden with a romantic, informal feel? Pastel colors are the go-to for a cottage garden. Or perhaps a modern garden with clean lines and bold colors? Understanding your design preferences will guide your choice of perennials and their arrangement.
Think into the future
As perennials mature they will fill in the space and one of the hardest things to do when planting perennials is to consider the spacing between the plants when they are at their mature size. Being impatient and filling out the space right away is going to cause problems in the future, as well as increased chances of fungal and disease issues.
Maintenance and care
As with any garden, perennials require regular maintenance. Be sure to provide proper watering, mulching, and fertilization based on the specific needs of each plant. Regularly deadhead spent blooms and remove any diseased or damaged foliage to promote healthy growth.
Plan for seasonality
Perennials can provide blooms and interest throughout the year. When selecting plants, pay attention to their flowering times to ensure you have a mix of perennials that bloom in different seasons. This way, you’ll have a continuous display of color and texture from spring to fall.
Choose a variety of heights and textures
Incorporate perennials with varying heights and textures to create visual interest and depth in your garden. Combine tall, vertical plants like delphiniums or hollyhocks with mid-height flowers such as coneflowers or salvias, and add low-growing groundcovers like creeping thyme or sedum for a layered effect. Depending on the viewing angle, place tall behind mid-height and then low groundcovers.
Consider foliage
While flowers are often the main attraction, don’t forget about foliage. Perennials with interesting foliage, such as ferns, coral bells, or ornamental grasses, can add texture and color even when not in bloom. Incorporating a mix of foliage types can provide year-round appeal in your garden.
Group plants according to their needs
Group perennials with similar growing requirements together. Consider their preferred light levels, moisture needs, and soil conditions. This will make it easier to care for the plants and ensure they thrive. For example, place sun-loving plants in areas with full sun and moisture-loving plants in areas that retain more moisture.
Create focal points
Use perennials to create focal points or anchor areas in your garden. Select a few standout plants, like ornamental grasses, tall flowering perennials, or shrubby varieties like hardy hibiscus, and place them strategically to draw the eye and add drama to your landscape. Small Hydrangea trees are another great focal point option!
Incorporate native species
Consider including native perennials in your garden. Native plants are adapted to the local climate and require less maintenance, making them an eco-friendly choice. They also provide habitat and food for native wildlife, helping to support biodiversity. Incorporate native species: Consider including native perennials in your garden. Native plants are adapted to the local climate and require less maintenance, making them an eco-friendly choice. They also provide habitat and food for native wildlife, helping to support biodiversity.
Remember that gardening is a dynamic process, and as your perennials mature and spread, you may need to divide or relocate them to maintain the desired look and prevent overcrowding. With time and attention, your garden will flourish, and you’ll enjoy the beauty and resilience of your perennial plants for years to come.
If you are a houseplant parent, it’s inevitable that you will have to deal with insects at some point. It’s important to keep on eye on your houseplants and check the tops and bottoms of leaves when you can to make sure you don’t have an infestation of the common insects found on houseplants and catch them before they get out of control.
Mealy Bugs
Signs of infestation: Plant leaves have fuzzy white spots. Look in the nooks and crannies of leaves and stems as these are their favorite spots. You can see these insects easily.
Step 1: Try to wash the Mealybugs off with a steady stream of water. When they have developed their hard outer shell, this may be difficult. Dip cotton balls in alcohol and remove all visible mealybugs. Use cotton balls to clean the leaves and cotton swabs to clean inside small gaps. Step 2: Repeat the treatment as necessary. This is best for light infestations. Mix 1 cup of rubbing alcohol with 1 quart (32oz) of water. Pour the solution in the spray bottle or straight rubbing alcohol for thicker, hardier leaves. Step 3: Spray the whole plant, not only where mealybugs are visible. Spray leaves well on their tops, under leaves and stems. Repeat the treatment once or twice a week until the issue is gone. Alternative sprays for heavy infestation that may work better: Insecticidal Soap Spray, Neem oil or pyrethrins are other sprays that can be used if alcohol wipe isn’t working and often times a quicker way to kill pests.
Spider Mites
Signs of infestation: Plant leaf gets a “dusty” look in an area. They can be yellow or red in color. Often found on the underside of leaves. Spider mites are seen more often in the winter inside because they prefer dry and warm environments. Raised humidity, keeping away from heat source or locating plants in higher humidity areas helps in prevention but not guaranteed.
Step 1: First dislodge mites with a steady stream of water outside or in the shower. Dip cotton balls and swabs in alcohol and remove all visible mealybugs. Use balls to clean the leaves and swabs to clean inside the gaps. Step 2: Mix 1 cup of rubbing alcohol with 1 quart (32oz) of water. Pour the solution in the spray bottle. Step 3: Spray the leaves wipe off or use a houseplant insecticidal spray. Some people use Neem Oil that can help but an insecticidal spray works the best and will take less time to get rid of them. Step 4: Treat any plants that are nearby as well since they spread easily or at least rinse off their leaves and spray with alcohol. *For any spray you can test a leaf to make sure it doesn’t damage the leaf and avoid spraying the leaf during the sunniest part of day or if the plant gets direct light. Step 5: Repeat the treatment once or twice a week until the issue is gone.
Fungus Gnats
Signs of infestation: Tiny small black bugs are flying around the soil of your plants. They do not feed on your plants but take advantage of moist soil to lay their eggs within the first couple inches of soil.
Step 1: Change your method of watering. Water your plants by setting them in water and they will take up water from below. Leave the top 2 inches of soil dry. Alternatively, only watering your plants once the soil is dry a couple inches down and try to prolong between watering until reduced signs of adult gnats are seen. Step 2: Use BT- bacillus thuringiensis powder. It’s a natural bacteria that produces proteins that kill insects. Sprinkle BT on the top of soil of your plants. It is safe to use around humans and mammals but avoid ingestion of any product. Step 3: Control flying adult population with sticky traps placed around your plants.
If you see signs of any other insects on your leaves, most insects can be controlled with above methods of wiping leaves off, use insecticidal spray and systemic insecticide.
Please note: If you are worried about any spray treatments damaging a specific plant since some may be more sensitive than others, test the spray on one leaf first and look for signs of damage. Never spray in direct sunlight as that can result in sun scald marks due to the moisture on the leaves
If you have any questions about identifying an insect, please email us a picture of your plant if there are signs of insect damage to info@drummersgardencenter.com.
What You Should Know About Raspberry Plants
Summer-bearing raspberries and fall-bearing raspberries are two types of raspberries that differ in their fruiting habits and growth patterns. Here’s some information about each:
Summer-bearing raspberries:
Fruit production: Summer-bearing raspberries, as the name suggests, produce fruit during the summer season. They typically bear fruit on the second-year canes (also called floricanes) that grow during the previous year.
Harvest time: The harvest period for summer-bearing raspberries usually starts in early to mid-summer, depending on the variety and climate. The fruiting season typically lasts for several weeks.
Growth habit: After summer harvest, the second-year canes that produced fruit start to decline and should be pruned down to the ground. New primocanes (first-year canes) then grow during the summer and fall.
Pruning: To maintain healthy growth and encourage fruiting, it’s important to prune summer-bearing raspberries properly. Remove the old canes that have fruited, leaving the new primocanes for the next season’s fruiting.
*IMPORTANT FOR NEW PLANTS* Your new small raspberry plants may look like they died if you only had a cane up that was fruiting the last season. Wait for a bit into spring to see if new canes pop out of the soil before digging them up.
Fall-bearing raspberries (also known as everbearing or autumn-bearing raspberries):
Fruit production: Fall-bearing raspberries have a different fruiting habit. They produce fruit on both the primocanes of the current year and the floricanes of the previous year. This means they can produce two crops in a year.
Harvest time: The first crop of fall-bearing raspberries typically starts ripening in late summer or early fall, like the summer-bearing raspberries. However, the primocanes continue to produce fruit until the first frost, allowing for a second crop in the late fall.
Growth habit: Fall-bearing raspberries grow primocanes throughout the summer and fall, and these canes carry the first and second crops. After the second crop is harvested or frost occurs, the entire plant is pruned to the ground in late winter or early spring.
Pruning: Since fall-bearing raspberries bear fruit on both primocanes and floricanes, the pruning process is slightly different. In late winter or early spring, remove all canes that have fruited the previous year, leaving the new primocanes for the upcoming season’s fruiting. This promotes better airflow and prevents diseases.
Both summer-bearing and fall-bearing raspberries require well-drained soil, full sun exposure, regular watering, and adequate spacing for optimal growth. They are generally easy to grow and can provide a delicious harvest of sweet and tangy berries. The choice between the two types depends on your preference for a single abundant harvest (summer-bearing) or two smaller crops (fall-bearing) throughout the growing season.
Raspberry Management Information (pruning and training raspberry plants)
Be on the lookout for signs of pest damage, such as holes in leaves or wilting plants, and address the issues promptly. Japanese Beetle damage is usually seen starting end of June, which looks like your leaves have turned to lace.
The frequency of fertilizing your annual plant containers can vary depending on several factors, including the type of plants, the quality of the soil, and the type of fertilizer you are using. However, as a general guideline, it is recommended to fertilize annual plant containers every two to four weeks during the growing season. Choose a fertilizer that is specifically formulated for flowering plants or general-purpose fertilizers with balanced ratios of nitrogen (N), phosphorus (P), and potassium (K). This will provide the necessary nutrients for healthy growth and vibrant blooms.
Watering and Maintenance:
Check the soil around your plants, especially newly planted ones, to ensure they are getting enough water in the summer heat. If they are dry a few inches down, water early in the morning or late in the evening to reduce evaporation. Remove any weeds that might have sprouted to prevent further spread of unwanted plants. Use a hand trowel or a garden fork to gently loosen the soil around the weeds and carefully remove them, making sure to get the roots out as well.
Harvesting:
If you have a vegetable or fruit garden, now is a great time to harvest ripe produce. Pick ripe fruits and vegetables such as tomatoes and berries. Regular harvesting encourages continuous production and ensures your plants stay healthy. If you have birds or other critters eating your raspberries, consider netting your berries while they ripen.
Pruning and DeadheadingAnnuals:
Regular pruning and deadheading of annual plants promotes healthy growth and flowering of your annual plants. Use sharp and clean pruning shears to remove the excess growth. We recommend to only prune 1/3rd of the plant size. Additionally, deadhead any faded or spent flowers to encourage new blooms. This will not only keep your garden looking tidy but also stimulate the growth of more vibrant flowers.
Think of your fall vegetable garden in July!
In the month of July, it’ll be time to start broccoli, cauliflower, brussel sprouts, and cabbage seedlings for fall planting. Many frost tolerant annuals should be started 6-10 weeks before first predicted frost date. In Zone 4, that is September 21st-October 7th.
Remember, specific tasks might vary depending on your location, climate, and the types of plants you have in your garden. Always adapt your gardening tasks to suit the unique needs of your plants and the current season.
Read Beneficial Bugs Not all insects are cause for worry. In fact, many insects are beneficial. Attract the beneficial bugs with plants to help mitigate the non-beneficial bugs. This is a must read if you want to cut back on insecticides and create a balanced ecosystem.
Read TOP 5 TIPS for Summer Plantings The hot weather and drought conditions may give gardeners pause before they add to their gardens and landscape. With these top 5 tips you can make summer garden planting successful
Landscape Design Using Evergreens
In this Elements of Landscape Design Series post we are focusing on landscape design using evergreens as a sustainable plant that is one of the most versatile plant groups.
Partnering evergreens with shrubs and perennials
Evergreens create structure, pretty living privacy screens, backdrops, form, texture and rhythm. A single evergreen can be a focal point or a complimentary backdrop to other plants, garden decorations and resting areas.
Architectural simplicity, which is very popular right now, can be easily created with a row of evergreens with the pop of colors of blooming shrubs in front. Add another layer in front of those shrubs with a repetition of one or two perennials and you can have a three-layer balanced look. Have even more fun with the spaces in-between the perennials with annuals so you can have flexibility with color schemes year-after-year. A gradual transition in heights creates a pleasing effect compared to an abrupt tall and then short plant in front. Of course, if you like contrast that may be exactly what you are going for.
Evergreens can make an intentional space for any combination of plants. The use of an evergreen that can easily be shaped, like boxwood, can create borders and frames that create rhythm and support other plants. Plant herbs, perennials, flowering annuals, grasses, and bulbs to create moving swaths of color among resilient and structured evergreens.
A sculptural use of an evergreen is to use one as accent plant and focal point to create a special moment where your eyes stop and rest.
With all their different uses and bold structure, no wonder they’re commonly called the backbone of a landscape.
First image : Use evergreens as accent plants in a naturalist garden. Photo credit: Canva
Second image: Use repetition of an evergreen as a frame to other plants. Photo credit: Canva
Impact of evergreens on their own
Evergreens will also create a changing and diverse looking landscape on their own.
The lovely lime green new spruce growth ( Image 1 ) and tan colored pine cones ( Image 3) show how an evergreen can change color and texture during its lifetime and season so read the tags and look at pictures to be aware of how your evergreen may look throughout the seasons.
Foliage of particular evergreens can change color during the winter months and will create pretty privacy fences all year. Layering tall, medium, and spreading ground cover evergreens with different textures and color can also create a big impact with a verdant color palette. ( Image 2 ).
Add flowing tall grasses and deciduous trees to create softer and billowing texture behind or intermixed with evergreens.
Image 1: Rainbow’s End Alberta Spruce new lime-green spring growth.Image 2: Evergreens used as groundcover, hedging, and accent plants.
What to consider when choosing evergreens
1. Color and textures of needles, leaves, nuts and cones. This includes becoming familiar with how they shed heavy loads of old foliage. Pine, arborvitae, spruce, and cypress can have brief periods of brown foliage on the inner mature foliage before they drop. This is a natural process and it allows them to grow new green growth the next year.
Image 3: Dolly’s Choice Mugo Pine with new pine cones.
2. Sunlight requirements. Full sun: 6+ hours. Part sun: 4-6 hours. Shade: Less than 4 hours.
3. Size and shape at maturity. Ex: Large pyramid-shaped pine varieties can lose their bottom branches when they get large and create a space underneath.
4. The soil type you are planting in. Ex: clay, sandy, loamy, holds water, well-draining, etc.
5. Location you want to plant. Ex: open south side or north areas that get a lot of cold north wind will be harsher winter conditions so hardier evergreens may be needed.
6. Purpose of the evergreen. Ex: pretty living fence, wind block, shade, backdrop for other plants, home for wildlife, accent plant, hedge, or add texture and color for the winter. Evergreens have so many uses!
Think about creating a balanced landscape when shopping for new plants and when walking around your gardens. When you’re looking at plants that you are drawn to, like the blooming hydrangea, dark bronze-leaf ninebark, towering coneflowers, or the low-lying annual which blooms all season; think about how an evergreen will be the strength those plants need to highlight their stunning colors and textures.
Spring Blooming Shrubs
These shrubs bloom during the early growing season and are great design backbones to any garden or landscape. Add these spring blooming shrubs behind a summer blooming garden to have sequential flowering.
All blooming shrubs require part-sun to full-sun for best bloom production.
Acclimating plants grown inside or in a greenhouse is called hardening off. Hardening off thickens the cuticle of their leaves to avoid access moisture loss and strengthens tender young plants. If you are planting potatoes, onions, asparagus, strawberry bare roots, or anything completely under the soil you do not need to take these steps.
Slowly acclimating plants to the reduced humidity, stronger winds, and lower or higher temps than the greenhouse, will reduce stress to your plant.
How to harden off plants grown inside or in greenhouses:
Hardening off takes 1 to 2 weeks depending on the weather and your available time. One week is usually sufficient. When there is a very windy day, heavy rains or quick rise in temps on clear sunny day avoid direct exposure when you are going through the hardening off process.
ONE WEEK HARDENING OFF TIMELINE: *Best to do this when temps are 50F or above. Cold-tolerant plants like pansies and cole crops can handle ~40F temps when starting this process.
Day 1: Start by placing them in a sheltered, shady spot for a few hours, then bring them inside at night.
Day 2: Move them to full sun for 1-2 hours; morning sun is best, then shade, and indoors at night.
Day 3: Increase sun exposure to 3-4 hours, followed by shade, then inside at night.
Day 4: Add 1-2 hours more of sun daily until they get at least 6 hours.
Complete the hardening off in about a week, gradually exposing them to more sunlight, wind, and temperature changes. Check the soil daily; water when the top few inches dry out to ensure oxygen reaches the roots.
Acclimate slower if you see signs of stress. Signs of stress can be quickly can be wilting in the sun, scorched leaves, and/or drooping. Movement from the wind is beneficial but not in excess to cause complete drooping over for long periods.
After you notice they aren’t stressed and looking healthy, you can keep them outside! Spring can have drastic temperature swings so always keep on eye out until threat of frost has passed.
How to harden off perennials grown under sun protection:
During the sunniest and warmest part of the year, perennials growing under shade cloth may benefit from a quick 2-3 day acclimation. When you buy plants grown under shade cloth that have already been exposed to wind and fluctuating temperatures, hardening off is focused on increasing sun exposure for full sun perennials. Shade perennials should go in the ground right away.
It’s a quicker process than annuals and if you choose to plant during consecutive cloudy and cool days, planting in their permanent spot is usually fine!
Reminder to check the soil moisture daily. Water your plants when the top few inches of soil are dry.
Spring Flowering Perennials
These perennials bloom during the early growing season and are a welcome sight after a long-cold winter. Mix these spring flowering perennials in with your summer and fall-blooming flowers for a show of sequential blooms all gardening season. These early blooming perennials can also help pollinators get food before the trees start blooming and also attract pollinators to your fruiting trees. If you are interested in adding more pollinator friendly plants, see two garden designs that can help you plan your new garden spaces.
Bergenia a.k.a Pigsqueak
Bloom time is April and May. This plant is called Pigsqueak because if you rub two leaves together it makes a squeaking sound. Bergenia love shade or dappled sunlight and a great alternative to the hosta.Hellebores
Best to plant these in raised beds, on slopes, or front of the garden to see their downward facing blooms, Hellebores can bloom very early spring into mid-May. Bleeding Heart
These hearts bloom mid-May to June. Heart-shaped pink flowers that dangle from outstretched stems. Cool-moist areas are best with morning sun.Ajuga a.k.a Bugleweed.
These flowers bloom early May through June. It’s an aggressive spreading ground cover that helps choke out weeds. Commonly used for hard-to-grow shady area, erosion control or under Black Walnut trees since it’s resistant to Juglone.Fernleaf Peony
Deep red large flowers grow on fine-textured fern-like foliage that grows in a 1′-2′ foot mound. Provide 6 hrs of sun and they will bloom in late-spring. May need stem support to prevent drooping. Forget-Me-Not
They start blooming in May and can re-bloom later in the season. Pink or blue flowers of Forget-Me-Not create a blanket of small flowers over a short 5 inch to 12 inch plant. Used as a ground-cover in landscapes, this perennial is biennial and reseeds itself. Deadhead blooms to prevent re-seeding if you want to inhibit spreading. Squaw Weed a.k.a Round-Leaved Ragwort
Blooms late-spring to early-summer. Excellent ground cover with sea of long-lasting yellow flowers. Will flower in full sun to part shade and spreads slowly and easy to contain. Columbine
Blooms mid-spring. Blue, pink, or purple bell-shaped flowers great for part shade and woodland areas. Native Columbine has smaller red and yellow flowers that tend to have slightly more nodding in the flowers. Sweet Woodruff
Forms thick mats of foliage with small white flowers blooms April and May. Best grown in moist, shady areas. Can handle dry shade but won’t grow as prolific. Poppy
Poppies can bloom in cooler weather April through June. A shorter lived plant that easily reseeds itself for year-after-year blooms. These delicate flowers love growing in full-sun. Geum
This is a member of the rose family that loves full morning sun and afternoon shade. Mid-spring flowers perch atop fuzzy stems. Long-blooming flowers that butterflies adore! Dead-head old flowers to push more blooms.Cushion Spurge
The tiny yellows flowers are insignificant but the bright yellow bracts surrounding the blooms is what makes this cushion-shaped plant a lovely spring perennial. The leaves will also turn orange in the fall. Grow in full sun to avoid legginess. As part of the Eupohorbia family, it can handle drought once established.Lungwort
This early spring bloomer is a low growing plant with fuzzy white speckled leaves. Creates a clump of textured foliage with flower stalks that rise above the foliage. Great for shady locations and deer resistance.Vinca Minor
Prolific bloomer with deep lilac color flowers. Vining habitat that creates a blanket of gorgeous glossy dark leaves. Shade tolerant but produces more blooms in mostly sunny locations.Primerose
These extremely colorful flowers that come in multiple colors will bloom early to mid spring. They are perfectly happy blooming before deciduous shrubs leaf out. Great for moist, partly shady garden areas!
When searching for perennials to enhance your landscape this season, be sure to keep an eye out for the ones mentioned above, as well as the additional spring flowering perennials listed below in our nursery.
If you are looking for more perennials to add to your garden, especially ones that can handle drought, give Top 8 Tough as Nails Perennials a read!
Deicing Salt Tolerant Plants
When you live in a state that has snow and ice it’s inevitable that part of the yard will be exposed to deicing salts when the snow melts. As the snow melts the salt is incorporated into the ground water that the plants use when the ground thaws. The accumulation of salt will inhibit the plants ability to uptake nutrients and eventually lead to death.
Deicing Salt Plant Damage
There are a few signs that your plants have been damaged by salt. You may see brown needles on evergreens, grass along a road or sidewalk that isn’t growing back and stays brown, and stunted growth or death of plants that were planted near the salted area. Salt buildup can happen over multiple years so death may not be within one winter season.
Salt Tolerant Plants
Switching the type of deicing salt to something that is plant safe can be extremely helpful if you want to plant whatever you want around an area that may be exposed to salt. Plant safe ice melt alternatives include calcium chloride, magnesium chloride, or calcium magnesium acetate instead of rock salt or sodium chloride.
If switching your deicer isn’t an option, here is a list of plants that are salt tolerant around your driveways, sidewalks and roadsides. Please keep in mind that if there is an abundance of salt, plants still may exhibit signs of stress even if it’s labeled as a salt tolerant plant.
Grasses: Prairie Dropseed – Native to MN Big Bluestem – Native to MN Blue Fescue Northern Sea Oats Switch Grass Maiden Grass Karl Foerster Reed Grass – Very Tolerant Fountain Grass – Very Tolerant
Salt Tolerant Shrubs
Chokeberry Barberry Forsythia Mockorange Potentilla Arrowwood Hydrangea Spirea Lilac New Jersey Tea – Native MN shrub
Juglone Toxicity Info – Resistant and Susceptible Plants
Black walnut (Juglans nigra) and Butternut trees and closely-related species produce a toxic substance, Juglone, which can be harmful to plants growing in areas nearby the trees or their root systems which can be 50’-60’ radius for large trees. Juglone toxicity inhibits respiration in susceptible plants and the effects can include stunted, retarded or deformed growth or death.
The black walnut tree is the most commonly planted tree in the north. At maturity it reaches 80’tall and 50’ wide. Butternut trees also makes a good shade tree and is grown for its edible nuts. At maturity the butternut reaches 65’ in height and also becomes 50’ wide.
Juglone Damage
Damage due to Juglone depends on how close the susceptible plant is growing to roots of the trees. Root proximity appears to be necessary before harm is done to a susceptible plant. It is also possible toxicity could occur from leaf decay, from nut husks and from moisture dripping through the leaves of the trees. The quantity of Juglone produced by these methods is small and less damaging than root contact.
Control Juglone Damage
The best way to control any damage done by Juglone is to avoid planting susceptible plants near Black Walnut trees and closely related species. With the lack of a chemical control for Juglone, using resistant plants in the landscape and keeping susceptible plants with good resistance from the leaf canopy of these trees is the best physical control.
Tree removal is not recommended because removing the roots is complex and any roots remaining in the soil can still give off Juglone until they decay completely which can take several years. Practicing good sanitation of leaves and nut husks is advised. Rake up the leaves and don’t use them in the compost pile. Avoid using the wood or bark as mulch.
Note about Juglone Plant Lists
The resistant and susceptible plants listed here are generally common plants and both lists are not complete as research continues. Often research is based on observations of what plants do best and what plants do not thrive in the presence of Juglone-producing trees. Get the full list of plants resistant or tolerant to Juglone on this downloadable PDF from K-State Research and Extension.
Plants Susceptible to Juglone toxicity
Trees
Alder Chokeberry White Birch Hackberry Linden (Basswood) Magnolia Pine Rhododendron Silver Maple
Be ahead of the spring and get indoor blooms in late winter!
Forcing fall bulbs to bloom indoors is a simple way to enjoy color before there is any outside. Watch our YouTube video to get visual examples and quick instructions.
First time forcing bulbs? Try Daffodils or Hyacinth first.
Bulbs that work best with the water-growing method: Hyacinth Daffodils (Narcissus) Tulips *smaller bulbs can work when set on top of pebbles.
Required Chill Period
Fall bulbs need to go through a chill period before they bloom. All bulbs should be in their chill period by the end of October. It’s ok if you’re late, it’ll be later than Jan/Feb that you’ll get blooms.
You can chill them in any area that stays between 35F-45F, as long as it doesn’t go below freezing or above 50F. The fridge is the best way to get consistent temperature. If you have a cold storage room or an unheated garage that doesn’t get below freezing, that will work as well.
WARNING: If chilling in a fridge, do not store them with fresh fruits. Ethylene gas that is emitted from fruit will affect flower formation.
At the end of the chill period, you may start seeing foliage and root growth.
Tips for Growing Bulbs in Water
There are specific vases, called Bulb Vases that have an area for the bulb to rest without having to be submerged in water. These are a beautiful addition to table decor. You chill your bulb for the specified period they need and then put them in the vase. It’s that simple and a great way to play around with different varieties of bulbs.
You can also set bulbs on top of pebbles or rocks in any glass container and keep the water level up to the base of the bulb.
Make sure the bulbs are not submerged further up than the root area. Even if the water is slightly below the base of the bulb, the roots will start growing after their chilling period.
After you place your bulb in the vase or glass container, set it in bright indirect light, in the coolest room you have. Once the foliage and bud starts forming you can move it to brighter light.
Once they start blooming, you can set them anywhere you want to enjoy them.
Tips for Growing Bulbs in Soil
You can chill your bulbs in paper bags first and then pot them up or plant them in pots and then chill, if you have the space.
The potting soil needs to have excellent drainage and choose a pot with a drain hole. Plant your bulbs in a 6 inch deep pot. You can plant in shallower pots but may require a bit more watering.
Pots labeled as “Bulb Pots” are shallow and great for smaller bulbs.
The diameter will determine how many bulbs you can plant together. “One large bulb may be placed in each 4-inch pot. Use six tulips, three hyacinths, five daffodils or 15 crocuses (or other small bulbs) in each 6-inch pot.” – Missouri Extension Office
Add enough soil mixture to fill the pot so the bulbs are placed as follows:
Hyacinths and tulips: Allow only the tip of the bulb to show above the soil line. Daffodils: Plant deep enough that one-half of the bulb shows above the soil line. Small bulbs (crocus, snowdrop, grape hyacinth, etc.): Plant so they will be about one inch below the soil line.
You can plant multiple varieties together as long as they get their required chill period. Purchase bulb varieties that have similar bloom times or plant all of the same variety if you want to have uniform flowering.
Keep the soil slightly moist but not soggy, even during the chill period.
Tulip tip: When planting tulips, face the flat side of the bulb outwards. This is where the main leaf is grown and it will create a uniform look.
Illustration of a pot planted with Tulip bulbs. The bulbs flat sides are facing outward. Courtesy of Missouri Extension.
Signs That Your Bulbs Are Ready After A Chilling Period
If they are planted in a pot, the roots could shoot out the bottom of the drain hole and the foliage may start growing. They are ready to come out of dormancy!
Then, place the pot in the coolest room you have with bright sun. This is mimicking the cool spring air while the buds are forming.
Once they are blooming, put them anywhere you want in your home to enjoy. If it’s warmer and sunny, the bloom time may be reduced.
What To Do When The Blooms Fade
Keep the bulbs in bright sun so their foliage can take in energy. Once the ground is workable you can plant them outside to their required depth. This way they can continue growing until their foliage dies back a few weeks later. Keep the bulbs in the ground and they may bloom next spring for you. Give them a dose of Bulb Tone to help them take in energy for blooms the next year.
If you don’t have a yard, try planting them in outdoor pots in full sun! Once the foliage dies back try planting annuals around them to utilize the soil space. Once fall hits you can take them out or leave in the pot and simulate the chill period again as described above and try to get them to bloom.
Animal Repellents and Plant Protection
We all love animals but sometimes they go where we don’t want them to or damage our landscapes and gardens. They can chew, eat, scratch, and damage plants throughout the year. When animals get hungry, they may not spare much. Protecting your plant investment is about protecting them from extensive damage that will severely stress or kill your plant. If you end up with a few bites are scratches, luckily your plants will be fine and will heal.
There are animal and human safe products available to repel mice, squirrels, voles, moles, raccoons, deer, and rabbits.
First we will look at what animal damage looks like so you know what you’re dealing with if you see it.
Rabbit chew marks on a tree.
The two most common animals that damage our plants are deer and small rodents like rabbits and voles. Deer will rub against the bark and leave gashes (see main post image). They will even chew off the top of shrub branches.
Rodent damage will have cleaner cuts. Rabbits can chew down into the cambium layer of shrubs and trees and chew off small branches. It’ll look like a 45° angle cut as shown in the image above. The cambium layer is where water and nutrients are taken up. If the damage to the cambium layer goes around the entire branch or trunk, it will kill the plant and is called girdling. Voles can eat the roots of plants, bark, and dig tunnels that wreck lawn grass.
It’s important to reapply repellents as directed and after heavy snowfall. Make sure rabbits can’t get above the tree guards to nibble on the bark higher up the tree.
Scented Repellents
Examples of a few animal repellents.
Various sprays and pelleted product contain scents and tastes that the animals are repelled by. The products contain all natural ingredients. They could contain clove oil, cayenne, peppermint oil, spearmint oil, putrefied egg, and possibly others. All of them are safe to use around your home and gardens.
Unfortunately, if animals are hungry enough, they will eat despite any offending smells that typically keep them away.
Animals can also get used to certain stinky smells. Alternate products that contain different ingredients to avoid them becoming used to the smell. Repellents will also need to be reapplied frequently and the frequency depends on the product instructions and weather.
When choosing between a spray or granular we do recommend getting both. Spray works best in the spring-fall and granular does better in the winter. Avoid spraying animal repellents on plants when the temps are below freezing.
Physical Barriers May Be the Best Bet
Snow dug out around white tree guard to prevent rodents from reaching tree trunk.
Install fencing or netting around your plants to prevent animals from accessing them. You can also use row covers to protect your plants from pests like insects and birds during the growing season.
One common physical protection for trees in the winter is a white plastic tree guard. They have two benefits. One is to prevent sun scald and frost cracks and the other is to protect tree bark from deer and rabbit damage. This is a great physical barrier to use every winter especially on young trees that have thin tender bark. There are also mesh tree guards to put around tree trunks that can be used year-round as they provide adequate air flow around the trunk. Those will not prevent winter weather damage.
If you use physical barriers, the snow may build up around them and allow animals to reach above the barrier. Dig out snow around the barrier if it’s creating a platform for the animals to perch and have a snack. * See image above of snow removed from around the tree trunk.
Covering your evergreens with burlap to prevent sunscald or winter burn during the winter will also help protect your evergreen from animal damage if they can’t dig under the burlap.
What To Do After the Damage Is Done
If a rabbit has eaten the entire cambium layer of a tree or shrub, the plant may be severely damaged and may not survive. However, here are some steps you can take to try to save the shrub:
Prune the damaged area: Use sharp, clean pruning shears to remove any damaged or broken branches. This will help prevent further damage and allow the shrub to redirect its energy to healthier areas.
Water: Give the plant plenty of water to help it recover. Make sure the soil around the plant stays moist but not waterlogged.
Apply fertilizer: Apply a balanced fertilizer to the soil around the plant to provide it with the nutrients it needs to recover.
Protect: Protect the plant from further damage by installing a fence or guard around it, or by using repellent sprays or other deterrents to keep animals away.
Monitor: Keep a close eye on it and watch for signs of recovery. If the plant does not show signs of recovery after several weeks, it may be best to remove it and replace it with a new one.
Remember, the extent of the damage will depend on how much of the cambium layer was eaten and how quickly you take action. In some cases, the tree or shrub may be too damaged to save, and you may need to replace it with a new one.
If animals, like deer, ate some of the plant or chewed it down to a shorter height, the plant will survive if you follow the care steps above.
If you have an animal eat herbaceous perennials as they start growing in the spring, they can recover if they didn’t eat them all the way to the ground. Even if they did, it still may survive if it’s in it’s active growing period with a well-established root system.
Repel Mice and other Rodents from Nesting
You may have a barn, camper, boat, wood piles, sheds, decks etc. that you want to keep little critters like mice away during the winter and summer. There are repellents like Mouse Magic and Rat Magic that are safe to use around children and pets and won’t harm rodents or anything that eats them like some poisons do. They smell nice as well!
If you distribute the packs or granules around the areas that they may want to nest, along wall edges, and where they may enter, it should repel them away from those areas. If you have a lot of rodents, you may need to use more.
Rat Magic has a few more ingredients in it to help repel squirrels and chipmunks as well. Try sprinkling it around your garden if you have them digging up your bulbs or creating holes for their food stash.
RELAXATION TIME
It’s end of summer relaxation time and to treat yourself before winter comes!
Redecorate a space to make it feel cozy and ready for extended time inside.
Container Rescue Steps
Mid-summer is a great time to clean up or redo your annual containers. Here are a few steps to follow to refresh and rescue your annual containers.
Pollinator Planting Guides
Support for pollinators is a joint effort – a partnership.
As of July 2022 Monarchs are now at critically low populations. As a flagship pollinator – one that attracts attention because of it’s beautiful colors and easier tracking methods – this news is a wake up call that we are losing pollinators at a fast rate. We need to add pollinator plants to our landscapes every year.
What We Need to Do Now
Add plants into our landscapes so there is a succession of blooms spring through fall. You can use pollinator friendly annuals, perennials, shrubs, and trees to accomplish this.
Reduce or eliminate the use of insecticides. Organic insecticides still kill beneficial insects. There are now studies that find that even if the plant isn’t blooming, pollinators will drink dew off of plant foliage. If it’s treated with insecticides it will kill them. If you do need to spray, avoid bloom time.
Plant ecologically sound landscapes. Add a diverse mix of native plants into your landscape to bring in beneficial insects, birds, and pollinators. Predatory birds and insects are a great way to control damaging insects without the use of insecticides.
Plants to Add for Monarchs
Name – Bloom Time
Pale Purple Coneflower – Early-summer Butterflyweed – Mid-summer Milkweed – Mid-summer – Emphasis on Common Milkweed since they lay their eggs on it. Black-eyed Susan – All summer Joe Pye Weed – Late-summer Blazing Star – Late-summer Aster – Late-summer to fall Monarda fistulosa – Late-summer to fall Goldenrod – Late-summer to fall
Click on a map to download the Ecoregional Planting Guide. Each guide will give you information on specific plant traits that pollinators prefer ( color, odor, pollen, nectar, flower shape ) as well as a list of plants to support pollinators in that region. There are many overlaps in plant varieties in these guides. We wanted to include specific regions because we have customers that are from nearby areas that may live in a different zone.
Mankato is zone 5a (was 4b) and in the Prairie Parkland Temperate Province.
Don’t have room for an in-ground pollinator garden? Check out the portable pollinator garden list from National Garden Bureau.
Sources: Pollinator Partnership. Selecting Plants for Pollinators, Prairie Parkland, Temperate Province. Published by Pollinator Partnership, San Francisco
Pollinator Partnership. Selecting Plants for Pollinators, Eastern Broadleaf Forest, Continental Province. Published by Pollinator Partnership, San Francisco, USA. https://www.pollinator.org/guides#about
ABOUT POLLINATOR PARTNERSHIP MISSION
“Birds, bats, bees, butterflies, beetles, and other small mammals that pollinate plants are responsible for bringing us one out of every three bites of food.
They also sustain our ecosystems and produce our natural resources by helping plants reproduce.
Without the actions of pollinators agricultural economies, our food supply, and surrounding landscapes would collapse.”
Planting spring flowering plants in the fall creates an even prettier spring yard! Flowering spring bulbs can even show their blooms when snow is melting on the ground. Here is a list of plants that give us a show early-to-late spring. From spring through fall, anytime you add plants, you’ll be happy you did because they will be enjoyed for years to come.
Spring Blooming Bulbs
These bulbs are available in late summer for you to plant in the fall when temperatures start dropping. Bulbs are one of the more popular plants because of how easy they are to plant. Fall planted bulbs need the cold dormancy period of winter before they bloom in the spring. Plant your bulbs around your late sprouting perennials to fill in the area before the foliage grows in to create a succession of blooms. If you have deer around, look for deer resistant logos on the bulb boxes.
GALLERY OF FALL PLANTED BULBS FOR EARLY SPRING BLOOMS
Allium – Purple small or large round blooms
Crocus – Bloom colors include purple, yellow, or white
Grape Hyacinth – Purple Blooms
Yellow Daffodils in early spring before perennial plants emerge.
Tulips – Many color varieties of solid or multi-colored!
White Daffodils with Grape Hyacinth
Yellow Daffodils with pink and purple Hyacinth
Snowdrop – Blooms are bright white
Perennials
Perennials are herbaceous, which means their foliage dies down each fall and will regrow in the spring. These highlighted perennial varieties come up earlier in the spring and create an early show of color!
GALLERY OF PERENNIALS FOR SPRING BLOOMS:
Bleeding Hearts – Variety bloom colors include pink, pink and white, white, or red.
Veronica – Variety bloom colors include blue, purple, white, or pink. Shown: Blue Bomb
Hellebores are the harbingers of spring. Hellebores – Variety bloom colors include white, pink, purple, or yellow.Shown: Honeymoon Series Mix. Credit: Walters Gardens
Columbine – Variety bloom colors include pink, red, blue, or purple.
Bleeding Hearts – Variety bloom colors include pink, pink and white, white, or red.
Pigsqueak a.k.a Bergenia – Variety bloom colors vary from white to dark pink. Shown: Winter Glow
Jacob’s Ladder- Bloom color is white with yellow center.
Sweet Woodruff- Small white blooms. Great ground cover.
Bugleweed – Small bluish purple flowers. Great ground cover.
Armeria – Variety blooms colors include pink, white, or red. Shown: Splendens
Woodland Forget-Me-Not – True blue bloom color. Great as a spreading underplanting.
Rosylva Forget-Me-Not
Dutchmans Breeches – Bloom color is white to pink.
Cushion Spurge – Variety colors include red, orange, white, pink or, yellow. Great fall foliage color as well. Great ground cover.
Shrubs
Shrubs drop their foliage each fall unless they are evergreen shrubs. Their woody structures stand over winter, creating winter interest in your yard. Shrubs can create a focal point among perennials and are used to easily create a larger grouping of blooms in the spring. We’ve all seen lilacs blooming in the spring but we’d like to show many other options to consider for an array of blooms in the spring.
Chokeberry – Blooms delicate white blooms and also has bright orangish red fall leaves. Shown: Mound
Rhododendron – Bloom colors vary from purple, lavender, peach, or red. Shown: PJM
Pussy Willow – Silvery fluffy catkins grow before foliage fills in for lovely texture and contrast in spring. Shown: Salix discolor
Serviceberry – Blooms white flowers every spring, and produces edible fruit. Brilliant orange and red in the fall. Shown: Standing Ovation
Azalea – Variety bloom colors include red, orange, yellow, and pink. Shown: First Editions® Electric Lights™ Red Azalea
Viburnum – Blooms white flower cluster. Vibrant fall colors as well and some varieties are great for multi-season hedge. Shown: Snow Viburnum
Barberry – The foliage of these shrubs are lovely! Orange, red, lime green, yellow, and purple leaf colors.
Lilacs – Blooms are light to dark purple, tall or compact growing, as well as rebloomers. Shown: Proven Winners Bloomerang Lilac
Trees
Trees will always catch our eye because of their size and the easiest to notice around town in spring arrives. The bright pinks, reds, and whites lining the streets show us that warmer days are ahead and everything is waking from dormancy.
TREES FOR SPRING BLOOMS:
Redbud – Blooms fuschia colored flowers in the spring and brilliant yellow foliage in the fall. Shown: MN Strain Redbud
Crabapple – Variety bloom colors include white, pink, and reddish purple. There are varieties that are fruitless as well. Shown: Show Time Crabapple
Magnolia- Variety Blooms are in this light pink or white. First Editions Centennial Blush and Royal Star are the Zone4 hardy magnolia trees. Shown: First Editions Centennial Blush
Please note that many of the trees and shrubs shown are sold quickly in the spring due to their colorful show and may not be available later in the season. We recommend starting a wish list so you know what to grab, even when it’s not blooming. Visiting Drummers Garden Center and Floral in the spring through fall will give you the best ideas for how your plants will transition and create a perfect yard all season long.
Bring houseplants indoors for winter
As the temps start to cool and the leaves start to fall outside, we need to start bringing in your houseplants to create a plant oasis to enjoy all winter long.
Once the overnight temps are consistently dropping below 50°F, bring your houseplants indoors to avoid damage and stress to your plant. If you have flowering tropical plants, there is another method explained below that you can use to if you want to have them go dormant.
Watch our Youtube video &/or read instructions below.
Let the indoor greening begin!
Before they go inside…or at least before they’re near other plants.
Step 1: Treat for pests. The outdoors is full of insects that also want to enjoy our plants. Before you bring them in, you can spray you plants lightly with a hose or inside shower to knock off any insects or dirt. Be careful to not blast them with high pressure as to not damage foliage. Next, you can spray with an organic insecticidal soap, Eight, or any insecticide spray safe for your houseplants if you notice pests.
You can also use a Bonide systemic houseplant insect control that you sprinkle onto the soil and watered in and will treat the plant up to two months against plant feeding insects. Ideally, you treat for pests at least a week before bringing in your plants to avoid introducing insects into your home or other houseplants.
Another method if you are worried about bug eggs in the soil is to repot your plants. You can knock off all the soil and rinse off all old dirt from plants and pot. Repot in new potting soil. This is an easy method if you need to put your plants in bigger pots or split any plants that have grown too large for your space.
See info below on houseplant insects.
Step 2: You can prune back houseplants that had extensive growth if they don’t fit your space. When you prune, cut right after a leaf node, so you keep the node on. This is where new growth will start.
Step 3: Check the plant toxicity if you have pets in the house that have a tendency to chew on things. Here is a great list of plants and their toxicity levels to make sure you aren’t bringing in a plant that may be harmful to your pets.
Inside spot:
Imagine where you want to enjoy your plants and pay attention to their light needs! Get creative if you are finding that you don’t have enough shelf or floor space, if you need to keep the plant away from pets, or children. Try training your pothos to crawl up your wall with a pole or trellis or hang your ferns in your bathroom since they love humidity. Make sure that wherever you put them, you are paying attention to their light needs and avoid drafty areas.
It’s normal for your houseplants to have a transition period and some leaves may yellow and drop. Give them artificial sunlight with grow lamps if you find your plants are struggling due to lack of light.
Over-winter flowering tropicals:
Tropicals, like Bougainvillea, Hibiscus and Jasmine will need to go dormant in the winter if you don’t have a very bright spot to put it or it’s too large. Put them in a room that is between 40-50°F with a little sunlight and only water enough so the soil doesn’t get completely dry. No feeding of fertilizer needed until early spring. Flowering vines, like Jasmine, can be cut back 6-12″ above soil line. Tropical Hibiscus should be pruned after completely dormant. Prune a third of the way back, and make sure to keep two to three leaf nodes on the branch for new growth in the spring.
Lastly, have fun with creating your very own plant oasis! This is a year we need more than ever!
INSECTS YOU MAY SEE ON YOUR HOUSEPLANTS:
Please note: If you are worried about any spray treatments damaging a specific plant since some may be more sensitive than others, test the spray on one leaf first and look for signs of damage. Never spray in direct sunlight as that can result in sun scald marks due to the moisture on the leaves.
Mealy Bugs
Signs of infestation: Plant looks covered with snow or leaves have some white spots.
Step 1: Try to wash the Mealybugs off with a steady stream of water. When they have developed their hard outer shell, this may be difficult. Dip cotton balls in alcohol and remove all visible mealybugs. Use cotton balls to clean the leaves and cotton swabs to clean inside small gaps. Step 2: Repeat the treatment as necessary. This is best for light infestations. Mix 1 cup of rubbing alcohol with 1 quart (32oz) of water. Pour the solution in the spray bottle or straight rubbing alcohol for thicker, hardier leaves. Step 3: Spray the whole plant, not only where mealybugs are visible. Spray leaves well on their tops, under leaves and stems. Repeat the treatment once or twice a week until the issue is gone. Alternative sprays for heavy infestation that may work better: Insecticidal Soap Spray, Neem oil or pyrethrins are other sprays that can be used if alcohol wipe isn’t working and often times a quicker way to kill pests.
Spider Mites
Signs of infestation: Plant leaf gets a “dusty” look in an area. They can be yellow or red in color. Often found on the underside of leaves. Spider mites are seen more often in the winter inside because they prefer dry and warm environments. Raised humidity, keeping away from heat source or locating plants in higher humidity areas helps in prevention but not guaranteed.
Step 1: First dislodge mites with a steady stream of water outside or in the shower. Dip cotton balls and swabs in alcohol and remove all visible mealybugs. Use balls to clean the leaves and swabs to clean inside the gaps. Step 2: Mix 1 cup of rubbing alcohol with 1 quart (32oz) of water. Pour the solution in the spray bottle. Step 3: Spray the leaves wipe off or use a houseplant insecticidal spray. Some people use Neem Oil that can help but an insecticidal spray works the best and will take less time to get rid of them. Step 4: Treat any plants that are nearby as well since they spread easily or at least rinse off their leaves and spray with alcohol. *For any spray you can test a leaf to make sure it doesn’t damage the leaf and avoid spraying the leaf during the sunniest part of day or if the plant gets direct light. Step 5: Repeat the treatment once or twice a week until the issue is gone.
Fungus Gnats
Signs of infestation: Tiny small black bugs are flying around the soil of your plants. They do not feed on your plants but take advantage of moist soil to lay their eggs within the first couple inches of soil.
Step 1: Change your method of watering. Water your plants by setting them in water and they will take up water from below. Leave the top 2 inches of soil dry. Alternatively, only watering your plants once the soil is dry a couple inches down and try to prolong between watering until reduced signs of adult gnats are seen. Step 2: Use BT- bacillus thuringiensis powder. It’s a natural bacteria that produces proteins that kill insects. Sprinkle BT on the top of soil of your plants. It is safe to use around humans and mammals but avoid ingestion of any product. Step 3: Control flying adult population with sticky traps placed around your plants.
If you see signs of any other insects on your leaves, most insects can be controlled with above methods of wiping leaves off, use insecticidal spray and systemic insecticide.
If you have any questions about identifying an insect, please email us a picture of your plant if there are signs of insect damage to info@drummersgardencenter.com.
Easy Fall Planting
Fall is the second-best time to plant – with some saying it’s the best!
We typically have late-summer and fall sales. Check out current plant sales here.
GARLIC
Garlic is one of the easiest to crops to grow. Garlic is planted in the fall late September or early October. They start to grow their roots this fall and then emerge next spring. We recommend adding compost to your planting area two weeks before planting your garlic.
We typically carry 7 different varieties of hardneck garlic that has been proven to do well in MN climate.
Sow perennial plant seeds, that need stratification, after a hard frost – below 25 F. Stratification is the process of seeds being in a cold environment and then breaking dormancy once the weather warms. This ensures that they will not sprout until the following spring.
Be sure to mark the spot you planted. If we have a dry winter and less rain in the spring, make sure to water your seeds in the spring to keep soil moist.
Perennial plants to sow after a hard frost:
Blue and Breezy Flax Seeds
Forget-Me-Not
Hyssop
Lavender
Russell Lupine Blend
Milkweed
Penstemon
Sundial Lupine Bluebonnet
Colorado Blend Yarrow
LATE-FALL SOWN ANNUAL SEEDS
You’ll get earlier blooms and reduce time in the late winter/early spring sowing seeds indoors. The moisture from melting snow will greatly reduce your need to water in the spring.
Tips for sowing annual seed:
Sow the seeds after a killing freeze and before snowfall. You may also sow in late-winter between snow fall. The snow buries the seed and insulates them, helping to retain moisture.
Mix the seed with a bit of sand before sowing. This helps the seed spread evenly and gives you a better visual of where you have sown.
Mark where you planted with labeled garden stakes to avoid damaging emerging flowers.
Bulbs are really as easy as dig, drop, and done. When planting, make sure the soil is well-draining (soil doesn’t stay soggy more than a day) and use Bulb Tone to get their roots off to a healthy start before the ground freezes. Amend your soil with compost or top soil if it’s compacted or not well-draining.
If you have a presence of voles, mice, chipmunks, or squirrels we recommend planting them with a granular animal repellent.
LANDSCAPE PLANTS
Fall is a wonderful time to plant in you landscape. The heat of the summer is done and the cooler weather is less stressful for the plants during transplanting. The soil also stays moist longer, there is less disease and pest stressors, and your plants will put more energy into root growth than foliage.
We recommend mulching around your new landscape plants, leaving a couple inches open around the stems to help retain moisture when they are establishing themselves.
PLANT TREES, SHRUBS, AND EVERGREENS
Trees, shrubs, and evergreens can be planted up to 6 weeks before ground freeze (average ground freeze is beginning of Dec.). If the trees or shrubs are dormant by the time of planting, you may not need to water if the soil stays slightly moist. Make sure to mulch 2-3 inches around the root zone and wrap your tree saplings Oct. 31st or as soon as possible after that.
Deeply water your plants until the ground freezes. Only water when the top 2 – 3 inches are dry. It’s usually 5 gallons of water every week to two weeks depending on your soil type, size of the plant, and weather.
PLANT PERENNIALS
You can plant perennials up to 6 weeks before ground freeze (average ground freeze is beginning of Dec.) but sooner the better for transplanting success. Just make sure they are watered until freeze and heavily mulched after ground freeze to protect their roots.
When planting, mix in a slow release fertilizer – like Biotone. When the top couple inches of soil are dry, that’s when you should water. Water deeply so the plant roots reach deeper into the soil and create a more robust root system before winter weather.
A good rule of thumb to follow: “Blooms late-summer/fall, divide them in spring. Blooms spring, divide in the fall.”
REDUCE WINTER DAMAGE
If you have issues with rabbits or deer around, get a hard plastic mesh tree guard. You’ll be happy you did because if animals chew around the entire tree diameter, it’ll cut off nutrients to the tree, which will cause the plant to die. Shrubs and evergreens can also experience animal damage from hungry animals so use a granular or spray animal repellent or fencing.
Here is an extra note about evergreens. It’s very important evergreens have adequate water before ground freeze or you may experience browning of needles the next spring. Evergreens do better when planted early fall instead of late fall to help them take up moisture before freezing. They slowly lose water from their needles over winter and if they are in an area of high winds and/or bright, all day sun, it dries them out quicker.
Mid-August through mid-September is an ideal time to start new grass from seed. We carry high quality seed from Ramy Seeds in Mankato. If it seems daunting to keep the soil moist to sprout grass this time of year or it’s too late, you can wait until late fall – after we have our first frosts – to sow seeds that will sprout in the spring when the weather warms and spring rains help keep the seed moist.
PLANT COVER CROPS AFTER HARVEST
Cover crops are also an option if you are done with your garden space until next spring or before you plant garlic in late Sept. or Oct. It’s best to start growing cover crops as soon as you can but many crops will grow into late fall. Plant a quick growing crop like peas, oats, radishes, or buckwheat.
A cover crop is used to slow erosion from wind and rain, improve soil health, smother weeds, help control pests and diseases, break up compacted soil, and increase biodiversity. Using a cover crop can reduce the amount of compost you need to prepare your garden soil for next year.
Read our post about Living Soil which covers best practices for healthier soil and head over to the University of MN Extension article with a cover crops selector tool to choose a cover crop for your soil goals. For example: If you fertilize with liquid fertilizers you probably have excess nitrogen in your soil or if you grew peas ( nitrogen fixers) in an area then you’d choose a cover crop that adds other nutrients.
Plants improve your space!
Plants are a wonderful addition to our lives because they connect us with nature, which improves our mental health. Here are the top 5 reasons that plants improve your space.
1. Breathe Easier
Indoor plants will improve air quality by removing carbon dioxide, benzene, and up to 90% of formaldehyde. Formaldehyde can be found in household products such as glues, household soaps and cleaners, paints and coatings, lacquers and finishes, building materials, pet products, and more.
2. Relax and Refocus
If you are having a stressful time and need some help, put a plant nearby. Plants can help lower your blood pressure and reduce stress. This can help you reduce overall tension and refocus on the tasks you need to complete.
3. Help with Transition
Moving can be a stressful time, especially if you are moving away from home as a college student, to a different state, or for the first time! Many experts agree that plants can give you the same benefits as having a pet. If you already have plants, make sure to bring at least one with you. Plant owners feel less alone, better able to deal with stress, and hopefully feel more optimistic!
4. Friendly Flora
Not all bacteria is bad! Houseplants can increase the beneficial bacteria and microbial diversity in your indoor environment, which benefits our health while indoors. Experts do say playing in dirt helps our immune system so we are bringing that beneficial bacteria inside with us. No, that doesn’t mean you need to spread soil all around.
5. Aesthetically Pleasing
They are purely just pleasing to the eye. It doesn’t need to help us heal, accelerate output, boost our energy, or improve creativity, which plants can do! We can add plants just because it bring us joy and it creates the space that makes us feel more comfortable. That’s really the only reason you need to add plants. Your space is sacred and you make it into what you want!
Head to our Houseplants and Tropical Plant page to read more about the houseplants we offer and for link to plant care search through Costa Farms.
Late Summer through Fall Garden and Landscape Tasks
It’s late summer and fall is around the corner. Slowing down, enjoying time in the garden and eating delicious fresh produce are the reasons this is a fulfilling time of year. If you are wondering what you can do in the garden, here are a few garden and landscape tasks and tips.
PLANT CARE
Watering: Keep watering an inch of water weekly to your plants. For instance, trees and shrubs will soon set their leaf and flower buds for next season as well as keep growing their root structure. If you have fruiting plants, produce from pumpkins to apples are now making the final push to plump and ripen.
Weeding: The weeds are still growing and some may be flowering. Pull those weeds to prevent them from reseeding. Invest in some weeding tools to prevent hand fatigue and easily pull prickly weeds like thistles that you may be skipping without gloves or a weeder.
Fertilization: If your lawn is not in dormancy from drought, you can use a fall lawn fertilizer like Max Lawn Fall Lawn Food Winterizer to give your lawn a boost of nutrients before winter dormancy and have green grass in the spring.
You can also fertilize your trees, shrubs, and perennials with a fertilizer that is higher in Phosphate and lower in Nitrogen to promote more root growth before winter freeze. This boosts plant health going into winter and for the next season.
Pruning: If you have any woody plants or perennials to prune, the 3rd or 4th week of August should be the last week for these tasks. You don’t want to prune too late in the season because as the days shorten, plants begin the process of hardening off for the winter. Any new growth that doesn’t have time to complete this process may have damaged foliage in the spring.
Plant material cleanup: We recommend to wait until the spring to clean up the dead stems and foliage of your perennials. The foliage and stems help protect the plant roots from extreme cold weather and provide important protection of beneficial insects.
The exception to this recommendation is if you experienced any disease on a plant. In that case, clean up the foliage and dead stems and burn or toss the foliage in the garbage.
REDUCE WINTER DAMAGE
If you have issues with rabbits or deer around, get a hard plastic mesh tree guard. You’ll be happy you did because if animals chew around the entire tree diameter, it’ll cut off nutrients to the tree, which will cause the plant to die. Shrubs and evergreens can also experience animal damage from hungry animals so use a granular or spray animal repellent or fencing.
Here is an extra note about evergreens. It’s very important evergreens have adequate water before ground freeze or you may experience browning of needles the next spring. Evergreens do better when planted early fall instead of late fall to help them take up moisture before freezing. They slowly lose water from their needles over winter and if they are in an area of high winds and/or bright, all day sun, it dries them out quicker.
If you have houseplants outside during the summer, once the temps are consistently 50F or below overnight, it’s time to bring your plants inside. Read our blog on the steps to start a couple weeks before bringing them inside.
CLEAN GARDEN TOOLS
We like this step-by-step guide from The Spruce on how to clean and store tools.
STILL WANT TO DO A BIT OF PLANTING?
Sowing turf grass: Mid-August through mid-September is an ideal time to start new grass from seed. We carry high quality seed from Ramy Seeds in Mankato. If it seems daunting to keep the soil moist to sprout grass this time of year, you can wait until late fall to sow seeds that will start growing in spring with the snow melt and spring rains.
Divide perennials:
Dividing perennials (PDF List of perennials and dividing time): When the days are cooler and your perennials are done flowering, you can divide and replant your perennials if they are crowded or not performing well in their original spot. A good rule of thumb for figuring out if you can split a particular perennial is if it blooms in the late summer or fall, divide in the spring. If the plant blooms in the spring, divide in the fall. It’s very important to boost root growth with Biotone Starter or anything with higher Phosphate and lower in Nitrogen when you transplant. Phosphate promotes root growth over foliage growth which is more important when transplanting in the fall.
Plant helpful cover crops:
Using a cover crop may reduce the need to use compost to prepare your garden soil for next year. 2Cover crops are also an option if you are done with your garden space until next spring or before you plant garlic in late Sept. or Oct. A cover crop is used to slow erosion from wind and rain, improve soil health, smother weeds, help control pests and diseases, break up compacted soil, and increase biodiversity. Plant a quick growing crop like peas, oats, radishes, or buckwheat.
Read our post about Living Soil which covers best practices for healthier soil and head over to the University of MN Extension article with a cover crops selector tool to choose a cover crop for your soil goals. For example: If you fertilize with liquid fertilizers you probably have excess nitrogen in your soil or if you grew peas ( nitrogen fixers) in an area then you’d choose a cover crop that adds other nutrients and provides other benefits.
Minimize Japanese Beetle Damage
Leaf eaten by Japanese Beetles and looks like lace.
Japanese Beetles are serious pests in both the adult and the larval grub stages.
The adult beetles are above ground, feeding, mating and laying eggs from mid-June to early August. The white ‘C’ shaped grubs spend the rest of the growing season eating the roots under your lawn.
If you do notice leaves that look like green lace, that’s a sign you have Japanese Beetles in your yard. Luckily healthy trees and shrubs will survive these feedings. Focus your mitigation efforts on immature or heavily damaged plants as well as fruits, vegetables and herbs first. These immature plants can tolerate some leaf feeding but severe damage may affect plant growth and reduce yield.
Grub Identifier
C-shaped, white to cream-colored grubs with a distinct tan-colored head. They will be 1/8th inch up to 1 inch long. Japanese Beetle grubs look like other white grubs and can be distinguished by the hairs on the end of their body.
Photo courtesy : UMN Extension
Methods to Minimize Japanese Beetle Damage
Start managing their population right when you start seeing leaf damage. The adult beetles will be feeding up to 8 weeks starting around mid-June.
Cultural Control Methods
Incorporate plants around your favorite landscape and garden plants that repel Japanese beetles such as catnip, chives, garlic, odorless marigold, nasturtium, and white geranium.
Natural predators to the beetle are birds, spiders, and possibly raccoons, moles, and skunks. The Starling bird is it’s greatest predator. Create a yard that attracts these predators so they can help you with minimizing damage and the beetle population.
DO NOT KILL Japanese Beetles with Winsome Fly eggs on their thorax. The white dots are visible with the naked eye so it’s easy to spot. The Winsome Fly uses the Japanese Beetle as a host and will kill the adult beetle. Growing the Winsome Fly population will help us all in mitigation of the Japanese Beetle.
Physical Removal
Browse your garden daily, focusing on the plants they are attracted to or the ones you want to minimize damage. Hold a small bucket of soapy water under the beetle and tap or shake the critter into it. You may have to grab them instead if they are flying away.
They naturally fall to the ground as a defense mechanism and easily get lost in the soil. Visit your plants as often as possible and inspect carefully.
Since they are attracted to the scent of other Japanese Beetles, do not squish them!
Netting Your Plants
If a tree or shrub is no longer in bloom, you can use a fine mesh barrier to cover the plant. If the plant is blooming and needs to be pollinated, hand-picking is going to be the only option. You don’t want to spray insecticides on your plant at that time.
Japanese Beetle Traps
If you can place traps far away from gardens and landscape plants, this can help populations migrate away from valuable landscape plants. Keep in mind, they can fly 10-15 miles to a new place to feed and you may just be attracting them to your area. Do not place the traps near your favorite trees and garden. The USDA recommends putting them at the border of your property and throughout the community.
Biological Controls
“Two natural enemies of Japanese beetles have been released in Minnesota. The fly Istocheta aldrichi lays eggs on adult Japanese beetles in summer, whereas the wasp Tiphia vernalis parasitizes grubs in the spring. Although both natural enemies became established here, neither is very abundant and they have little impact on Japanese beetle populations.” – UMN Extension
To focus on killing the grubs, start treating yards and gardens with grub killers in early July. Killing grubs under the lawn this summer will not affect the number of beetles this year, but next year the number of beetles that emerge from your lawn should be reduced. Killing grubs will reduce damage to your turf but adjacent properties may still have Japanese Beetles so you may not see reduction of adult beetles.
Bt
Bacillus thuringiensis galleriae is another natural way to kill the grubs. Bt is a naturally occurring soil bacteria that eats Japanese Beetle grubs before they can develop into beetles. It can last up to one to two weeks and it is not harmful to bees.
Milky Spore
Milky Spore is a biological agent that is specific to Japanese Beetle grubs and will not harm other grubs. It also does not harm earthworms, and other insects such as bees and butterflies, pets, humans or other animals. It does need one or more applications annually for three to five years to adequately inoculate your lawn, but once appropriate levels are in place, no further treatment is needed for 10 years.
Nematodes
Nematode biological insect control is 100% pesticide free, organic, and pet friendly for indoor houseplants as well as gardens.
In the spring, if you notice unexplained small patches of dead brown grass, you can dig up part of the area and you may find the culprits. Grubs! These areas can be spot treated with nematodes to control the grub population that will eventually go into their adult phase and hatch out of the ground.
Another option is to treat around plants that you know have been attacked by Japanese Beetles, Weevils, or Borers in late spring/early summer while the adults are active. Early fall, while the grubs are young, is another good time treat young grubs while they are moving around the soil and finding a place deeper in the soil before winter hits.
Japanese Beetle Insecticides
It’s the law to read and use insecticide according to the label and apply only as recommended. Make sure that it can be used around the plants you wish to treat and for the insects you want to control. We recommend avoiding insecticides when possible.
Systemic
A granular or liquid Systemic Insecticide containing Imidacloprid and dinotefuran, both neonicotinoids, can be applied to lawn one time per year. This seems like an easy way to minimize damage but these are highly toxic to all pollinators. The plant roots absorb the insecticide and will poison the beetles and any insects that munch on the plant. Apply when the plant is not in bloom to prevent pollinator death and 4-5 feet away from flowering plants.
Topical
Topical insecticides, like Eight, which contains Permethrin (high toxicity to fish and bees), can be sprayed on vegetables, fruits, flowers, nuts, lawns, and outside surfaces of buildings. Neem oil is an organic and less toxic insecticide that is an alternative. If you are spraying edible plants, be sure the product is labeled for those plants. Be aware, however, that these are ‘broad-spectrum’ insecticides that affect many kind of insects, including bees and butterflies, so use them cautiously, applying only when and where needed. Keep these insecticides away from ponds and streams as well.
Professional Application of Insecticides
There are insecticides that can only be applied by professionals, like chlorantraniliprole, that have a lower risk to harm other beneficial insects.
Here is another great resource from the USDA on Japanese Beetles, their life cycle, plants that are not susceptible to damage and ones that are, and much more! USDA Japanese Beetle Handbook (pdf)
Please let us know your questions or if you need help fighting off these buggers! We have many products in store to help minimize Japanese Beetle damage so come on in and we will fight this battle together.
LAWN DORMANCY AND WATER CONSERVATION.
IT’S NOT DEAD. IT’S DORMANT.
It’s not a pretty picture, but it’s an important message. If you see brown turf grass like this *image*, don’t worry. What we should worry about is what drought means for the water supply and our ground water level.
We’re happy to give you good news!
The same as dormancy during the winter months, turf grass goes dormant to survive drought conditions to conserve nutrients and energy. The grass won’t die unless there is a very long period of drought and extreme heat. We understand a lawn can be an important space for play and relaxation, and you don’t want your grass to die. To prevent death with as little water as possible, water turf grass with ½ inch every two weeks. This ½ inch of water will not green up the grass but will keep the crowns alive.
The responsibility of landowners is to conserve water during drought because the same water that is used for watering lawns is the same water all families drink. Turf grass doesn’t need the water, but we certainly do. In addition to the importance of conserving water for human consumption, reduced manual watering will save time and money.
Another issue during drought is the mistiming of watering during heat and drought. The mid-afternoon sun and wind evaporation negate watering efforts. That’s literally pouring money down the drain. When watering turf, water between 6:00 a.m. to 8:00 a.m. to avoid water loss.
After a drought period, depending on the variety of grass, it should green up within 3 to 4 weeks if accumulative rain is 1 inch a week.
What about water conservation for gardens?
The answer to that question is about perceived value and can be subjective. Watering your vegetables, fruits, and newly installed landscape plants is often viewed as important as these are valuable resources and adds biodiversity to the area that turf grass does not provide.
Let’s turn the problem into a solution!
If you’d also like to conserve water and still enjoy a garden, increase the square footage of hearty perennial landscape plants or Xeriscaping, a technical name for planting for non-irrigation gardens. For example, native plants have adapted to an area and can handle periods of drought because of their very long tap roots. There are many other plants, once mature, that create a hands-off landscape and will make gardening more affordable!
Use it or lose it.
Harvesting rainwater in rain barrels and cisterns can trap water for later use or create a swale or basin in your yard to direct rainwater to specific areas to make rain the primary irrigation method and reduce manual watering. Depending on the harvesting method, 1000s of gallons of water can be utilized from one rain event!
When it comes to plants, reliable is a characteristic we love! This is our top 8 ‘tough as nails’ perennials that will come back every year and tolerate a wide array of conditions. We would like to mention, even though they are tough, it doesn’t mean they can be completely neglected of nutrients, sun, and water. These plants, after their first couple years of more watchful care, will definitely catch your attention with their beauty, tenacity and reduced level of care once established.
Yarrow
Yarrow Vintage Rose with Salvia in the background.
Achillea millefolium is a Native American plant. Yarrow adds light texture to a garden and one of the best low care perennials for adding a burst of color. It grows tall ( can be up to 3′-4′) with showy clusters of fragrant white, red, pink, or yellow flowers, depending on the variety. It does well in hot and dry spots and resistant to pests. Their blooms typically last from early summer through early fall and are a wonderful cut flower!
Feather Reed Grass
Feather Reed Grass
Calamagrostis x acutiflora is an upright clump forming ornamental grass, with multiple varieties, that adds architecture, movement, and the seed heads add floating fluffy textures in the fall through winter. It does best in moist, rich soil but can handle poor, dry soils as well. This is the perfect grass for urban areas and tough to grow sunny areas. In addition to its high tolerance for multiple conditions, it is pest and disease resistant. Prune down foliage to a couple inches above soil before new growth in the spring and add organic fertilizer if it’s in poor soil if you want to give it a boost and that’s it!
Phlox
Phlox paniculata Coral Flame.
There are so many varieties of phlox it’s impossible to describe them all but they come in low, medium, and tall growing forms to fit in just about any garden. It’s one of the most versatile and colorful plants that have been used in gardens for over 100 yrs and for good reason. Most are long-blooming, often fragrant, and tall varieties don’t require staking. They prefer moist, rich soil and full sun, but depending on the variety, some don’t mind poor, rocky soils or part-sun. Flower colors range from pure white to red, with nearly every shade of pink, lavender, salmon and purple and some multi-colored petals. With proper planting, you can avoid most disease issues, such as powdery mildew.
Daylily
Handwriting on the Wall Daylily.
Hemerocallis means “beauty for a day”because daylily buds blooms only one day but has successive blooms over 4-5 weeks. Some daylily varieties are labeled rebloomers since they perform a couple times in the season with successive blooms. The Daylily is considered “a perfect perennial” because it’s drought tolerant, can grow in almost any kind of soil, can grow in full or part-sun, offers an array of early season to late season blooming varieties, has showy vibrant colors, are pest and disease resistant, and attracts birds, bees, and butterflies. Can be grown on hillsides, around the city, or in a traditional garden with very little care needed.
Sedum
Pure Joy Sedum with coneflowers.
Sedum, also called stonecrop, have thick succulent like leaves that form clusters of small colorful flowers (white,red,pink,or yellow) in late summer and fall that bees love! There are low-growing and tall varieties that love full sun and can handle drought conditions. Once these plants are established they require almost no care. Sedums are easy to split in spring and fall if they get too big for their space. These perennials can grow quickly! Foliage of the fleshy leaves are not only green but there are varieties with varying foliage colors. For example, Sedum Dragon’s Blood Tricolor has white and green foliage with pink edges or deep purple leaves like Sedum Dark Magic. Just make sure these plants have well-draining soil because they can succumb to root rot in prolonged wet soil.
Coneflower
Pow Wow Wild Berry Coneflower.
Echinacea, comonly known as Coneflower are bright, upright, and tough perennials! They can take the heat and drought conditions once established ,deer resistant, and trouble free! Echinacea purpurea is the native coneflower to North America but there are varieties with many different bloom colors. These flowering perennials can have blooms that last from mid-summer though fall! Give coneflowers full sun and avoid other plants shading them. They don’t need much in regards to fertilizer if you mix in plenty of compost into the soil when planting. They attract bees and butterflies and if you leave the flowers on in the fall, birds like to eat the seeds. Prune off dead flowers in summer to promote more blooms for fall.
Russian Sage
Denim N’ Lace Russian Sage. 2020 PW Perennial of the Year.
Perovskiaatriplicifolia, commonly known as Russian sage is a must have plant to add to your garden! Russian sage has grey-green leaves that are very aromatic with bluish-purple flowers that bloom mid-summer through fall. It can tolerate clay soil, dry soil, street salt, and are deer and rabbit resistant. It’s also disease and pest resistant! It really is a tough plant! They can fill up a 3′-4’x3’x4′ space in your garden quickly. Birds, bees, and hummingbirds will appreciate this valuable addition as well!
Hyssop
Blue Fortune Hyssop. Photo Courtesy of Monrovia.
Agastache, or commonly known as Hyssop or Butterfly Mint, have very fragrant foliage and flowers that attract bees and butterflies. The flowers bloom late summer through fall to add color when other perennials are winding down. Most hyssop varieties are native to North America and not only like compost rich soil but also lean, dry soil. They prefer a “tough love” approach so they don’t need much water once established and be sure not to over-fertilize. Only top-dress with compost in spring if you want. Hyssop prefer full sun but can tolerate part sun areas.
All fresh tomatoes are great but those of you who are looking for tomatoes that are blight resistant, look no further!
Brief description of blight:
Blight causes sudden yellowing, wilting, spotting, or browning of new leaf growth, fruit, stems, or the whole plant, depending on the severity. It spreads by fungal spores that are carried by wind, water, tools, and insects from infected plants, and then deposited on the plant or dead plant matter on the soil. The disease requires moisture to progress, so when moisture or rain comes in contact with fungal spores, they reproduce. The spores thrive in humidity and the spores can then be transmitted through the wind easily.
Blight can infect many different plants, i.e. apples, potatoes, and cucumbers, and can be caused by various fungal strains like Alternaria solani, a.k.a. Early Blight, or Phytophthora infestans, a.k.a. Late Blight.
Prevention is key, even for blight resistant tomatoes. Copper fungicide, or Fung-onil can help slow the growth once you see signs of blight or spray on the plant prior (about 2 weeks) before predicted hot and humid weather.
Example of early blight on a tomato leaf. Source: Univ. of MN Extension
Best practices to prevent blight:
Healthy plants are less effected by blight. Provide proper water and nutrients. Tomatoes are heavy feeders. Tomato Tone or Plant Tone are good options when you are first planting your tomatoes. If you get a lot of foliage growth, fertilize with less nitrogen and more phosphorus, 5-10-5.
Mulch around your plant to prevent soil from splashing up onto the foliage.
Water your plant at the base and avoid the foliage. Morning is best so it can dry throughout the day.
Provide proper spacing between plants and air flow but using cages.
Sanitize all garden tools between plants
Clean up any dead infected foliage around the plant and either burn or put into the trash. Do not compost!
Prune the lower branches of tomatoes a foot above the ground to help reduce water splashing on the leaves. Prune further if you see any disease spots on lower leaves.
Don’t let diseases deter you from certain plants since many plants can get blight without proper care, prevention, or crop rotation. If you have been effected by blight, we understand the frustration, so try one of these blight resistant varieties listed below. If we have especially hot and wet weather, we recommend having a fungicide on hand so if you start seeing blight, you can treat a.s.a.p.
BLIGHT RESISTANT TOMATOES
Variety
Best Used For
Location*
Growth Habit
Beefmaster
Slicer
Garden
Indeterminate
Better Boy
Slicer
Garden
Indeterminate
Big Boy
Slicer
Container
Determinate
Big Daddy
Slicer
Garden
Indeterminate
Heirloom Brandywine
Slicer
Garden
Indeterminate
Brandywine Yellow
Slicer
Garden
Indeterminate
Champion II
Slicer
Garden
Indeterminate
Cherokee Purple
Slicer
Garden
Indeterminate
Early Girl
Slicer
Garden
Indeterminate
Rutgers
Slicer
Garden
Determinate
Supersteak
Slicer
Garden
Indeterminate
Gladiator
Slicer/Paste
Garden
Indeterminate
Juliet
Snacking
Garden
Indeterminate
Sunsugar
Snacking
Garden
Indeterminate
SuperSweet 100
Snacking
Garden
Indeterminate
Yellow Pear
Snacking
Garden
Indeterminate
Big Beef
Salsa
Garden
Indeterminate
La Roma
Paste
Container
Determinate
San Marzano
Canning/Chopped
Garden
Indeterminate
*All listed container plants will also do well in the ground. These tomato plants tend to have a more compact size.
Determinate = Plant grows to a certain size and stops, bearing most of it’s fruit within a one month period. Great for small spaces or containers. Some will grow tall and still need tomato cages.
“What is one to say about June, the time of perfect young summer, the fulfillment of the promise of the earlier months, and with as yet no sign to remind one that its fresh young beauty will ever fade.”
– Gertrude Jekyll, On Gardening
This post is about late spring/early summer gardening tips and things to look for that may be showing up soon in your garden.
Fertilizer
Don’t forget water soluble fertilizers for container plants. Container plants are in a potting soil that do not contain enough nutrients for all season. Depending on the plant, you will need to add fertilizer to the water or use a slow release fertilize like Osmocote. Follow directions of product and individual plant needs for fertilization. Top dressing containers with compost can also be done to add some nutrients.
Boost for New & Established Plants
Most in-ground soils will benefit from adding organic material like compost and a starting fertilizer like Biotone Starter before planting or Plant Tone after planting. Top dressing the established perennials/shrubs with compost in the spring will give them an extra boost of nutrients. Plants like butterfly bush, delphinium, and clematis like if you put a mound of compost around their root ball.
Watering
Newly planted plants in the ground need deep watering so their roots reach down and establish themselves before winter and reduces stress on the plants. Water deeply a couple times a week. If it rains a little (pay attention to how many inches you get with a rain gauge), you can water around your new plants a little more to get water deep into the soil. It helps you conserve water and save time watering. 1″ of water per week is the recommended amount of water. Pay attention to the soil and if it is wet looking, hold off for another day. Best method is to stick your finger in the soil and if it’s dry a couple inches down, it’s time to water.
Weeding
Remove weeds now while they are small, as they grow quickly. Weeding is easy when soil is damp since it’s easier to pull the whole plant including the roots. Be careful not to walk on soil around your plants to avoid compaction of the soil.
Prevent Fungal Diseases
With rain and warming weather you need to be proactive about fungal diseases. It’s best to prevent it, instead of treating it because once it starts, you can’t get rid of it completely. Treat your plants that have a higher chance of fungal issues with a fungicide before you see signs of it. For example, tomatoes usually get blight so best to treat with Bonide Revitalize or Copper Fungicide before it starts. Make sure to water your plants at the base and water in the morning when possible so the water can dry before it cools off at night. Mulch around your plants as well to help prevent fungus from the soil splashing on your plants.
Insect damage is going to start. Keep an eye on your plants for damage to their foliage. It’s important to remember, a little bit of insect damage is not bad and if you see an insect, it doesn’t mean they are bad. We need to move passed the thought that bugs are icky and nuisance. There are very important insects that are good for the garden and actually improve plant health.
Look for these invasive species instead:
Japanese Beetles: Metallic looking green/bronze beetles flying or munching on landscape plants. They love roses, hollyhock, cherry trees, plums, grapes, blackberries, and linden trees. They can be found snacking on other plants as well. Read more about them here. Incorporate plants that repel Japanese beetles such as catnip, chives, garlic, nasturtium, and white geranium around your susceptible plants. Jumping Worms: Although we haven’t had any recordings of jumping worms in our area, these can be very detrimental to lawns and gardens. There are sightings of these worms in the Minneapolis/St. Paul area so if you are doing any transplanting of plants from that area, purchases of mulches and soils, or any plant swap around our area. Read more about them here so you can know what to do to avoid them or if you see them, how to alert the U of MN Garden Extension. There are no proven ways to eradicate these worms yet.
Getting rid of insects isn’t always easy and great care should be taken if you choose to spray with insecticides, even ones labeled organic. It’s still an insecticide made to kill insects.
*Quick side note about fungus since we have been having cool springs the last couple years. With cool/wet weather you may encounter anthracnose on your plants. If you are seeing brown spots on trees and shrubs early in the spring it may be this.
Starting a Vegetable Garden & Resources
Congrats on starting your vegetable garden journey!
There has been a huge increase of people wanting to grow their own food as well as flowers, pollinator plants and converting lawns to native species so you’ll find a large community, including us, that can help you with all your trials and celebrate your successes.
This post is for bringing the basic info together to start you off. We are always here to answer your questions if you have any if you can’t find what you are looking for email us! Feel free to call or stop in!
Info sheets we like to handout in store for all vegetable gardeners:
You can also read our post about seed starting supplies and steps.
Additional Resources:
We’d also like to direct you to our Resources page for additonal gardening information.
We like getting our plant and gardening information from multiple sources, just like you do, so we found this webpage that helps you decide on where to plant, soil health, and more information. These steps are not only for vegetable gardens but perennial gardens and landscaping!
Don’t forget to follow us on the Facebook, Instagram and subscribe on YouTube for plant and gardening tips!
Seeds you need to start in March and April and what you need!
Early Spring Yard and Garden Tasks
The desire to start gardening and enjoy outside is hard to suppress. Each spring will bring us new weather patterns and it’s best to take Nature’s cues when it comes to accomplishing these yard and garden tasks
YARD AND GARDEN TASKS:
1. Wait to clean up dead perennial matter until temps are consistently around 55F-60F. Beneficial insects will be in their dormant state in leaf litter and dead perennial matter. You should wait to clean up dead plant material as late as possible into the spring.
You can top dress with compost as well as mulch around the root zone of your plants when you see perennials emerging.
2. Clean and sanitize your outdoor containers, bird baths, bird feeders, and garden tools. Check out the new garden decor and tools in store!
3. Prune off dead/damaged branches on shrubs and trees. Late winter/early spring is the best time to prune trees, before their buds are formed. Refer to our pruning guide in regards to shrubs and trees.
4. Clean debris from your vegetable garden and top dress the soil with compost at least two weeks before you plant. Avoid compaction of the soil by using designated walkways. Compaction of the soil will reduce the level of oxygen available for plant roots. Lightly till in compost if you notice your soil is compacted.
5. Early to Mid-April, depending on weather and ground temperature, is the best time to put down new grass seed or ground covers like clover. Wait to scatter seed until day temps are 60F+ consistently before spreading seed. Most seeds, including grass won’t germinate until the soil is 55F+. We carry bulk or bagged grass seed from Ramy Seed in Mankato. If you want to forego a conventional grass lawn, get a wildflower seed mix and scatter the seed in mid to late April.
Please note, if you want to do a weed killer in the same area you want new grass, you will have to wait to over-seed grass until summer or fall. If seeding is more important – forgo the crabgrass or weed killer and just use a lawn food
6. Apply crabgrass killer and weed pre-emergents just before we have consistent 60F days. Most products last 6-8 weeks and timing the application with the weather is important or you may need to reapply. Weeds germinate when soil is 55F. There are many turf products, likes Maxlawn Weed and Feed, that contain fertilizer as well as weed killers so you can accomplish both tasks if you have weeds throughout your lawn. Our staff can help you decide what is best depending on what you want to accomplish!
If you don’t mind weeds, use a lawn fertilizer around the time you have to mow for the first time.
Plant summer bulbs when the soil has warmed to above 40F and the soil isn’t soggy. Usually early April through mid May depending on the spring weather. The soil should be rich and well-draining to avoid bulb rot if cooler temps come back.
Find growing instructions in the store!
Cool Season Hardy and Semi-Hardy Vegetables:
Seed Starting
Smell the soil and see the plants grow new leaves! You can experience new life by starting seeds, also known as sowing, indoors this winter! Each plant packet will tell you when to sow the seeds but most will be started late winter through early spring.
Reasons to start your own plants from seed:
Save money over the long run – The initial investment into growing gear may be seem like a lot but you can use trays, pots, lights, etc for multiple years.
If you have a plant that dies, it’s ok! Sow extra seeds so you can avoid total loss. That one plant loss will be a low-cost loss than an already grown starter plant. If all else fails, we have starter plants to make sure you grow what you want to!
Seeds will last longer than the packet expiration date. There may be lower germination rate so plant one or two extra seeds per hole.
You can grow a lot of plants and a diverse variety! Garden centers, like us, grow a lot of different varieties but we can’t grow them all.
Next, we will cover seed packet info to take note of, supplies you will need to start seeds indoors, caring for seedlings, and hardening off seedlings.
Important seed packet info to get to know the plants you are growing:
The best time to plant ( Weeks before or after frost) The last frost date for Southern MN is projected as May 1- May 15th. See examples in the next section of sowing times before transplanting outdoors.
Indoor or direct sowing recommendations
How deep to plant the seeds
Days to germination gives an idea of how long it takes the seed to sprout
Days to maturity = the number of days from planting to harvest
Seedling thinning & spacing directions
Check if it’s perennial (must be zone 4 to be S.MN hardy) or annual (only grows one season)
Start seeds indoors or directly sow them in the garden or planter?
Use the “date to maturity” as a guide for your produce. This will let you know about the time you should be harvesting and if you will need to sow in the winter. Some plants have a LONG growing season and should be started indoors around Feb/Mar to reach maturity. ( ex. peppers, celery, tomatoes, cole crops, lemongrass, and rosemary)
Some plants have sensitive roots and mature fast enough in our climate to be directly sown. Examples are corn, cucumbers, potatoes, carrots, sunflowers, nasturtium, beans, radishes, peas, dill, and radishes.
**Hardy perennials may require cold stratification or scarification for proper germination. Read more about starting seeds outdoors in the winter, which is needed for zone 4 and 5 perennial seeds.
AVOID using soil from your yard/garden if possible! It is an easy way to introduce unwanted pests and disease problems for little seedlings. *Most at-home compost piles do not get hot enough to kill harmful pathogens.
Recommended for seeds – Seed Starting Mix. It is a fine textured, soilless medium that is sometimes heat sterilized. It contains no nutrients and is intended for germination only.
When potting up seedlings into containers – Standard Potting Mix. Any potting mix will do! Some may contain nutrients to start feeding your plants but if you have them planted in containers you will have to supplement the soil with fertilizers as they get bigger.
Supplies needed to start seeds indoors:
Plug tray, soil pellets or seed starting potting soil, open flat, humidity dome, pots, watering can, heat mat, fertilizer, grow light, and a fan.
Let’s dig into each of these materials and why you need them.
Plug Trays – Provides a controlled environment for proper germination
When choosing a size of plug tray, ask yourself how many plants you want to grow. Some plug trays come with smaller plugs and can fit more plants and vice versa. The smaller the plug, the sooner you will need to pot up into larger plug trays or pots.
Soil Pellets
Usually, these pellets are made of coco coir. To expand the pellets, soak them in water and place the seed in the soil.
Open Flats
With drainage holes: Fill with seeding mix and scatter seeds. Divide and up-pot or plant outside when they are ready.
Without drainage holes: Use under plug trays to catch the water/soil.
Humidity Dome – Keeps moisture in and helps germination of seeds.
Fits over most plug trays and open flats. A short dome is for seed starting, and a tall dome is for propagating cuttings. Domes will need to be taken off after the seedlings are a couple of inches tall.
Pots – Plastic, Coco Coir, Biodegradable options
Use various sizes to start seeds if desired. Pots are good for when you need to divide plants in plug trays and up-pot. Choose the right-sized pot when up-potting! Too big and it may not dry out fast enough, causing root rot.
Watering Can/Spray Bottle – For keeping the soil moist and not disturbing the soil around seedlings.
Heat Mat – Most homes are not warm enough for proper germination
Raises soil temp 10-20 degrees above room temperature which will speed up the germination process and reduce chances of seeds rotting. The heat mat does not need to be on once all the seedlings have sprouted.
Lights & Timer – Supplemental light is essential to growing happy seedlings indoors!
Plants need strong light so supplemental light prevents weak and leggy plants. Get full spectrum/daylight bulbs. There are T8 & T5 fluorescent, Standard Bulbs, and LED options.
Use a timer to make life easier! 14 hrs. of light per day is the standard after seeds germinate.
There is no need to have a light on before seedlings emerge unless the seed packet says “light germinated”.
Fans
A light breeze helps grow strong plant stems. The movement of the stem will strengthen it. It will also help prevent fungal diseases from too much humidity.
Fertilizer
Seedlings do not need nutrients right away. Wait until they have a few sets of true leaves before adding fertilizers.
A half-strength, balanced fertilizer works well for most plants. We recommend looking up proper fertilization for specific plants grown.
Caring for seedlings:
Proper watering is essential. Keep soil evenly moist until germination.
Allow tap water to sit out overnight to dechlorinate when possible. Avoid using soft water.
Know your plant’s specific watering and fertilization needs by reading their packet or researching online.
Find a routine and water early in the day if possible.
After germination, allow the soil to dry slightly between watering. This encourages root growth! Avoid “loving your plants to death”, aka overwatering.
Hardening Off – Allows your plants time to adjust to light, temperature, and environmental changes
Start putting your potted plants in the shade on a calm day, for an hour or two. Slowly increase time by 1 to 2 hours outside and sun exposure over several days. It usually takes 7-14 days to fully acclimate. Reduce sun exposure again if you see signs of sun-scorched foliage. Make sure you check the soil moisture once or twice a day, depending on pot size.
We carry grow lights, seed starting kits, seedling potting soil, fertilizer, and seeds. Later in the spring, we will have vegetables and herbs that we have grown for you to purchase if you don’t get to start your seedlings.
Shamrock Plants – Luck’o the Irish!
This post is dedicated to the lucky Shamrock Plant! The official plant of St. Patrick’s Day!
Oxalis Info
You may call them Shamrock plant, but it’s latin name is Oxalis regnellii. These plants are part of the wood sorrel family, Oxalis, and you can even see other cultivars in the wild that are hardy in MN. For example, Oxalis stricta (Yellow Wood Sorrel) is a native wildflower. They look very similar to Trifolium repens L., the White Clover, which is the true shamrock plant. White clover is a beneficial pollinator plant and soil nitrogen fixing plant, as well as ornamental interest with its cute blooms.
The ornamental Shamrock Plant you see blooming in late winter in garden centers is known as the false shamrock because of the similarities of the three heart-shaped leaflets of clover, has small white blooms, and is a perfect plant for St. Patrick’s Day.
Oxalis typically grow to around 6″ tall and can grow quickly. The leaves will open and close according to the light throughout the day, called nyctinastic movement. The leaf colors vary between cultivars and typically the burgundy and green varieties are seen in garden centers.
Another plant you will see often is Oxalis tetraphylla, the Iron Cross, a.k.a as the Good Luck Plant. These plants have four leaflets, that are green with a dark purple blotch at the center. When you can’t find a four-leaf clover in the wild, just get yourself a whole plant with four leaflets!
How to Grow Oxalis
The Oxalis plant grows from rhizomes ( like a bulb ) in the soil. A big difference between these and other houseplants is that it can go dormant in the summer. Other ways that may promote dormancy is if the soil is dried out too many times, the inside temperature gets too cold, or it doesn’t receive enough sunlight. We will cover dormant care after the basic care of oxalis.
Light
After you pick out your Shamrock Plant and bring it home, put it in bright indirect light. It can take full bright light during the winter months in the morning. The bright light will promote more blooms. Speaking of blooms, these plants are known to bloom on and off all winter and one of the easiest plants to bloom! Too dark and your plant may not bloom. It may also go into dormancy.
Watering
The soil of your plant should be lightly moist at all times. You can let the top of the soil dry before watering. Frequency will depend on the humidity of your home, size of the plant, and container it’s in. If you let it go completely dry multiple times it may signal to the plant that it needs to go into dormancy. If you water it again after it goes completely dry and the foliage keeps dying back, let it go into dormancy to avoid rotting the rhizomes.
Dormancy
As stated above, your plant may go into dormancy and is likely at some point during its life. If the rhizomes are not soft and squishy, an indication of over-watering, your plant is just taking a rest. Dormancy can last a few weeks to a few months depending on the environment and variety.
Clean up the dried up foliage and stop watering and put the pot in a cool dark place. The plant will naturally want to come out of dormancy when it’s ready. If it’s been dormant all summer or for a few months, you can bring it out to the light, give it a little water and it should promote new growth! Some people have been successful by letting it go dormant only a few weeks and then bringing it back out to the bright light.
Be sure the soil doesn’t get soggy before the foliage starts popping out because it could rot the rhizomes. You should start seeing new foliage in no time with the sunlight and light watering!
Now that you know more about the Shamrock Plant we hope you give it a try! It’s a fun plant to gift for a little luck during the late winter and for St. Patrick’s Day!
Choosing a Christmas Tree
We start the season of festive greenery early at Drummers Garden Center and Floral. Christmas Trees, as well as spruce tops, wreaths, garlands, and evergreen bundles including cedar, pine, and juniper are in around mid-November. We know some of you wave your magic wand of decorations as soon as you can and others fully enjoy just the cozy feel of the season so we have them for you before Thanksgiving!
Our Christmas Trees come from sustainably grown tree farms that focus on quality and providing freshly harvested trees. Nelson Family Farms up in Wild Rose, WI is one of our Christmas tree vendors and each year we unload a large semi full, and then hang from rafters of our greenhouse for easy viewing. The tree branches relax and you see them in their full form. We also cut the trunk, net them, and help you load if needed! The greenhouse also smells amazing with all the scent trapped inside.
We believe the trees we provide are the best value. We carry Fraser Fir, Balsam Fir, White Pine, and Victorian Fraser Fir. *See image with our four tree varieties
Tree attributes:
To help you decide on a Christmas tree this year here are a few attributes of each tree variety. The trees can vary in size 5′-14′ tall also so make sure you measure the height of the room it will be in.
White Pine: Size ranges from 6′-8′ tall and have soft, flexible needles that are bluish-green in color. Needles are 2½ – 5 in. long. They have good needle retention. These trees have little fragrance. Great for people who may have allergies to evergreen scent. These trees look so lovely with lights woven in and out of their long needles and lighter weight ornaments.
Fraser Fir: Size ranges from 6′-12′ tall and have good form and the best needle retention of all the varieties. The branches are slightly upturned. Has a pleasant fragrance. Our most popular tree!
Victorian Fraser Fir: Size ranges from 6′-14′ tall and are the same as Fraser Firs but untrimmed and space between branches are wide. This is a more traditional style of Christmas tree. True to natural form in the wild. Sometimes they are still adorned with little cones on them. Good needle retention.
Balsam Fir: Size ranges from 5′-12′ tall. These Christmas trees have the strongest and longest lasting fragrance of the tree varieties. These are relatively dense trees and have two toned needles with dark green on top and silvery green on the bottom.
Winterizing new evergreens and trees
Wrap New Trees
We recommend new trees, also known as saplings, are wrapped with a protective tree wrap or vinyl guards end of October to help protect against sun scald and frost crack. If you tree does experience winter damage it’s not necessarily terminal for the tree but can increase chances of disease and insect damage. The wrap can also help deter animal damage during winter.
Wrap up to the first tier of branches coming out of the truck and slightly overlap the wrap as you go up the tree.
Remove the wrap in spring after freezing temps have passed because you don’t want to trap moisture and heat when it warms up. There are wraps that state they can be used all year-round so read packages before keeping on all year. This should be continued every year until the bark begins to thicken and roughen.
Trees with higher susceptibility to winter damage:
Guard Evergreens Against Harsh Winter Weather – and Animal Damage
We love the addition of evergreens to almost any yard. The year-round texture, color and refuge for wildlife is something you can’t replicate with other trees. Plus they look great covered in fresh snow and holiday lights.
The same winter weather and snow that contrasts nicely with our beautiful green and picturesque evergreens can sometimes cause damage.
Protection Against Winter Air and Snow
1. Water Thoroughly
Keep evergreens well hydrated throughout the year. Proper watering depends on soil drainage, weather, and size of the plant. Average is around 5 gallons of water a week to two weeks for shrubs and trees. If the soil is still moist, wait to water. Water thoroughly one day and not every day. Continue to provide ample moisture until the ground freezes.
2. Cover Soil
Surround evergreens with a fresh layer of insulating mulch to regulate the soil temperature and seal in moisture. Once the ground freezes, the roots cannot replace lost water, and sun and wind can deplete it from the foliage, a double whammy for your evergreens.
3. Spray with Wilt Stop®
Evergreen leaves have more surface from which to lose water, so they are more susceptible to winter desiccation (drying). This can be prevented with an anti-desiccant spray like Wilt Stop that helps to seal in moisture and protect your broad and narrow-leafed evergreens.
Wilt Stop is it is natural and non-toxic— made from the resin of pine trees—and it forms a soft, clear and flexible barrier over foliage to prevent your evergreen from drying out.
4. Build a Burlap Barrier
If evergreens are planted on the South/Southwest side of your home, they may be getting the worst of the winter winds and scalding winter sun – a damaging combo. Watch the video above for best examples.
Post sturdy metal or wooden stakes at an angle around the evergreen trees, then wrap with burlap, making sure to keep the top open for light and air flow. The natural, porous fiber of the burlap or similar fabric allows some wind to pass through, making it resilient enough to withstand the wind, but minimizing the strongest, coldest gusts from reaching your evergreen. This can also minimize the accumulation of large amounts of drifting, damaging snow. When the snow starts to accumulate in the winter it helps keep rabbits from being up to sneak under and munch on your plant when they are wanting to start eating anything they can find. Use of animal repellents is also recommended if you have a large number of animals around your home.
5. Buddy-Tie Evergreen Branches
This is the same philosophy that is used when we buddy-tape a weaker, sprained or broken finger to a stronger one for support.
Some evergreens have multiple leaders or two dominant branches. On their own, they can be more susceptible to breakage from heavy snow and ice at the area where the trunk branches into two.
By joining the two leaders approximately halfway up from the weak crotch area, you give them stability and strength. You can use strips of strong cloth (the rest of your burlap) or nylon stockings for the bind.
Remove buddy-tie before spring growth to allow movement and prevent girdling.
Planting Fall Bulbs for Spring Blooms
By planting fall bulbs now, you’ll be greeted with a warm and blooming welcome that will take your breath away. The anticipation of watching your garden come to life with spring blooms is simply thrilling.
When to Plant
Plant your fall bulbs when overnight temperatures start dropping to around 40° F overnight or 6-8 weeks before the ground freezes. Store your fall bulbs around 60° to 65° F and in a dry area before being planted.
Bloom Time
Bloom times will be indicated on the package of the bulbs. Plant multiple varieties with different bloom times to give you the longest duration of early spring blooms or plant varieties that bloom at the same time for an array of colors!
Where to Plant
Wherever you want to plant, make sure the soil is well-draining. Bulbs don’t like wet feet or else they may rot. Add amendments like compost or topsoil to ensure proper drainage. Try not to plant in low-lying areas where water pools and stays soaking wet. Add Bulb Tone from Espoma to your soil when you plant to give them proper nutrients before and after blooming.
Plant bulbs in full to part sun. Check the bulb packaging to see sun requirements as some can take shady areas.
Layout
Bulbs look best in groups. Consider adding them to areas where you already have perennial plants to fill in bare spots. They will brighten that area in spring and then the foliage will be camouflaged by other herbaceous perennials and shrubs as they fill out.
It’s called “naturalizing” when you plant bulbs in sporadic groups throughout your garden to make it look like a meadow.
Bloom Colors
You may like a certain color repeated throughout your yard or if you want to dive into color combinations you can go back to what we learned in art class and use color schemes! Analogous, complementary, monochromatic, and split complementary colors are color schemes that you can build with flowers and other plants!
Common Fall Bulbs at Drummers
Allium – purple pom poms atop wand-like stems. Crocus – very early color. Some even bloom in snow! Daffodil (Narcissus) – sunny yellows and white. These are great in groups. Great for forcing. Grape Hyacinth (Muscari) – purple or pink. Hyacinth – the fragrance that will stop you in your tracks! White, pink, purple. Great for forcing. Tulip – Huge variety of colors, sizes, and bloom times. Great for forcing indoors for indoor bulb gardens. Snowdrops – small white flowers that hang like a bell.
Cornell University actually did tests with planting bulbs with other perennials to see how they looked. Click here to see the results!
Landscape Shrubs for Autumn Color
Discover beautiful fall shrubs for your garden now! We can help you choose plants with amazing autumn colors. Don’t wait, add these shrubs and keep the colors going all the way to the snowfall!
Tiger Eyes® Cutleaf Staghorn Sumac
This sumac grows about 6′ wide and 6′ tall and the foliage is beautiful all season long! The brilliant chartreuse green foliage is in the summer giving way to the fall when it’s leaves turns orange, yellow, and scarlet color. This plant definitely has an oriental look to it! It’s drought resistant, can take full sun, and is a zone 4 so it will survive the winters here!
Barberry – The foliage of these shrubs are lovely! Orange, red, lime green, yellow, and purple leaf colors.
We wanted to add this shrub because it provides color from spring through fall. The new leaves come out coral orange, turn green, and then a bright red in the fall, always adding warmth and a pop of brightness to your landscape. It grows 4′-5′ tall and 2′-3′ wide and likes full to partial sun. Tolerant of most soils other than slow draining/wet areas. Can take drought conditions once established and great can tolerate road salts and pollution well. Most barberries have wonderful fall color transitions so check out barberry as a great barrier plant in your contemporary or rustic garden.
Bailey Red Twigged Dogwood
This one we are also focusing further than the fall season. We don’t want to take away from the adorable white berries that adorn the plant in late summer but sometimes it’s what’s within that gives the real beauty. The dropping of its dramatic red and orange foliage in fall reveals bright red twigs that stand upright against the mostly colorless landscape. They can get fairly big at 9′ tall and 5′ wide. It’s great for mass planting, in wetter areas, and its roots work well to create an embankment for erosion control. Plant in full to partial sun and hopefully somewhere you see often in the winter! Really easy care and cutting back old stems in the spring will give you the best color on new growth.
Winter photo: Courtesy of Monrovia
Spirea
Birch leaf spirea autumn colors
Spirea is a spring/summer flowering shrub that works well for your border plantings and provides spring blossoms as well as great fall foliage. Some spirea varieties can also bloom spring and fall. Two Spirea came to mind when thinking of fall color. Magic Carpet Spirea (See image on the right ) that turns a rich russet red in the fall after its summer season mature bright gold foliage or the Tor Birchleaf Spirea that turns gold, red, and purple in the fall. The Tor Birchleaf grows in compacted mounds and is deer-resistant, fragrant, and attracts butterflies. The Magic Carpet grows full and bushy, is an early bloomer, and has the brightest colors in full sun. Planting them en masse and pairing them with other perennials would create a more dramatic effect on your landscape. Ask us about which varieties can be pruned after first flowering to try for continued blooming into fall.
There are many plants, other than shrubs, that can provide you with extended seasonal color and eye appeal in your landscape or garden. The garden is an evolving thing so when you have time to take tabs on when plants are blooming or changing color, why not add more plants for fall interest?
TOP 5 TIPS for Summer Plantings
1.MOST IMPORTANT! – WATERING
Proper watering is vital to plant survival. Proper watering doesn’t mean watering everyday. At least 1″ of water a week spring through fall season is the recommended amount. Frequency will vary depending on type of soil you have. For example, clay soils need infrequent yet thorough watering. This is because the water doesn’t percolate quickly through the soil. However in a sandy soil, water percolates easily. This requires thorough and more frequent watering.
Every one to two weeks, a slow stream of hose water for 5-10 min around the root zone should give you a deep thorough watering of trees and shrubs.
Perennials should be watered every 3-7 days depending on soil type and weather.
Check the soil regularly by pushing your finger a couple inches into the soil before you water. If the soil is moist, wait to water. Remember, even drought tolerant plants need a couple of years to become fully established and need deep thorough watering. Searing heat and windy days may require increased watering frequency.
2. PROPER PLANTING TECHNIQUE
Make sure to follow our planting guide (See image below) on the back of our Winter Hardiness Warranty Slip that comes with all trees and shrubs. Mix in compost and slow release fertilizer with beneficial fungi, bacteria, and nutrients, like Bio-Tone, into your native soil to help newly planted shrubs, trees, and perennials get off on a strong start.
3. MULCHING
Use 2-3 inches of mulch around your plants to help retain water and keep soil cool during hot and dry days. Mulch around the root zone and keep the mulch 2 inches away from the stem or trunk of the plant.
4.READ THE LEAVES
Summer-planted plants may wilt regularly if you are under- or over-watering, or from heat stress. Water sensitive plants, especially new perennials with shallow root systems, will tell you if they need more water. If there is slight wilting during the day yet they have moist soil, they may be succumbing to heat/light stress if no other signs of pests or disease are present.
If they are still wilting after the sun is going down, they are most likely under-watered if the soil is dry or the roots have already been stressed from over-watering. The best method to quickly learn how much water you plant needs is to check it regularly. Your plant will start establishing it’s roots and watering frequency may decrease.
5. PLANTING TIME
Planting on a cloudy day is less stressful on new plants. If the cloudy day is followed by a day or two of rain, all the better! You can also plant in the evening. That gives it half a day before it gets blasted with the summer sun.
We also made a video of planting a shrub to show how to properly plant.
Additional landscape plant heat stress remedies:
Spruce Top Style Ideas
Styling a spruce top container can be a lot of fun but sometimes daunting if there are so many options! That’s why we put together three styles for you! Add or take away what you want or grab the whole decoration bundle while in the store when you are getting your evergreens!
Without any further delay, here are the three easy styles!
Woodsy Winter Neutrals
Ingredients:
Curly Willow
Frosted Cones
White berries
Sakai Pod
Greens: Spruce, Pine, Cedar, and Berried Juniper
Recommended add-ins: Magnolia or Eucalyptus Leaves, Variegated Oregonia bundle, Dried Hydrangea Flowers
Classic Christmas
Ingredients:
Red Twig Dogwood
Birch Pole
Red Berries
White-tipped Pine Cones
Buffalo Check Ribbon
Greens: Spruce tops, Cedar, Pine
Recommended add-ons: Broom Bloom ( Neutral or Red), Red Ornaments
Glitzy Frost
Ingredients:
Metallic Green Berries
Frosted and Silvery Evergreen Foliage
Greens: Norway Pine, White Pine, Shore Pine, Cedar
Recommended add-ins: Short spruce tops if you want height, metallic globes, glitter pine cones, or glitter vines.
Poinsettias
Originally red, poinsettias are available in a huge variety of sizes and colors.
The best tips for keeping poinsettias in good shape are: keep them out of drafts, allow them to dry slightly between watering, and be sure to empty excess water from the bottom tray or cover provided when you purchased it. Here is Minnesota Gardener’s guide to caring for Poinsettias during the Holiday and year-round!
In season, purchase these beautiful plants in our store or on our floral website.
It’s the bracts of the plant, or modified leaves, that provide most of the color to poinsettias. The flower itself does provide a bright spot of color, see it? The yellow flowers are located in the center of each colorful bract.
Easy Care Houseplants
Connecting with nature is important especially since it’s easy to be disconnected from it these days. Houseplants in the home or office have proven to improve mental health and keep that connection with nature.
We get that not everyone can be a perfect plant parent and take care of ALL varieties of houseplants. This gallery of houseplants are ones that can handle a more “hands off” approach. Although these are easy plants to take care of, they still do have specific light, water, and nutritional needs. Most of these have similar needs but please research and ask about their individual care. We are happy to help!
*Note: All of these houseplants have different variations so the images are just a representation. For example, Aglaonema can have pale pinks or orange in the leaf or the Sansevieria varieties can have different leaf shapes!
Pothos
Sansevieria
ZZ Plant
Spider Plant
Aloe Vera
Aglaonema
Succulents and Cactus
Top 10 Perennials 2019
Back in January of this year, the full-time staff went to the Northern Green Conference up in the Twin Cities for continuing education and to see what is new for this year in landscaping and gardening. One of the more popular sit downs was the Top 10 lists of perennials, shrubs, and trees. Since June is Perennial Gardening Month we thought we’d share the Top 10 Perennials of 2019 decided by Mike Heger. Mike has been in the horticultural industry for over 40 yrs and has even written a book on growing perennials in cold climates. He of course prefaced the list with saying this was a very difficult list to make and was focusing more on natives and pollinators this year. Check out the quick list of his Top Ten Perennials!
Top Ten Perennials 2019
Baptisia Lactea ‘ White False Indigo ‘. Tough, long-lived plant, and tolerates many different soils and light conditions. Great nectar plant. The Blue False Indigo, Baptista ‘ American Goldfinch ‘, and Baptisia Decadence Series are other Baptisia he mentioned.
Calamintha nepeta ‘ Montrose White ‘ (Catmint). Clump forming mint with long bloom time. Great for bees and hummingbirds love it. Considered a zone 5 but could possibly survive our winters in the right spot.
Clematis ‘ Arabella ‘. A rambling ground cover that can have flowers all summer long. Mike said his bloomed 14 weeks! Bees and Hummingbirds enjoy!
Helianthus ‘ Lemon Queen ‘ (Hybrid Sunflower). Blooms late summer and fall and great for all kinds of pollinators. It’s a great tall, background plant. Blooms 2-2.5 months!
Native Liatris ligulistylis ( Meadow Blazing Star ). It blooms from the top down and monarchs and butterflies love it. Tolerant of many soils and high light. Another good native option is Liatris Pycnostachya.
Nepetax faasenii ‘ Purrsian Blue ‘ Catmint. A low maintenance clumping mint with 4-6 mths of color. The ‘Cat’s Pajamas’ is the shorter version with similar qualities. Will see butterflies, moths, bees, and hummingbirds around it!
Origanum ‘ Rosenkuppel ‘ (Ornamental Oregano). Burgundy blooms June-September and even past September at times. It prefers full sun and no wet feet. It is a zone 5 plant so may not survive winters in southern MN.
Salvia nemorosa ‘ Blue Marvel ‘. This perennial sage has violet-blue blooms and the butterflies and bees flock to it. Other forms of Salvia have white, pinks, and purple blooms and there are plenty of varieties to choose from.
Stachys monieri ‘ Hummelo ‘ Boteny. This is the 2019 Perennial of the Year by the Perennial Plant Association. This perennial tolerates many different soil and full sun to light shade.
Vernonia fasiculata ‘ Common Ironweed’. This native perennial can get up to 6′ tall and is a wonderful nectar plant. Painted lady butterflies love them and are a great plant in the back of the garden due to their height. Their blooms are a bright purple and bloom July, August, and September.
Vacation needed! Tips to help your outdoor plants while you’re away.
We all need to get away once and awhile! Some plants may do just fine with a longer vacation away like succulents and established drought tolerant plants. There are others, especially plants in containers, that need more attention before you leave and while you are away.
Here are a few ideas if you will be away from your plant family.
1. Move your full sun annuals to a more shady area if you aren’t gone more than a few days. Avoid deep shade.
2. Water your containers deeply a couple days before you head out to make sure there are no dry areas in the soil.
3. Add an extra layer of mulch on the soil to help trap the moisture. Be sure to take off this extra layer when you get back to avoid any issues with the soil holding moisture too long when you get back to watering regularly.
4. Use Soil Moist- it’s little granules that are worked into the soil that hold moisture, like a sponge, and will release water once the soil starts drying. This may help reduce watering throughout the season and help if you are only gone for a week or less *. A little goes a long way with Soil Moist and lasts a couple seasons! This product is usually used in containers but can also be used in the ground around plants that need more consistent moisture.
5. Use dispensers that screw onto recycled plastic bottles to release water into the soil as needed. Experiment with them first to see how long the water may last. There are other products out there but we like these dispensers since we can reuse bottles and they don’t take up much space when not being used.
6. If you frequently forget to water or spend a lot of time away from home, invest in self-watering pots like the Aquapots by Proven Winners. In addition to reducing the amount of water and times you need to water, they will help extend soil moisture if you need be away for a few days!
*Remember that due to weather it can be difficult to keep your plants watered despite some of these tricks. If you are really worried, hopefully a neighbor or friend can come water your plants while you are away if there is no rain. Check out local services or possibly Craigslist for people who can help water your plants while you are away. Maybe a local lawn mower can help out as well with a quick lesson on proper watering.
Acidic Soil Loving Plants
Three Plant Needs
Water, Sun, and Soil (Nutrients).
Where does soil pH level come in?
Plants need nutrients and have a balanced relationship with elements in the soil which will contribute to the health of plants.
Plants also have pH level preferences. The soil pH level can affect the uptake of nutrients. Depending on the plant, if the soil pH is not ideal then you may have a stunted and unhealthy plant – and it’s not because there isn’t nutrients in the soil.
Put Away the Fertilizer – For Now
If you are noticing any issues like yellowing leaves, no fruit production, growth seems stunted, and not blooming, checking the pH is highly recommended first before using fertilizers.
For example, you may add fertilizer to your garden but it still has little effect on your plant health if for some reason your soil pH is off. Too much fertilizer can also inhibit nutrient uptake because of soil nutrient imbalances. In addition, nitrogen and phosphorous runoff is a huge environmental pollutant, especially to our waterways and lakes.
Testing your soil nutrients is good gardening practice and could save you money in the long run. If you know your soil pH is within the proper range and your plant is showing nutrient deficiency symptoms, use a slow release fertilizer (like Bio-tone) for in-ground plants to avoid excessive nutrients and run-off.
What is Acidic Soil?
The range of pH is from 0-14. Acidic soil is considered anything below 7.
Many plants like to grow within the 6-7.5 pH range for optimal nutrient uptake.
In Southern MN, you may notice a lot of clay soil with lime, which tends to be more alkaline – 7 pH or above. Water coming from hoses in this area are usually more basic, which increases soil alkalinity.
Other factors that affect soil acidity are rainfall, nitrogen fertilizers, plants (like pines), and subsoil acidity. The best way to know your soil acidity level is a quick home test.
Acidic Soil Loving Plants
Plants that prefer slight acidity, 6.0-7.0 range:
Most plants! Each plant has a pH range it can tolerate and many plants can handle down to 6.0.
Plants that prefer strong acidity, 5.5:
Trees and Shrubs: Raspberry 5.5-7.0, Pears 5.5-7.0, Peaches 5.5-7.0
Trees and Shrubs: Azalea 4.5-6, Blueberry 4.5-6, Hydrangea-Blue flowered 4.0-5.0, White Pine 4.5-6.0, Rhododendron 4.5-6 Flowers – Lily-of-the-Valley 4.5-6.0
Plants have a range of pH that they will grow in and thrive. Those plants that have very strong and an extremely strong acidic soil needs, may need additional amendments to keep soil pH down.
Changing Soil pH
The best way to improve soil pH is through addition of amendments and adding organic material. To increase acidity – add sulfur – and to decrease acidity – add lime. Add both of these amendments in small stages and increments as to not shock the plant if it’s already planted. Read the instructions on any product you use to properly adjust the pH.
Favorite supplements to adjust the soil pH that will not shock the plants – if used as directed:
Epsoma Soil Acidifer – Organic, Safe, long-lasting, and won’t burn the plants if used as directed. Repeat in 60 day intervals if needed.
Epsoma Berry Tone for Berries – Organic, Good if you need to slightly increase acidity, Use early and late spring, Use on blueberries, strawberries, and raspberries, Will help produce bigger plants and more berries.
Adjust Soil pH with Organic Matter
Add any type of compost to your garden beds. This is best to do in the fall since it takes more time to adjust the soil pH using this method but feel free to feed plants with top dressing of compost during the growing season. Reach for compost first when wanting to add nutrients, improving soil aeration, improving water retention, and adjusting pH.
Modifying your soil’s pH will take some time. Depending on the type of soil you are working with, the addition of supplements and organic material may be needed year-after-year.
If you test your soil and notice you’re having troubles with keeping your soil more acidic, don’t fight it! Choose plants that will tolerate more neutral or alkaline soils. There are plenty out there!
Gardening by the Moon – A Fascinating Lore
We have all heard of the moon effecting the water tides but have your heard of it effecting soil moisture?
From The Farmers Almanac, gardening by the moon “is an age-old practice of completing chores around the farm according the the moon phases and that the moon governs moisture.”
Growing in Popularity
It is growing in popularity for various reasons but prominently because people are trying to find ways to stay in touch with nature. If people pay attention to the seasons, weather conditions, and natural patterns they can start to feel more in touch with their environment and surroundings.
There are certain garden centers that plant solely on moon phases and swear by it. We have yet to find current research projects that proves it to be more effective. However, we can find anecdotal evidence of its effectiveness online. To be in touch with your environment and weather conditions is an important part of your gardening success. Even if it is gardening by the moon’s phases or not. On this website , they list some sources of research, anecdotal accounts, and their findings for gardening by the moons phases.
General Rules
The over arching rule is that people plant specific crops based on the phase of the moon. It is also believed there are better times to prune, build fences, wean animals, fish, etc. What do they mean by better? Everything from better yields, increased growth, stronger fences, juicier meat, and even to more flavorful produce.
The general rules, from The Farmers Almanac website, is “the new and first-quarter phases, known as the light of the Moon, are considered good for planting above-ground crops, putting down sod, grafting trees, and transplanting.
From full Moon through the last quarter, or the dark of the Moon, is the best time for killing weeds, thinning, pruning, mowing, cutting timber, and planting below-ground crops.”
Working on your garden and land by the moon does seem like a good way to keep track of when to do certain tasks. If it produces better yields and healthier plants that would be an amazing bonus!
Conditions Are Important
If you choose to plant by the moon please remember that other planting conditions still need to be paid attention to.
Soil temperature
Present and forecasted weather conditions
Moisture levels
Soil type
Specific planting needs of the crops you want to grow
If you have any questions about when to plant something please contact us or stop in and chat about your gardening goals!
It can be a tough time for our plant babies due to the cold, dryness indoors, and lack of sunlight but it doesn’t take much to keep your plants healthy if you know what they are needing at this time. Winter houseplant basic care in the winter is simple and the rules below should help you take care of your houseplants! Remember houseplants are usually a form of tropical plant and we want to mimic that environment, within reason of course.
Houseplants keep our connection with nature, provide health benefits, and add beautiful color to our rooms. Let’s go over a few things to prevent complete loss and provide optimal houseplant care in the winter.
1.Big no-no! Taking the plant outside with no protection.
Houseplants are available all year-roundso we may not think about what the cold weather can do to the plants if they are exposed to the extreme temperature differences. When it is below 50 degrees, as the winters are in MN, plants do not like to be exposed to the cold. Think of plants like us. We can’t go outside without a protective layer in freezing temps. When buying a houseplant, make sure it gets wrapped up in plastic or paper before you leave the store and do not keep in the car without heat for long.
2.Add humidity around with trays with pebbles and water when humidity is low.
With the heaters going in the house, this can drop humidity levels drastically. If you don’t want to buy a humidifier for the rooms that you or your plant are in (humidity is good for us too!) , this is a good method to increase humidity around our houseplants. Fill a tray underneath your plant with pebbles. Make sure your plant is never sitting in the water so it still needs a smaller saucer underneath the actual pot. When the water evaporates, the humidity is elevated around the plant. Keep the tray filled with water. This also helps prevent spider mites since they love dry plants! 50-60 percent relative humidity is a good level for both people and plants. Some thin leafed plants may need up to 70 percent. Even succulents/cactus don’t mind humidity at 40 percent or more!
3. Make sure the warm air isn’t blowing directly onto the plants.
Along with humidity you must pay attention to temperature. Quick fluctuations of cold and heat can damage the foliage of a plant and dry it out too quickly. Buy a duct cover to direct airflow or move the plant away from the heating vent.
4. Make sure the leaves aren’t touching the windows.
The leaves touching the window are probably going to be damaged by the cold. You can put a barrier between them and the window if possible. Cardboard or some other form of protection if you don’t mind the obstructed view if you absolutely need the plants that close to a window.
5. Do not re-pot your plant into a larger pot in the winter.
Your houseplant is probably not actively growing and will do better up-potted in the spring or before November. If you do need to pot up, just pot 1-1/2 inches up and make sure you are paying very close attention to the water level in the soil! We don’t want to drown them. Pay attention to plants potting needs also. For example, Jade plant likes to be snug in its pot.
6. Hold off fertilizing your houseplants until March.
If a plant is over-fertilized in the winter it can create weak growth. Think of your plant as on a diet and ramp up the feedings around spring time.
7. Reduce watering frequency.
Too much watering is a common mistake people make with their houseplants. It really all depends on the environment in your home but before you water always check to see if the soil is dry before watering. If it’s damp, hold off. Succulents, cactus, sanseveria, zz plants, rubber plants, and pothos, are examples of houseplants that you can let the soil go completely dry before watering. Some plants, like prayer plants, ferns, and spider plants can be watered when the first inch of soil is dry yet still a bit damp deeper in the soil. Research your individual plant needs to find out their preferred watering schedule! You will get the hang of it quickly for each plant.
Don’t give up all hope if some houseplants don’t survive. Houseplant care shouldn’t be stressful! You just may need to try a different plant for your home! To keep our houseplants happy we do have to pay attention to what certain varieties of plants prefer so if you have any questions please feel free to call or email us with questions! Pictures help us diagnose issues also.
Holiday Houseplants
These Holiday houseplants are great for a fresh finishing touch to your decorations or great to give as a gift! With some care these houseplants can live all year-long, year-after-year.
1. Poinsettia
When you see Poinsettias, you think Christmas! The bright colored foliage of the Poinsettia instantly adds the joy of the Holiday season into your home or office! Read more about Poinsettias here!
2. Holiday Cactus
These Holiday cactus are long lasting, and easy to care for plants that bloom beautiful light pink, bright pink, deep red, or white. Some varieties bloom around Thanksgiving, some later near Christmas time!
3. Norfolk Pine
These “little Christmas trees” are great au natural or add small lights and decorations. These will last you for years with care and many more Holiday seasons!
4. Cyclamen
These houseplants have distinctive patterned foliage and adorable little heart-shaped flowers that definitely bring joy to any room.
Amaryllis bulbs are also an easy care plant that blooms during the Holidays that you can keep blooming year after year and have them outside in the summer!
With any of these Holiday houseplants, you can dress them up a bit with a ribbon (we have a lot of different styles!) or decorations that fit in with the Holiday decorations in your home!
Living Soil – What is it?
Living soil is all about diversity. Diversity of fungi, bacteria, protozoa, nematodes, arthropods, and earthworms breaking down organic matter that produces nutrients for plants to use. Who knew it was all of those things that makes a soil healthy…a living soil!
First, let’s talk about healthy fungus and bacteria.
Mycorrhizae is “a fungus that grows in association with the roots of a plant in a symbiotic or mildly pathogenic relationship”. Imagine a network of fungi that connects plants to one another and their relationship to eachother as mutually beneficial.
Plants feed the Mycorrhizae and Mycorrhizae help feed the plants. Untamed Science has an article that goes into more depth on Mycorrhizae. Have you heard of how plants have their own internet and can talk to each other? Read about it here from the BBC.
The three different kinds of Bacillus contained in this label on the right all have their own roles in the nutrient uptake of a plant. For example Bacillus megaterium is a phosphate solubilizing bacteria (PSB). As the name suggests it helps the nutrient phosphate become available for the plant. Others are nitrogen solubilizing bacteria and some are potassium solubilizing bacteria. Bacillus and Mycorrhizae will improve the growth of the plant, it’s nutrient uptake capabilities, and boost its immunity to disease.
Hopefully you will read more about these amazing underground webs of fungi and bacteria to better understand what they are doing but sometimes we just need to know…
“How can I ensure my soil is a ‘living soil’?”
1. Test your soil pH and nutrients. We carry SOILKIT, soil testing kit that you send in, with a postage paid envelope included, for them to analyze or you can submit a soil sample to the U of M.
2. When you plant a new plant into the ground use a fertilizer that contains these Bacillus and Myccorrhizae (Ectomycorrhizal Fungi – as seen on the label above). This will help build those highways of networking fungi and bacteria to boost your plants nutrient uptake. See the second image down of the tomatoes grown with and without Biotone. Incredible difference!
3. Try practicing a low till method of gardening. No-till farming has become a conservation effort for soil and water and low till or no-till gardening experience has shown that tilling the ground can interrupt these networks of fungi beneficial to our plants. If you add organic compost or manure on-top of your soil instead of tilling it in, it will slowly add the nutrients your soil needs. Less hard-work digging up dirt and better for the soil! Win win! You may need to use tilling to break up compacted sod when converting soil for a garden but even then if you lay a thick layer of compost over the sod or try the “black-out” method of covering the sod with newspaper, cardboard, or whatever blocks the sun out until it dies, then putting dirt on top, has worked just fine! Just keep in mind this takes a few years to create the healthiest soil, depending on how deficient or compacted it was before.
4. No bare soil! Keep your soil covered with mulch or a living ground cover. If you have dried grass clippings, use that! If you have leaves, use that! It is important to note that any diseased foliage should not be used as mulch.
Any mulch will help reduce evaporation of water (less watering, yah!), stop weeds from growing, and add nutrients to your soil over time as it breaks down. Another method to cover your soil is planting a cover crop or ground cover to stop weeds and to feed the soil! Some examples are oat, field pea, hairy vetch and buckwheat. See the buckwheat cover crop on the image to the right. This piece of soil was very nutrient deficient and needed a nitrogen fixating plant. The plant actually puts nitrogen into the soil! The blooms were great for pollinators also!
5. An added bonus of using a cover crop is it makes your own green manure. When you grow a cover crop you can leave the uprooted or sown crop to die once winter hits and leave it there until spring and lightly work into the soil or use as a natural mulch.
6. Soil aeration is very important. Keep permanent paths to walk on in-between your crop rows. This prevents the soil around your plants from compacting and interrupting the proper water and oxygen balance. Just like us, we need water and oxygen and when soil gets compacted it doesn’t hold the correct percentage (25% of each) of water and oxygen for healthy plants. The compost you added to your soil is also going to help aeration because it adds non-compacted organic matter and brings in earthworms who help aerate soil. If you don’t see earthworms, you know you don’t have enough delicious organic matter for them to eat. Add composted plant material and manure to help bring in the worms!
Soil health is one of the important part of our gardening efforts and understanding what it needs will help grow vigorous, healthy, and productive plants.
We may view bugs as a nuisance because they are eating our plants or intruding in and around our homes. The Spotted Wing Drosophila or Japanese Beetle are two examples of pesky bugs that can cause damage to our beloved plants. I could go on and on about bugs that cause us major gardening headaches and heartache at times.
Many of us know about the beneficial pollinators like bees or the pest killing dragonflies, butterflies, and spiders but let’s look at some bugs you may not have heard that can help us in our fight against nasty pests. These bugs aren’t usually a quick fix nor are they a complete eradication pest control, which in most cases, isn’t needed. If we look at the positive of beneficial bugs, we can help balance the ecosystem without using pesticides or comprising your crop with harmful chemicals.
Diversity of plants in your yard is the most important aspect of supporting all beneficial insect life so here is a limited list of plants that are proven to attract them.
Here are a couple beneficial bugs you can add to help mitigate aphid, mosquitoes, mites, and many other soft-bodied insect.
Praying Mantis
Praying mantis
The Praying mantis would be an insect you would need to introduce and is a predator of many insects, mites, and eggs. They have a really healthy appetite so be careful if you use other beneficial insects or worried about native bugs being eaten such as the Ladybug which we will get to in a moment. When they are young, the praying mantis will eat mosquitoes, aphids, leafhoppers, caterpillars and other soft-bodied insects. As adults, they will eat beetles, grasshoppers, crickets, and other pests in your garden! If you are worried about introducing an insect not native to Minnesota, you need not worry. The praying mantis will not survive the winter here. There are multiple sites that you can buy the praying mantis egg cases with instructions on how many you would need and the best time to use them.
Ladybug A.k.a Lady Beetles
Ladybugs
The native ladybugs are great predators to aphids and other soft bodied pests, mites, and eggs. You may not see native Ladybug anymore compared to the Asian Lady Beetle that was introduced in the South. Their purpose was to eat aphids from crops but made their way up North. You might not be as familiar with their larva either so check out the pictures here. You can buy Ladybugs to introduce to your garden but you have to make sure they stay there to eat and hopefully lay eggs! Many sites state to put them in the garden at night since they won’t fly at night and water around the area well!
What to do with all those Herbs!
We plant a variety of herbs and then we realize we have an over-abundance of herbs towards the end of growing season!
This quick list of ideas might help you when you when we want to try a new cultural dish, add some freshness to cooked or baked dishes, or maybe you want to have all year round use of herbs to enjoy that extra deliciousness without buying from the grocery store.
1. Eating Herbs
Of course this is one way to use those herbs! The thing is, we tend to just use a couple sprigs here and there and letting the rest rot or go to waste. Here are a few ideas on how to use more of them.
Take a handful of herbs…yes handfuls…and mix them up in a salad. Make it part of your greens. Try to stick with parsley, cilantro, chervil, tarragon, mint, and dill since they are lighter in flavor. A vinaigrette would pair nicely as not to overwhelm or mask the flavor of the herbs. Add some protein and viola!
Make a summer herb sauce or dish that requires large amounts of herbs. Like Basil Pesto, an Indian Raisto that is great with spicy dishes, falafels, or a chimichurri sauce? Here is a link to a good amount of recipes using herbs! http://www.wbur.org/hereandnow/2014/07/08/kathy-gunst-summer-sauces
For herbs like parsley, basil, mint, and cilantro, a great method of storing them to not degrade the flavor is by freezing. All you have to do is remove the leaves and discard the stem, and chop them according to how you envision using them in the future (soups, stir-frys, etc). Not generally good for fresh eating after thawing so think of a way you could use by cooking or baking.
Another way that you can store herbs is by drying them first. First and foremost, remember to use containers that are clean and dry when storing herbs. An article I found is really helpful on how to dry herbs for storing. https://theherbalacademy.com/6-tips-for-storing-dried-herbs/
There are a few ways of doing this but hanging them in loose bundles in an area that gets good air circulation until crispy dry is a great way to have a little bit of farmhouse feel as well as readily available herbs to use. Slowly drying will help keep the smell and taste integrity over a fast drying method in the oven.
This is something that I don’t hear many people doing but it’s a great way to change up our coffee, tea, cocktails, dressings, and whatever your herbie heart desires! The two ways I like to do it is by making a simple syrup or infusing an oil. You can make edible oils or just massage oils!
Do not buy a simple syrup in the store ever again! Use this for cocktails, coffee, tea, or something you want to sweeten up and impart the flavor of whatever you infused.
Basic Simple Syrup:
Equal parts sugar ( typically white sugar but try raw or demerara- great for Whiskey drinks) * I have not tried using a sugar substitute but give it a try!* +Equal parts water
+Now add your flavor! Rosemary, lavender, mint, ALL THREE?! Bring it to a boil and once the sugar is dissolved (will be really quick) take off heat. I like to let it sit with the herbs in there until room temp and then strain into whatever clean container with a snug lid I have. Keep it in the fridge!
Infusing with Oil
You can blend the herbs in the oil (EVOO could be really strong and over power the herb taste so a more neutral oil is best) and then bring to a boil. Sieve out the herbs through coffee filter and store! I always try to keep the oil away from the sun and even chill it in fridge so it lasts longer.
You can also just put herbs in oil and let it sit until the flavor is in the oil. Jojoba oil and olive oils tend to have long shelf lives so its good for making massage oils, hair treatments, salves, etc.
Two of our employees have a great business that make herbal teas! Click “Herbs for tea” for a file you can browse to look at few recommendations for annual and perennial herbs to grow and uses for tea!
5. Add herb seed to your spice cabinet.
Cilantro seed is coriander so you can crush or powder to make your own seasoning. Dill seeds are great for pickling! Chive flowers are edible and have a delicious mild onion flavor. Fry them up or eat fresh! If the seeds/flowers are not something you want to eat, then dry the seed pods of your favorite herbs and plant next year.
6. Even if you don’t use them for culinary purpose, don’t forget herbs and their flowers can attract pollinators, and even be a repellent for unwanted pests like mosquitoes.
Basil: repels asparagus beetle and the tomato hornworm. Plant side by side with your tomatoes
Catmint: repels aphids, asparagus beetle, Colorado potato beetle, and, squash bugs. Careful because this can easily spread from flower seeds.
Chives: repel aphids and Japanese beetles. Flowers attract bees.
Dill: repels cabbage moths and attracts beneficial insects. Flowers attract beneficial pollinators and predators like ladybugs, green lacewings, braconid wasps, tachinid flies, hoverflies, mealybug destroyers, and aphid midges.
Garlic: repels aphids, cabbage moths, and Japanese beetles. Plant under rose bushes to help repel Japanese beetles to their favorite food.
Hyssop: repels cabbage moth and great companion for all cole crops (any plant in the Brassica family…leafy greens, broccoli, kale, cabbage, turnips,bok choy)
Parsley: repels asparagus beetle. Best if you lightly crush the leaves to release the scent.
Sage: repels cabbage moths and carrot rust flies. Flowers attract bees, butterflies, and hummingbirds.
Rosemary: repels cabbage moths, carrot rust flies, and Mexican bean beetles and mosquitos.
Lavender: repels mosquitos. Attracts butterflies and other beneficial insects.
Mint: repels mosquitoes, aphids, cabbage moths, and even ants. Be sure to plant in pots or else this may take over your garden!
Culinary herbs such as mint, thyme, tarragon, oregano, dill, and chives can also be planted throughout the garden to help repel deer.
———
Whatever you want to do with your herbs, go for it! Experiment! If you don’t have time to use them, start giving them away! I love the gift of fresh herbs with some flowers!
Creating Winter Interest
The garden and landscape is an important feature of the home even in winter. Consider what you will look at through your windows as you cuddle indoors. Here’s a great article from the Minnesota Horticultural Society’s Northern Gardener Magazine to guide your thoughts as you design your landscape to include interesting things to look at throughout winter. Include evergreens, colorful and shapely shrubs, trees with interesting bark, statuary and even containers to catch the eye.
Plant Toxicity – A list of plants safe for pets.
Among the questions many of us have when we set out to purchase a houseplant or landscape plant is whether or not it will harm pets. Nobody wants a sick or injured pet or a veterinary bill.
Check out the ASPCA’s extensive list of plant toxicity. Their database sorts by cats and dogs. Furthermore, you can select whether or not the plant is toxic or non-toxic.


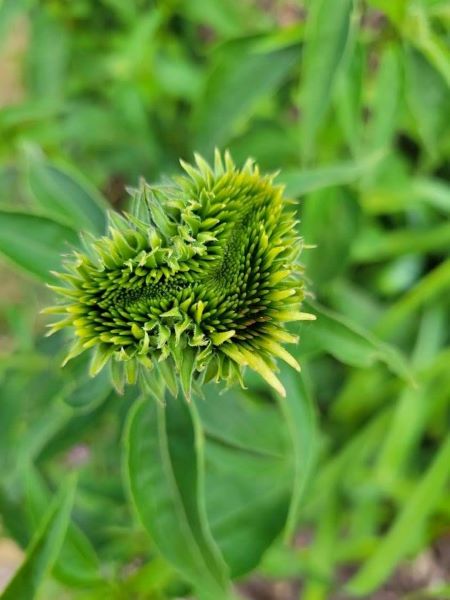


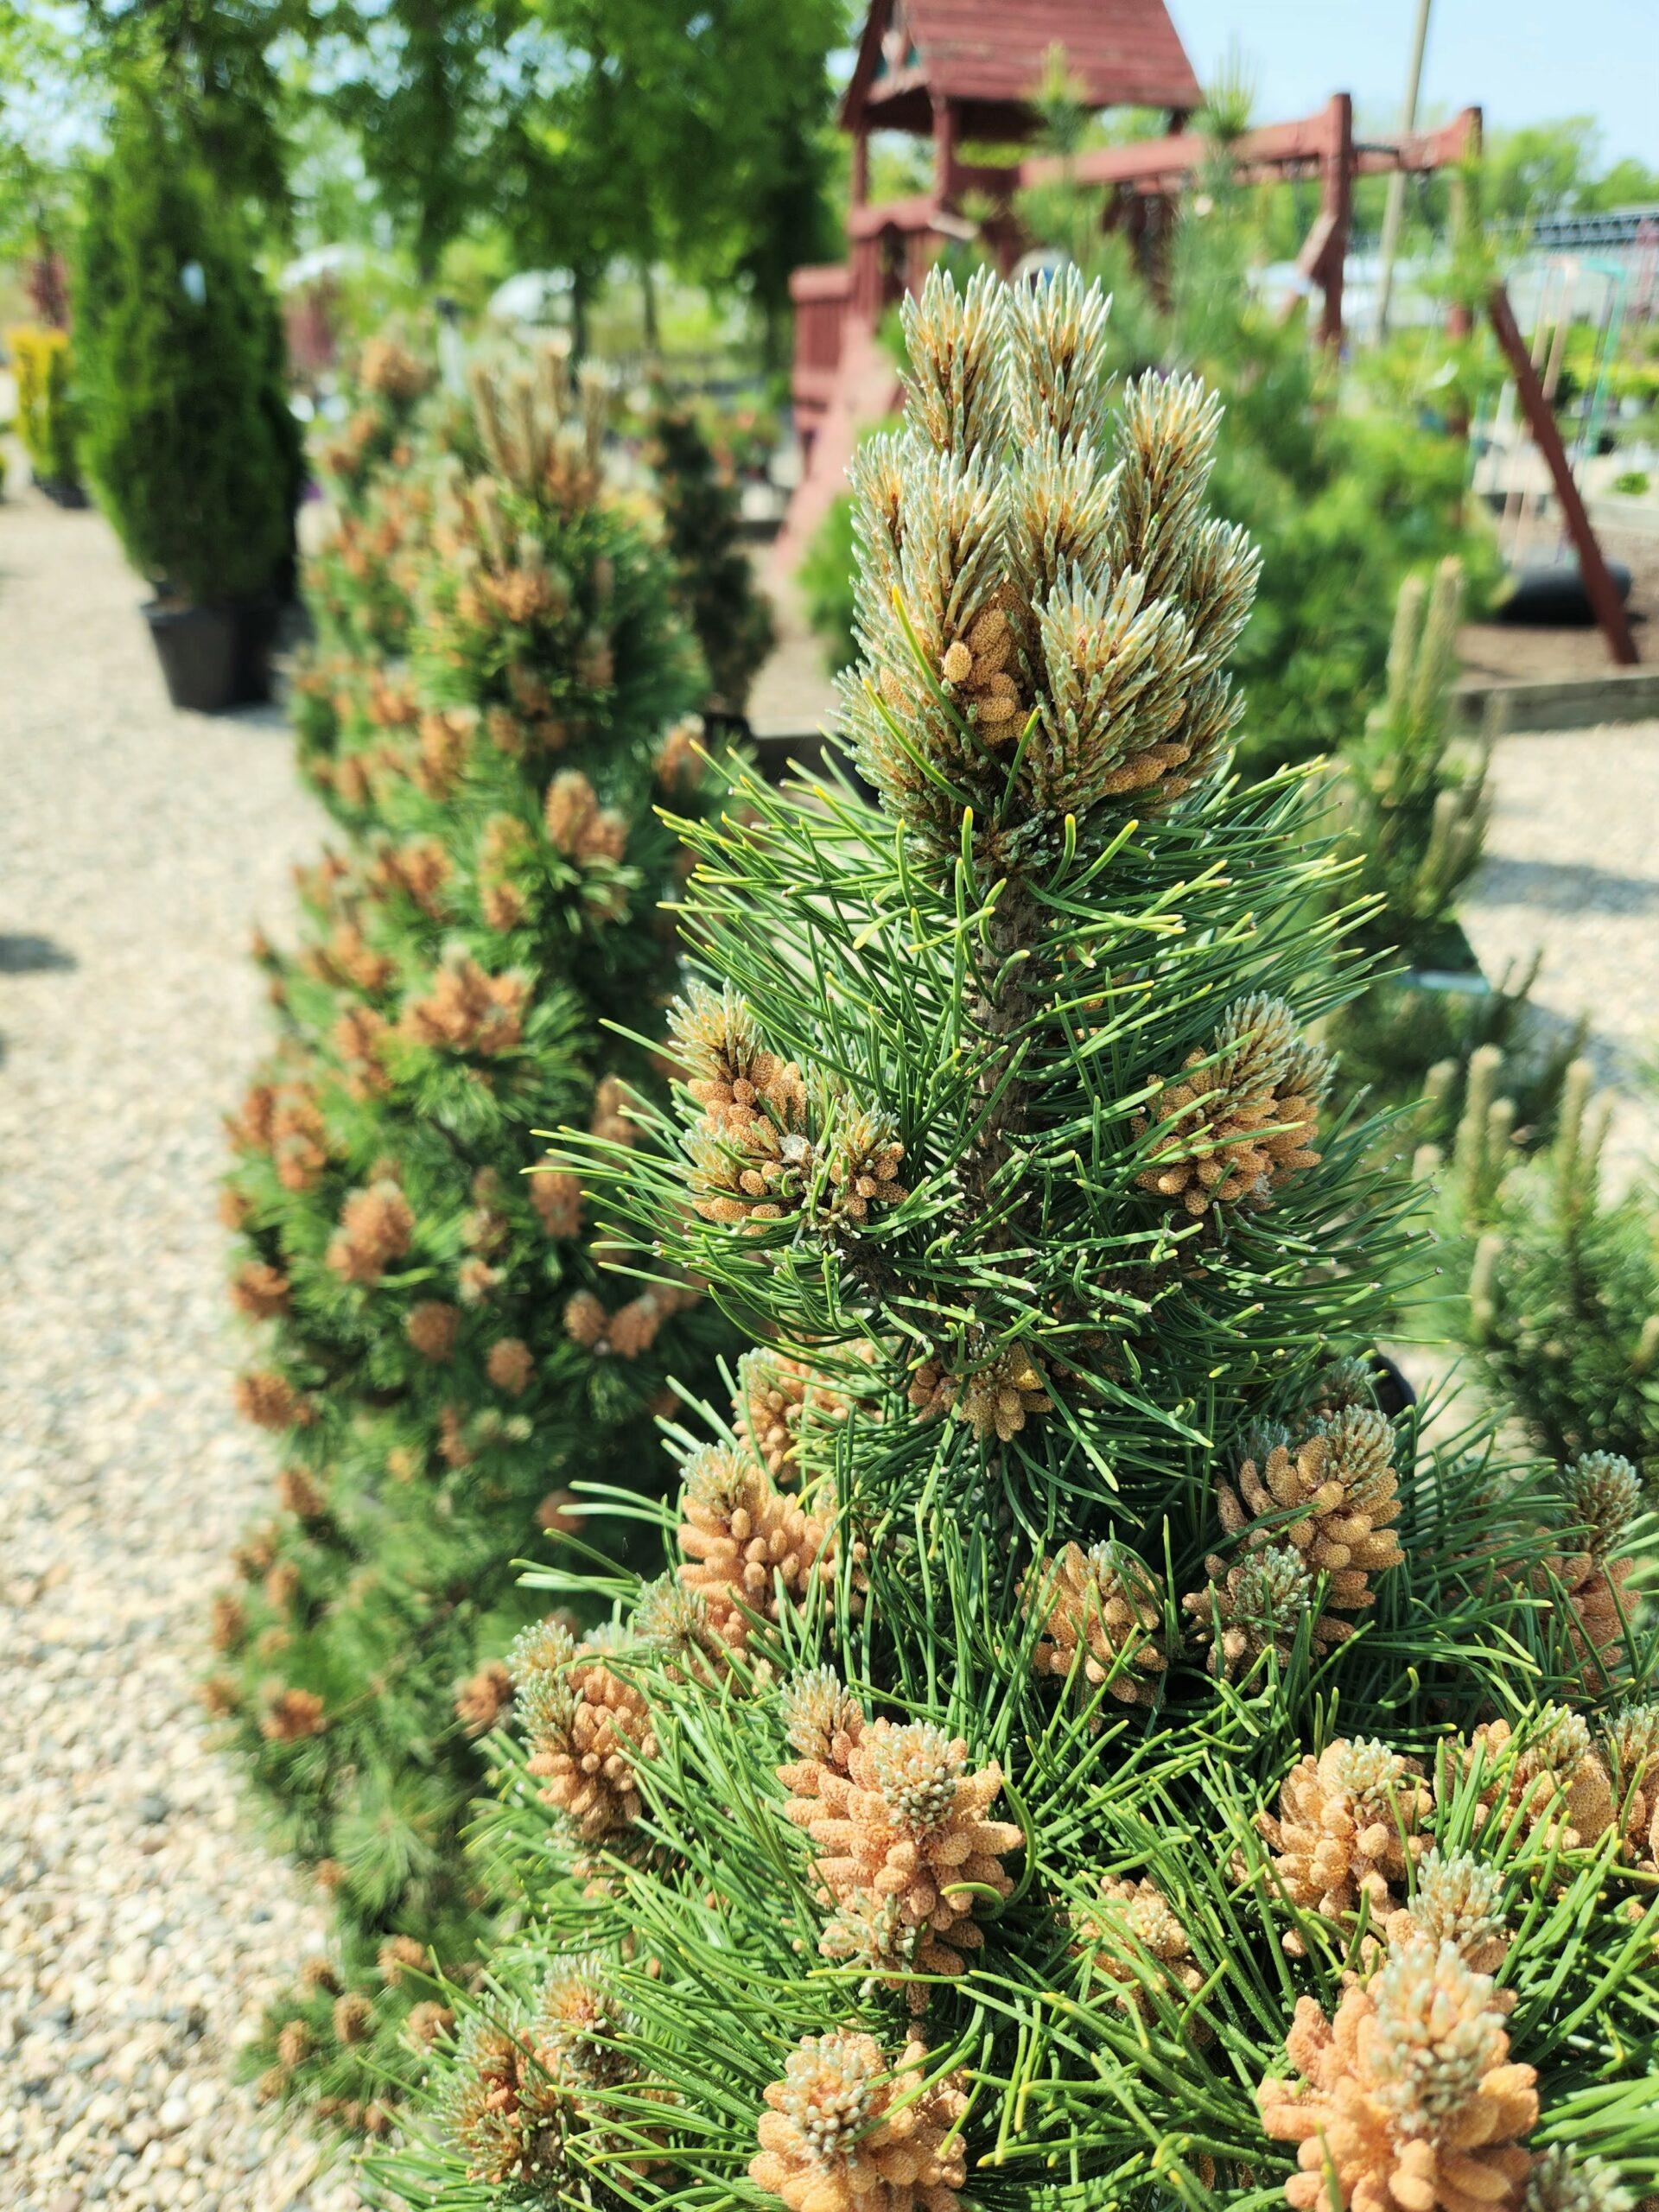

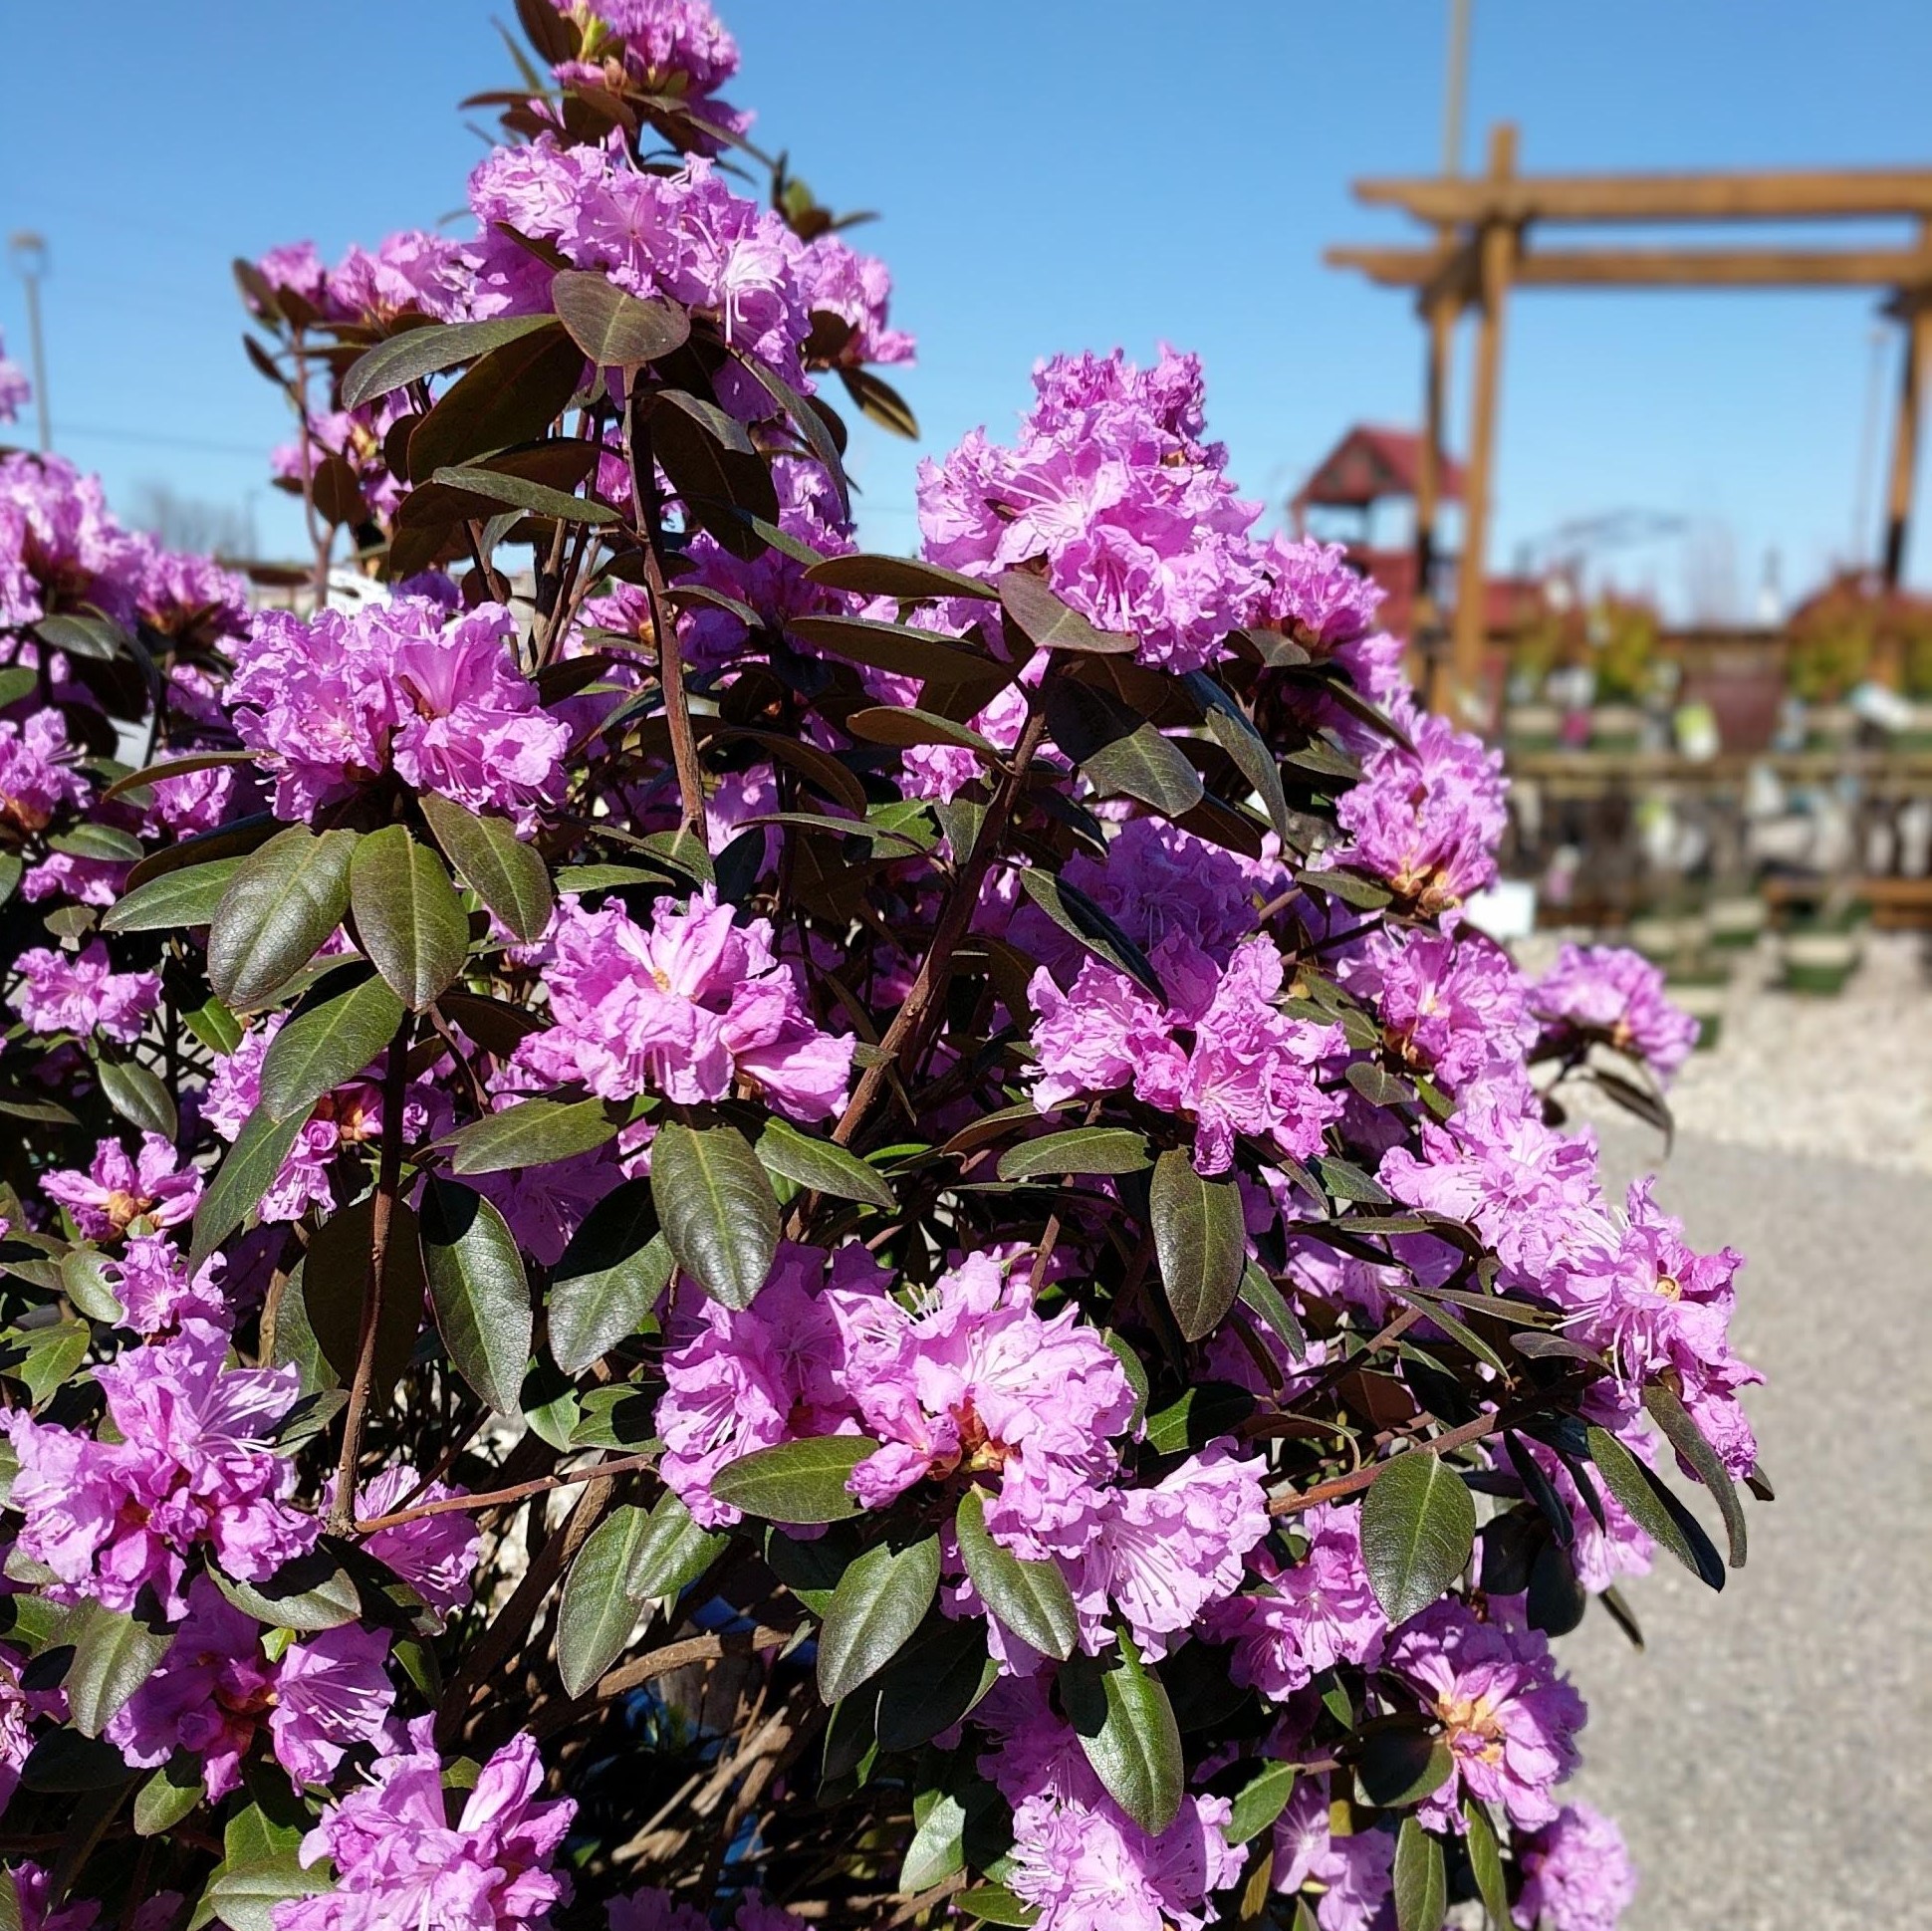

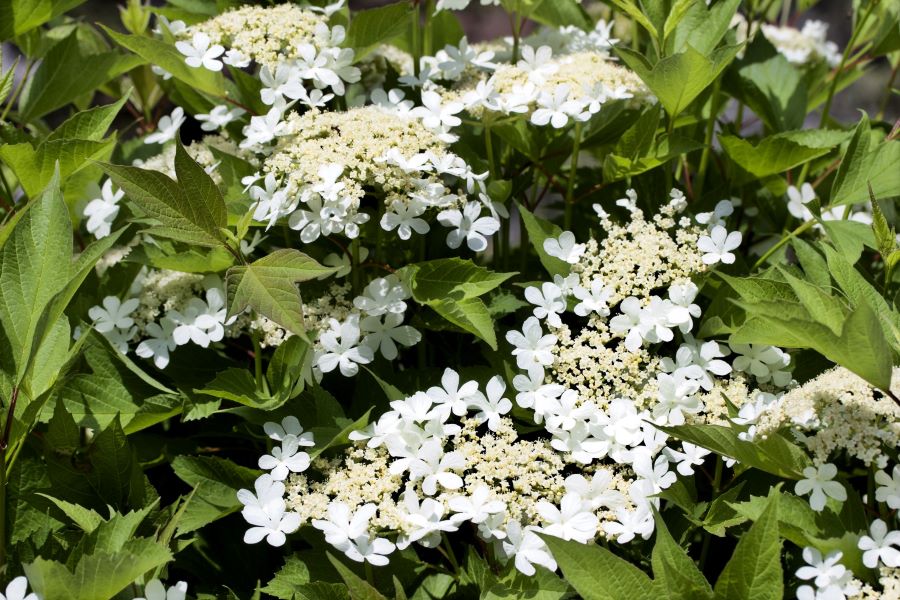
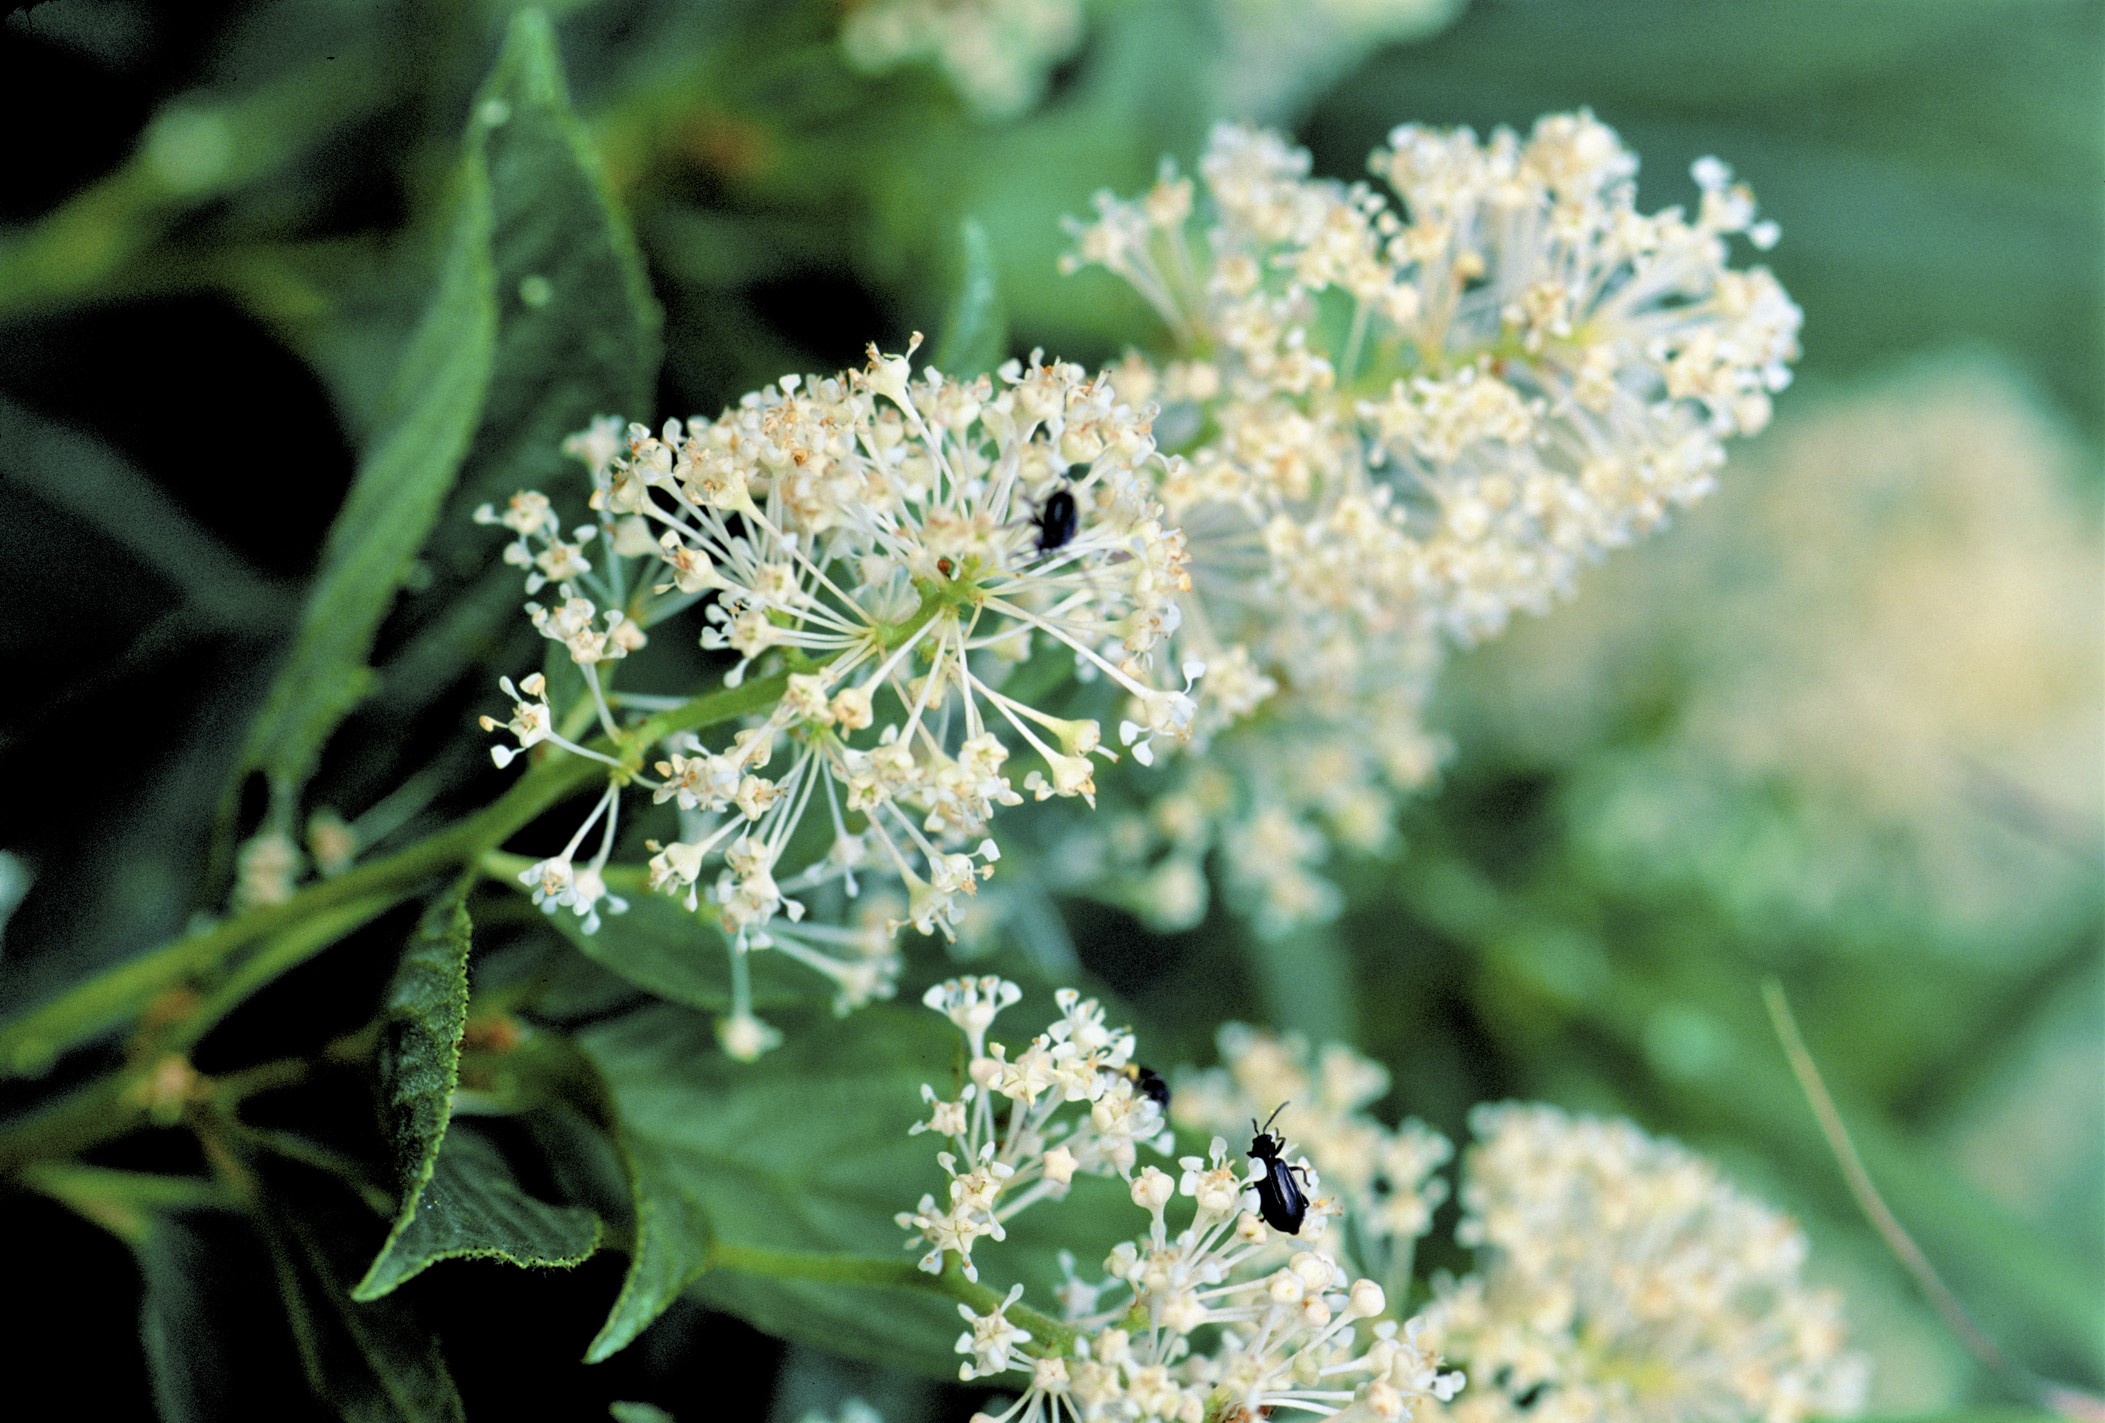
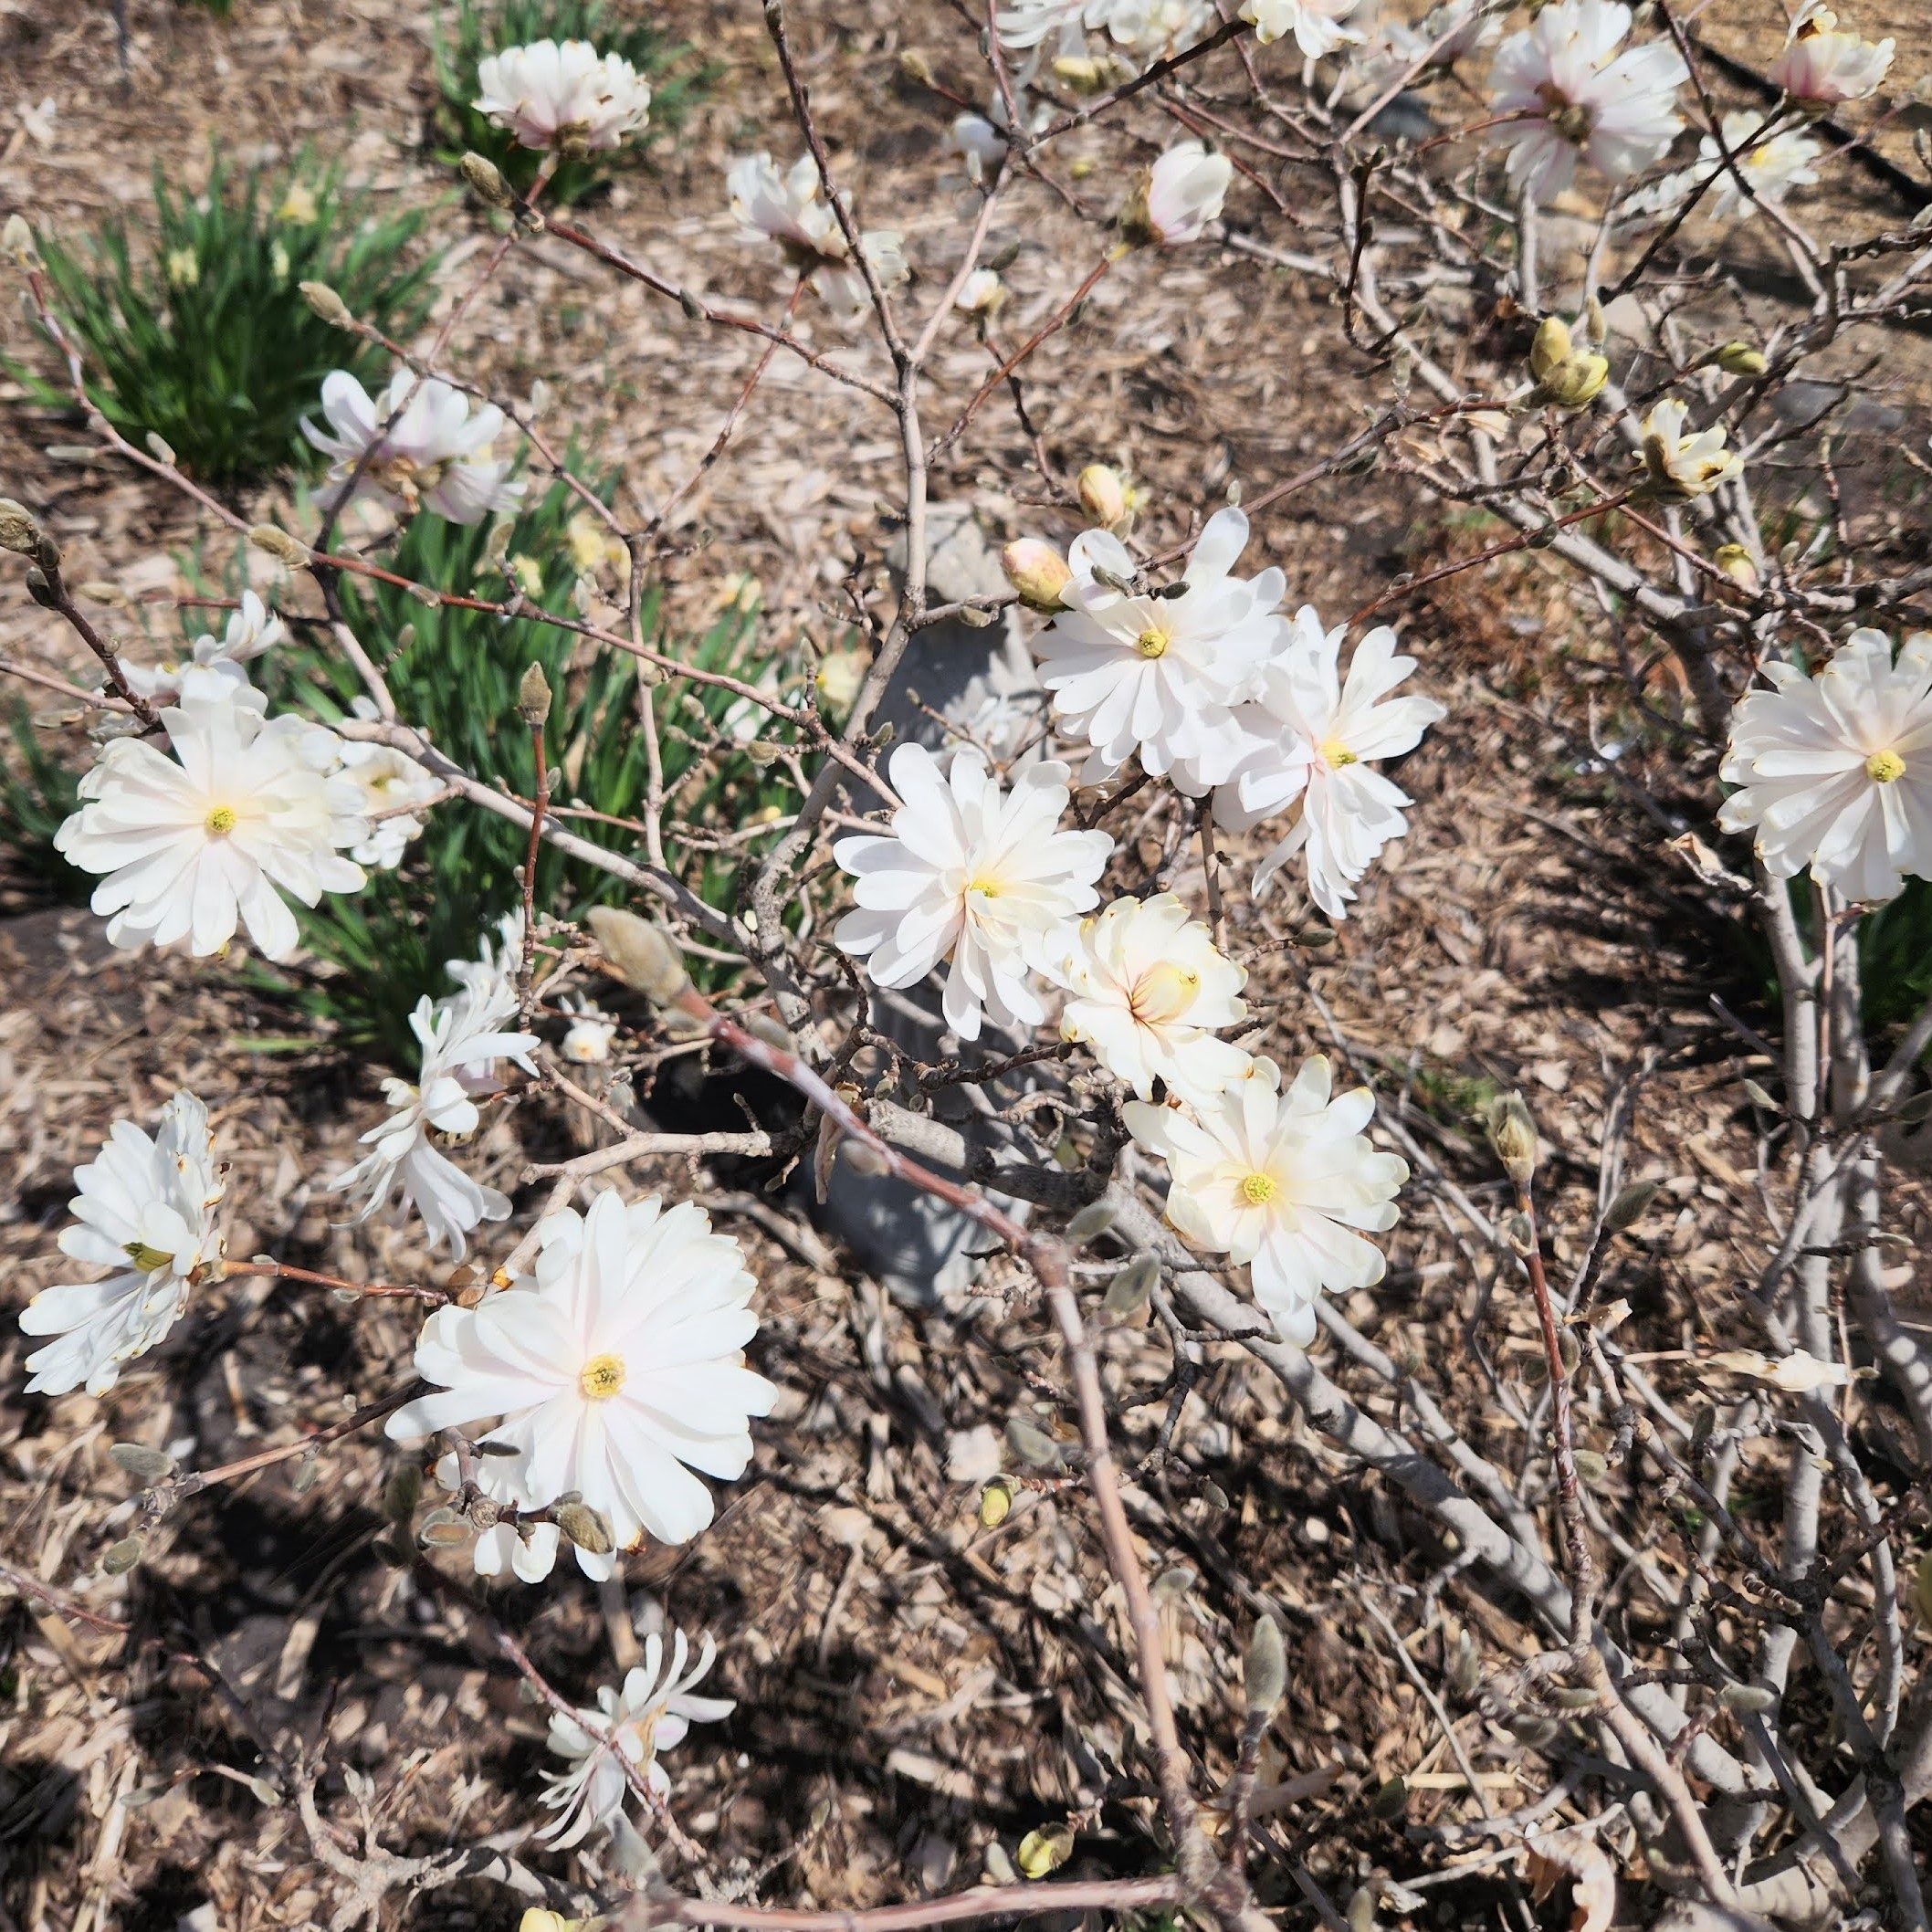
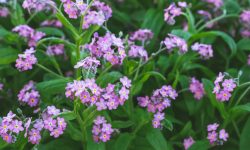
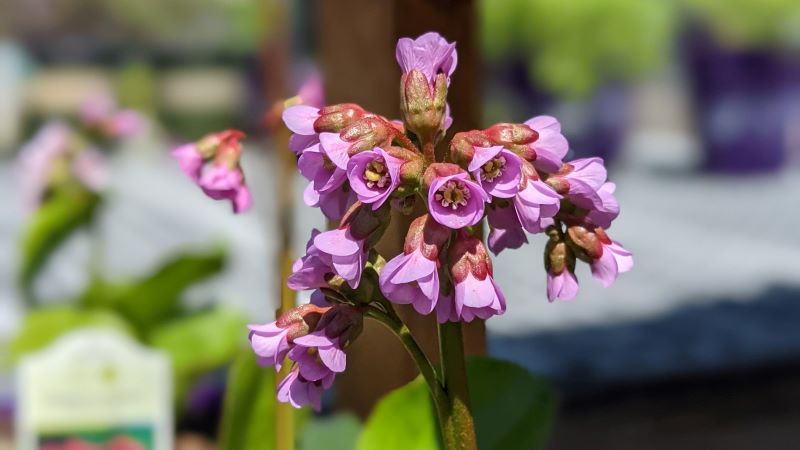

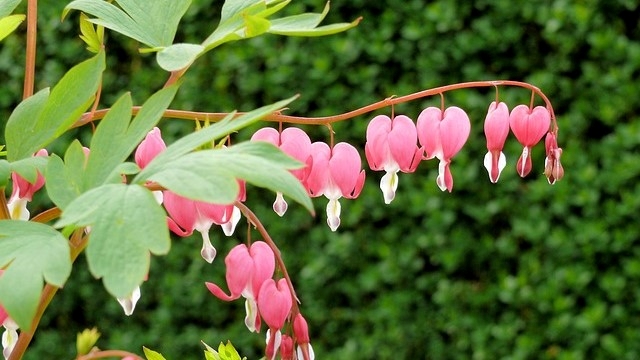
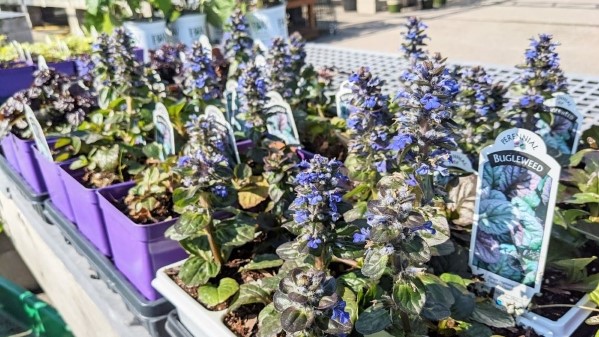
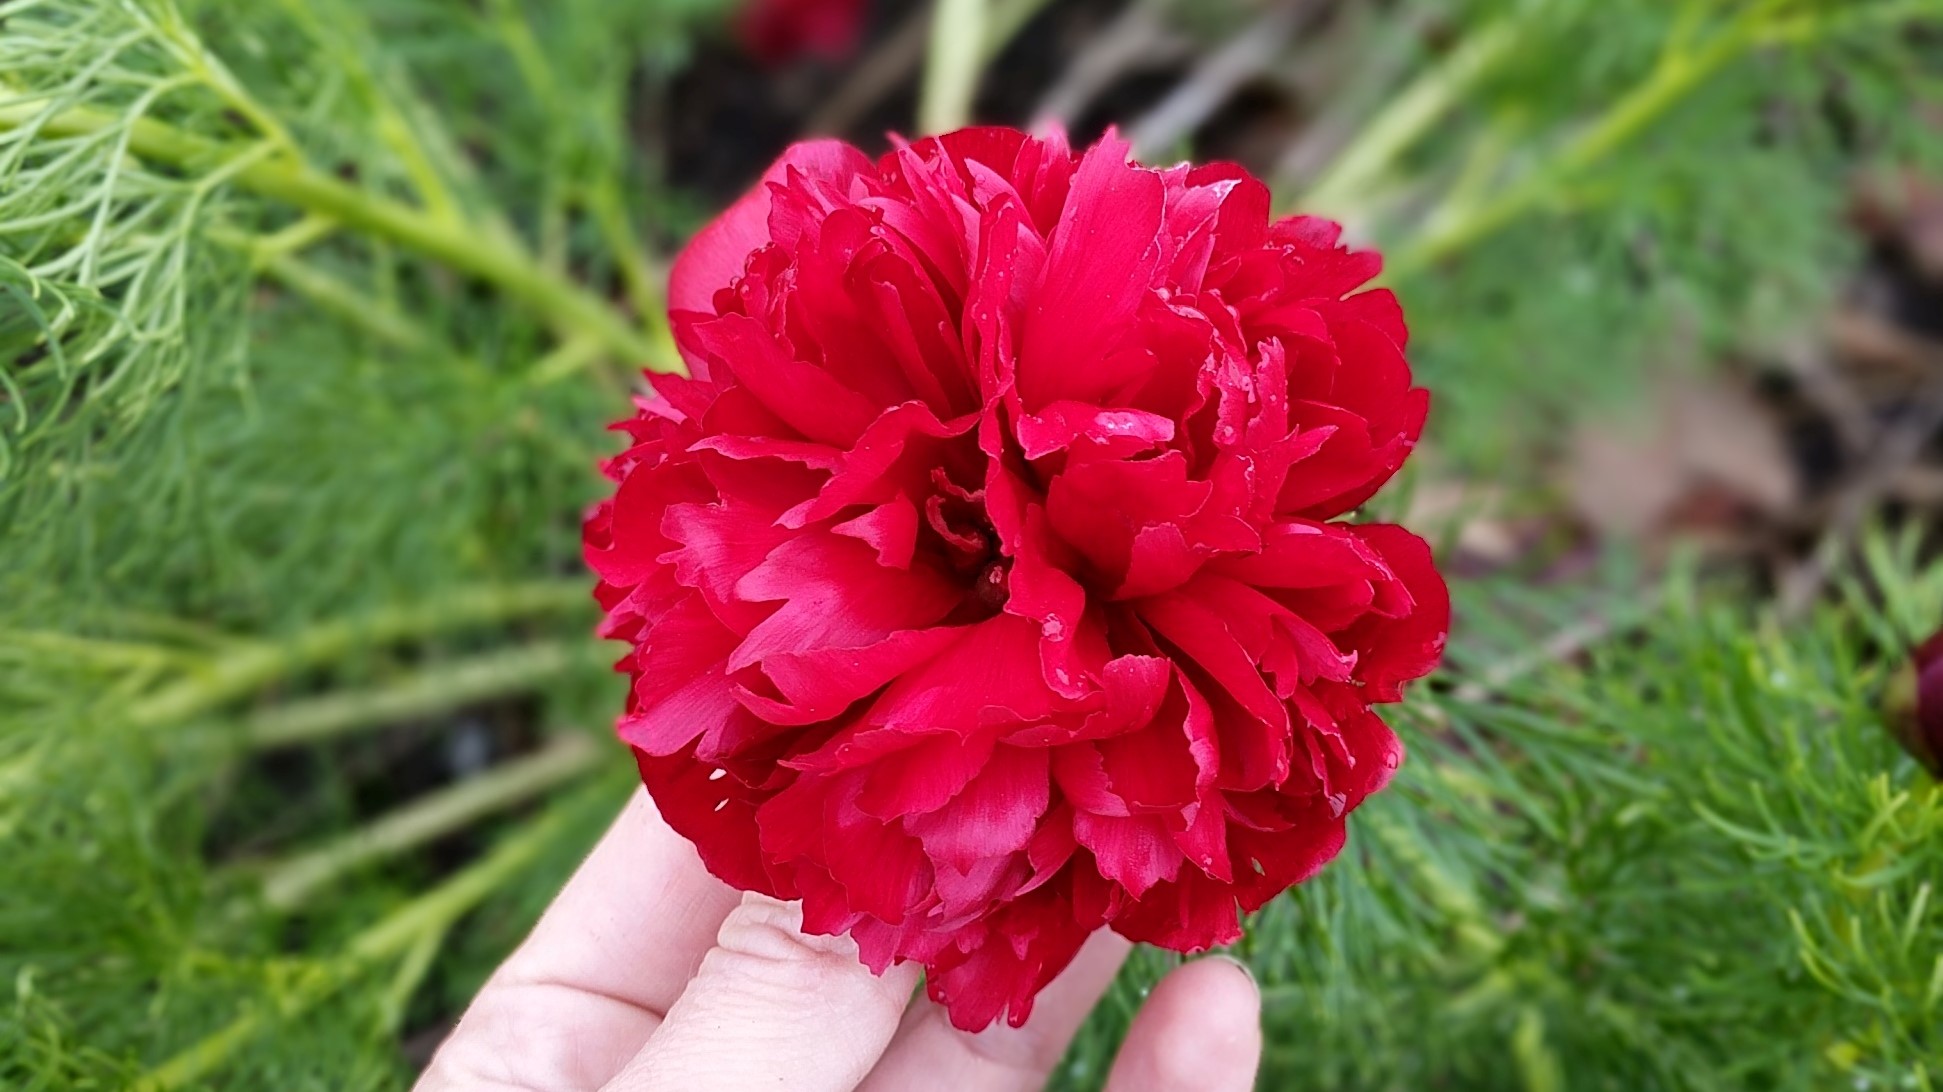
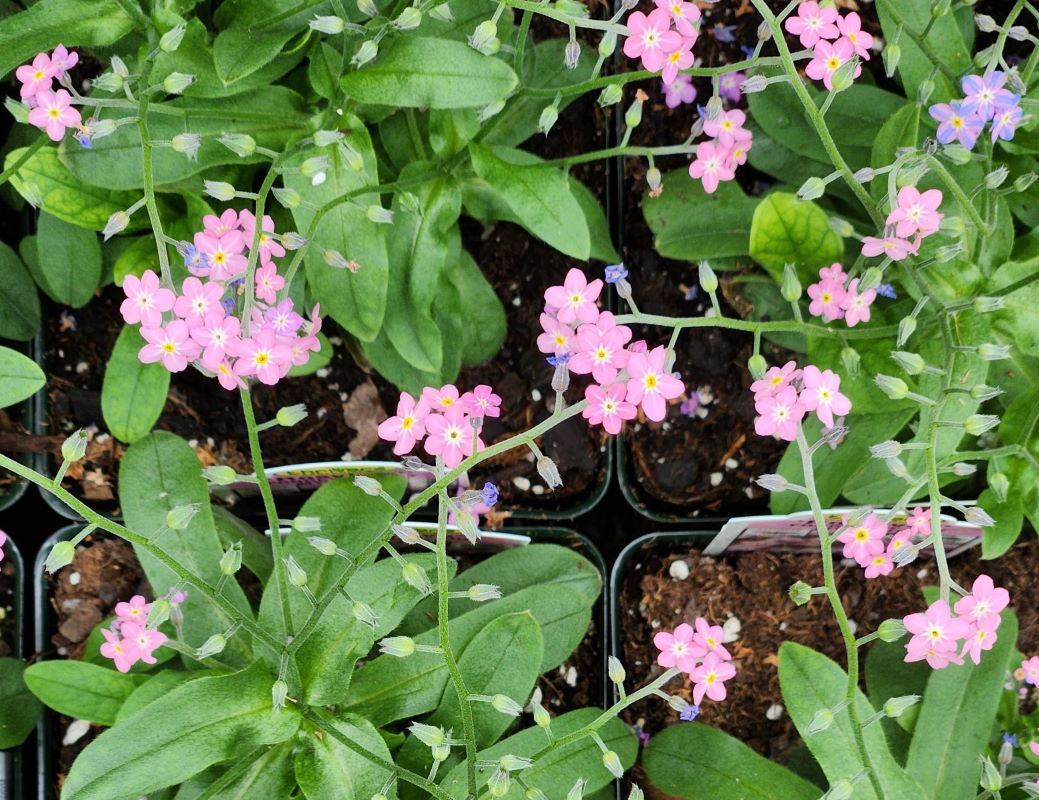
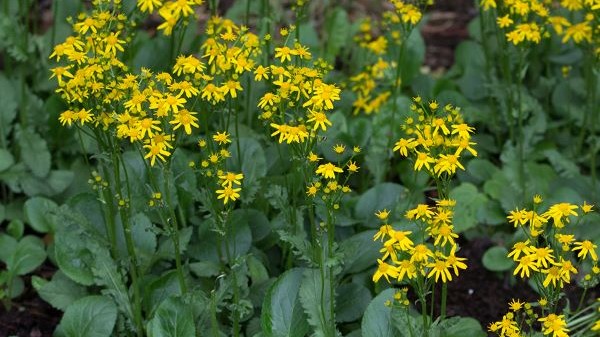

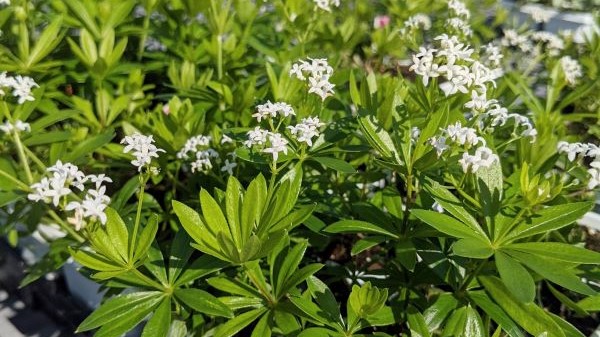
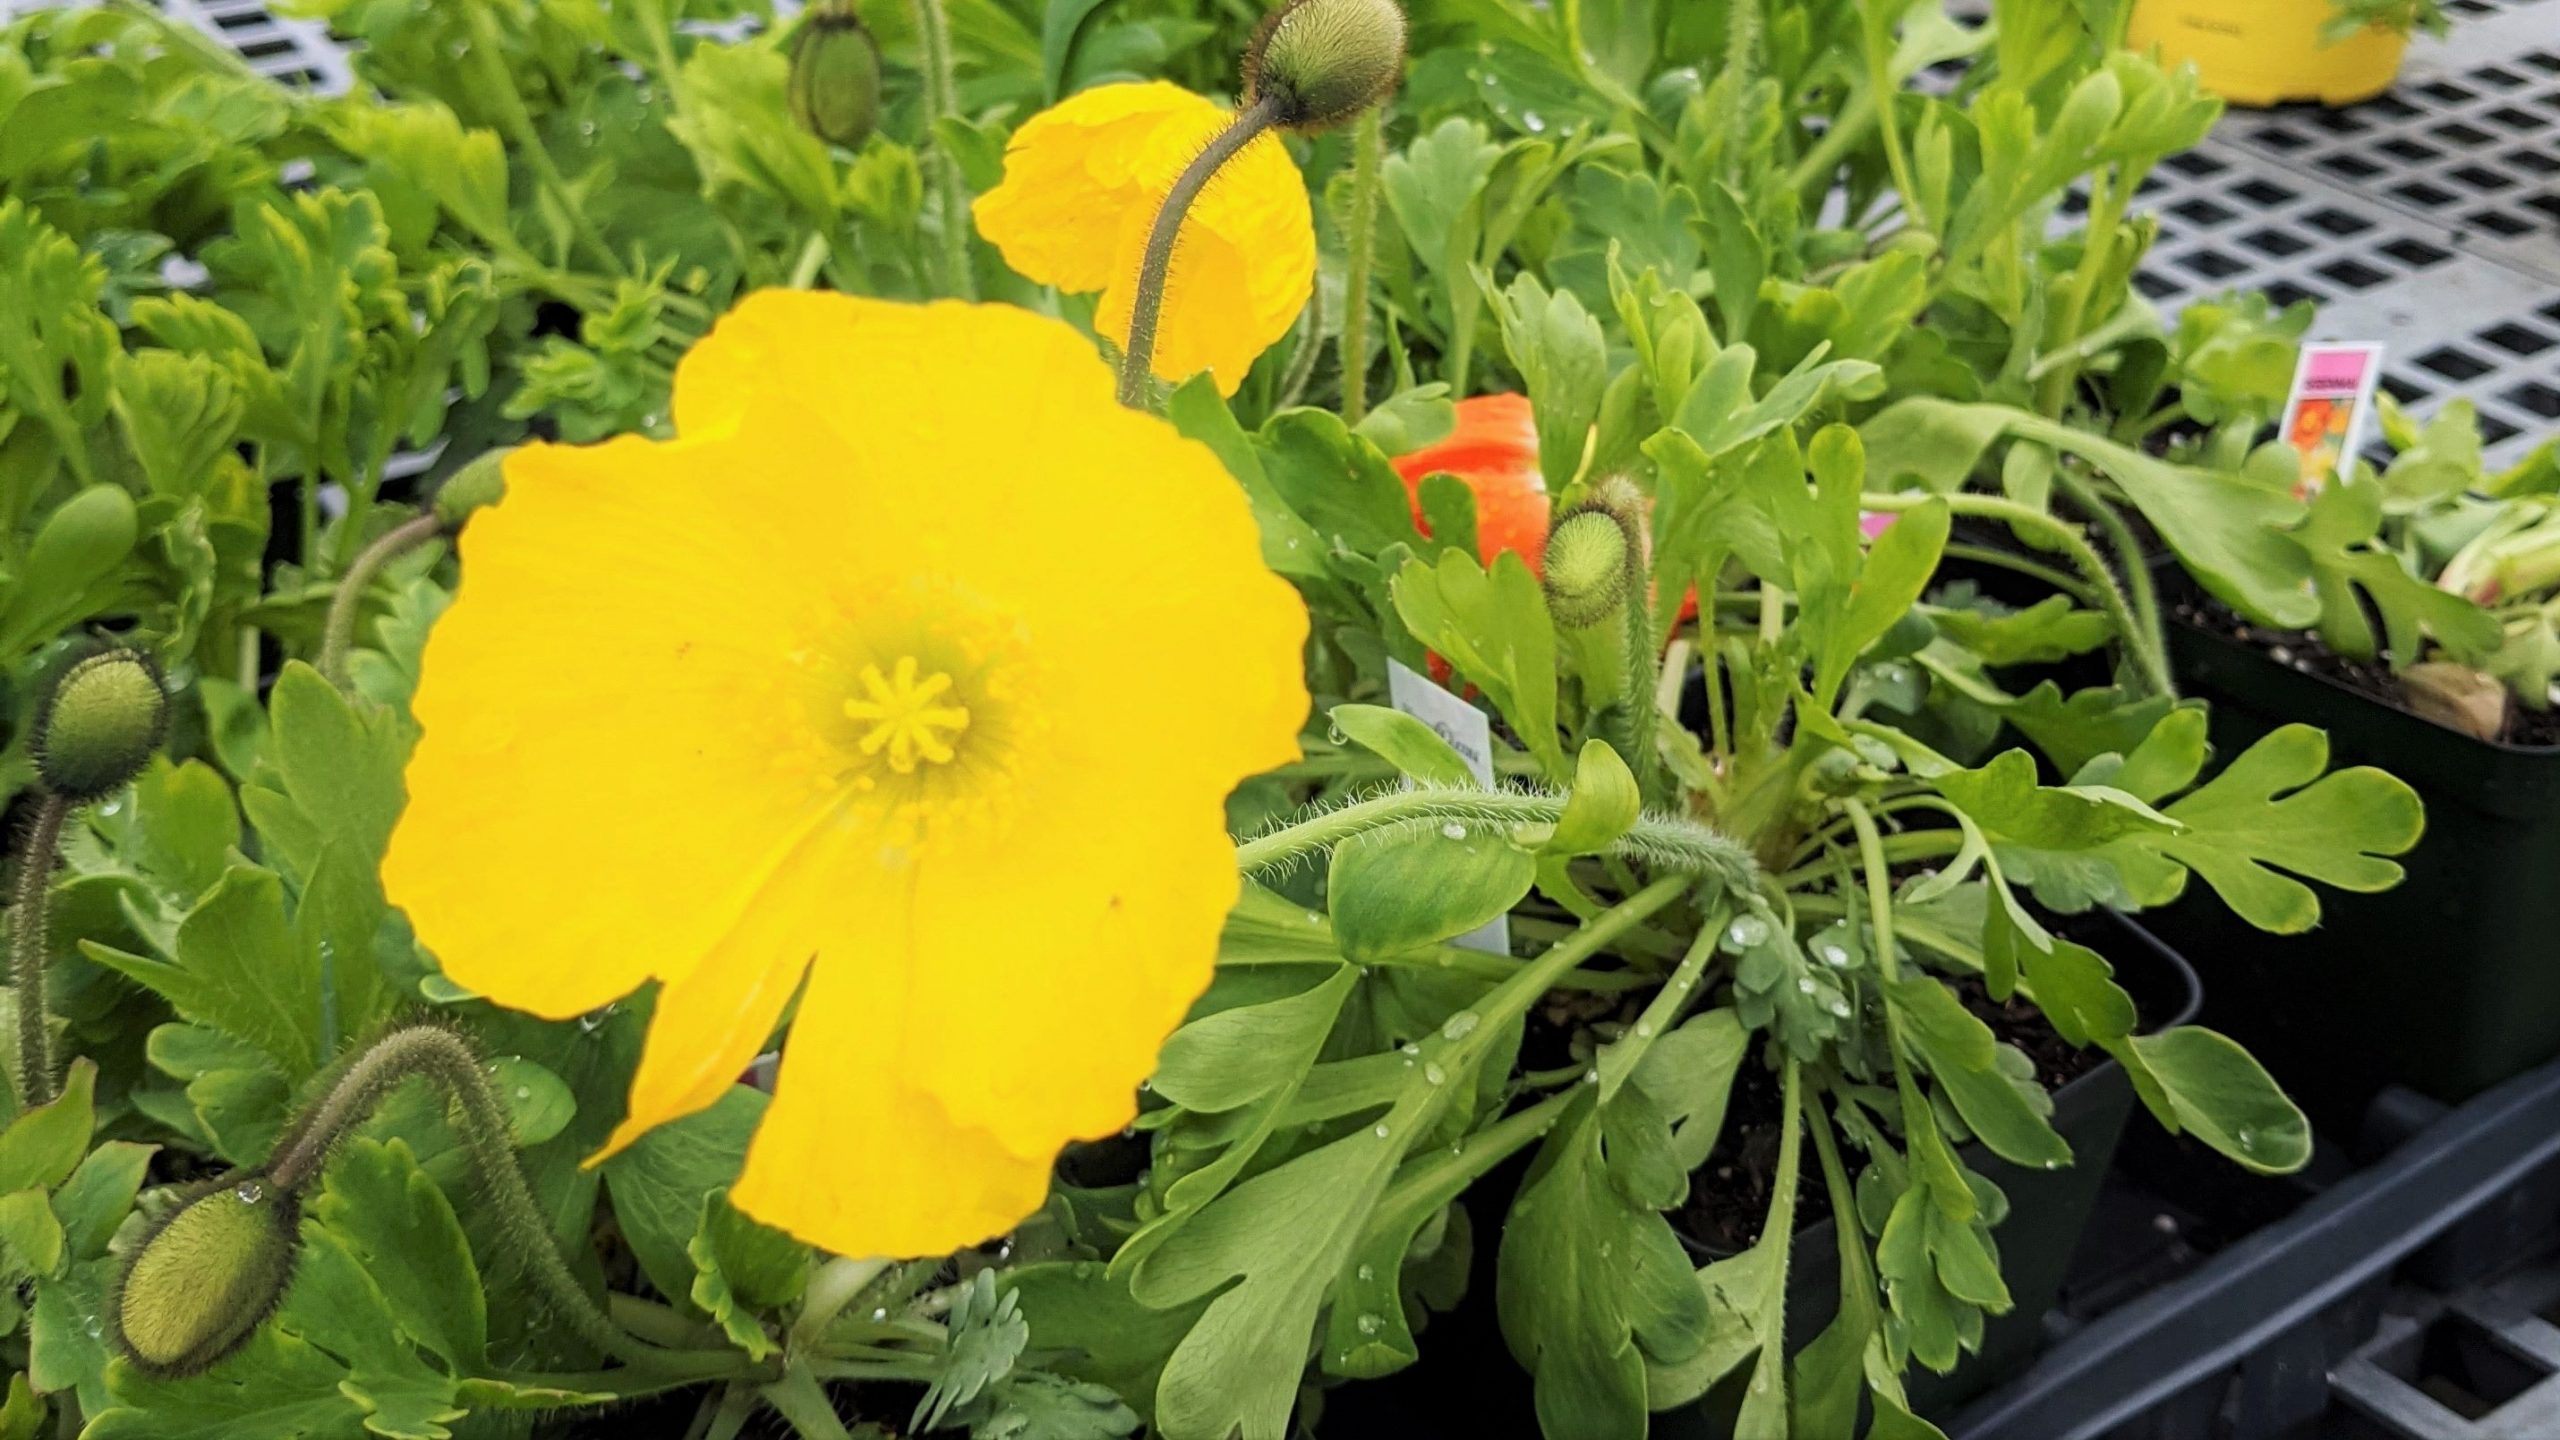
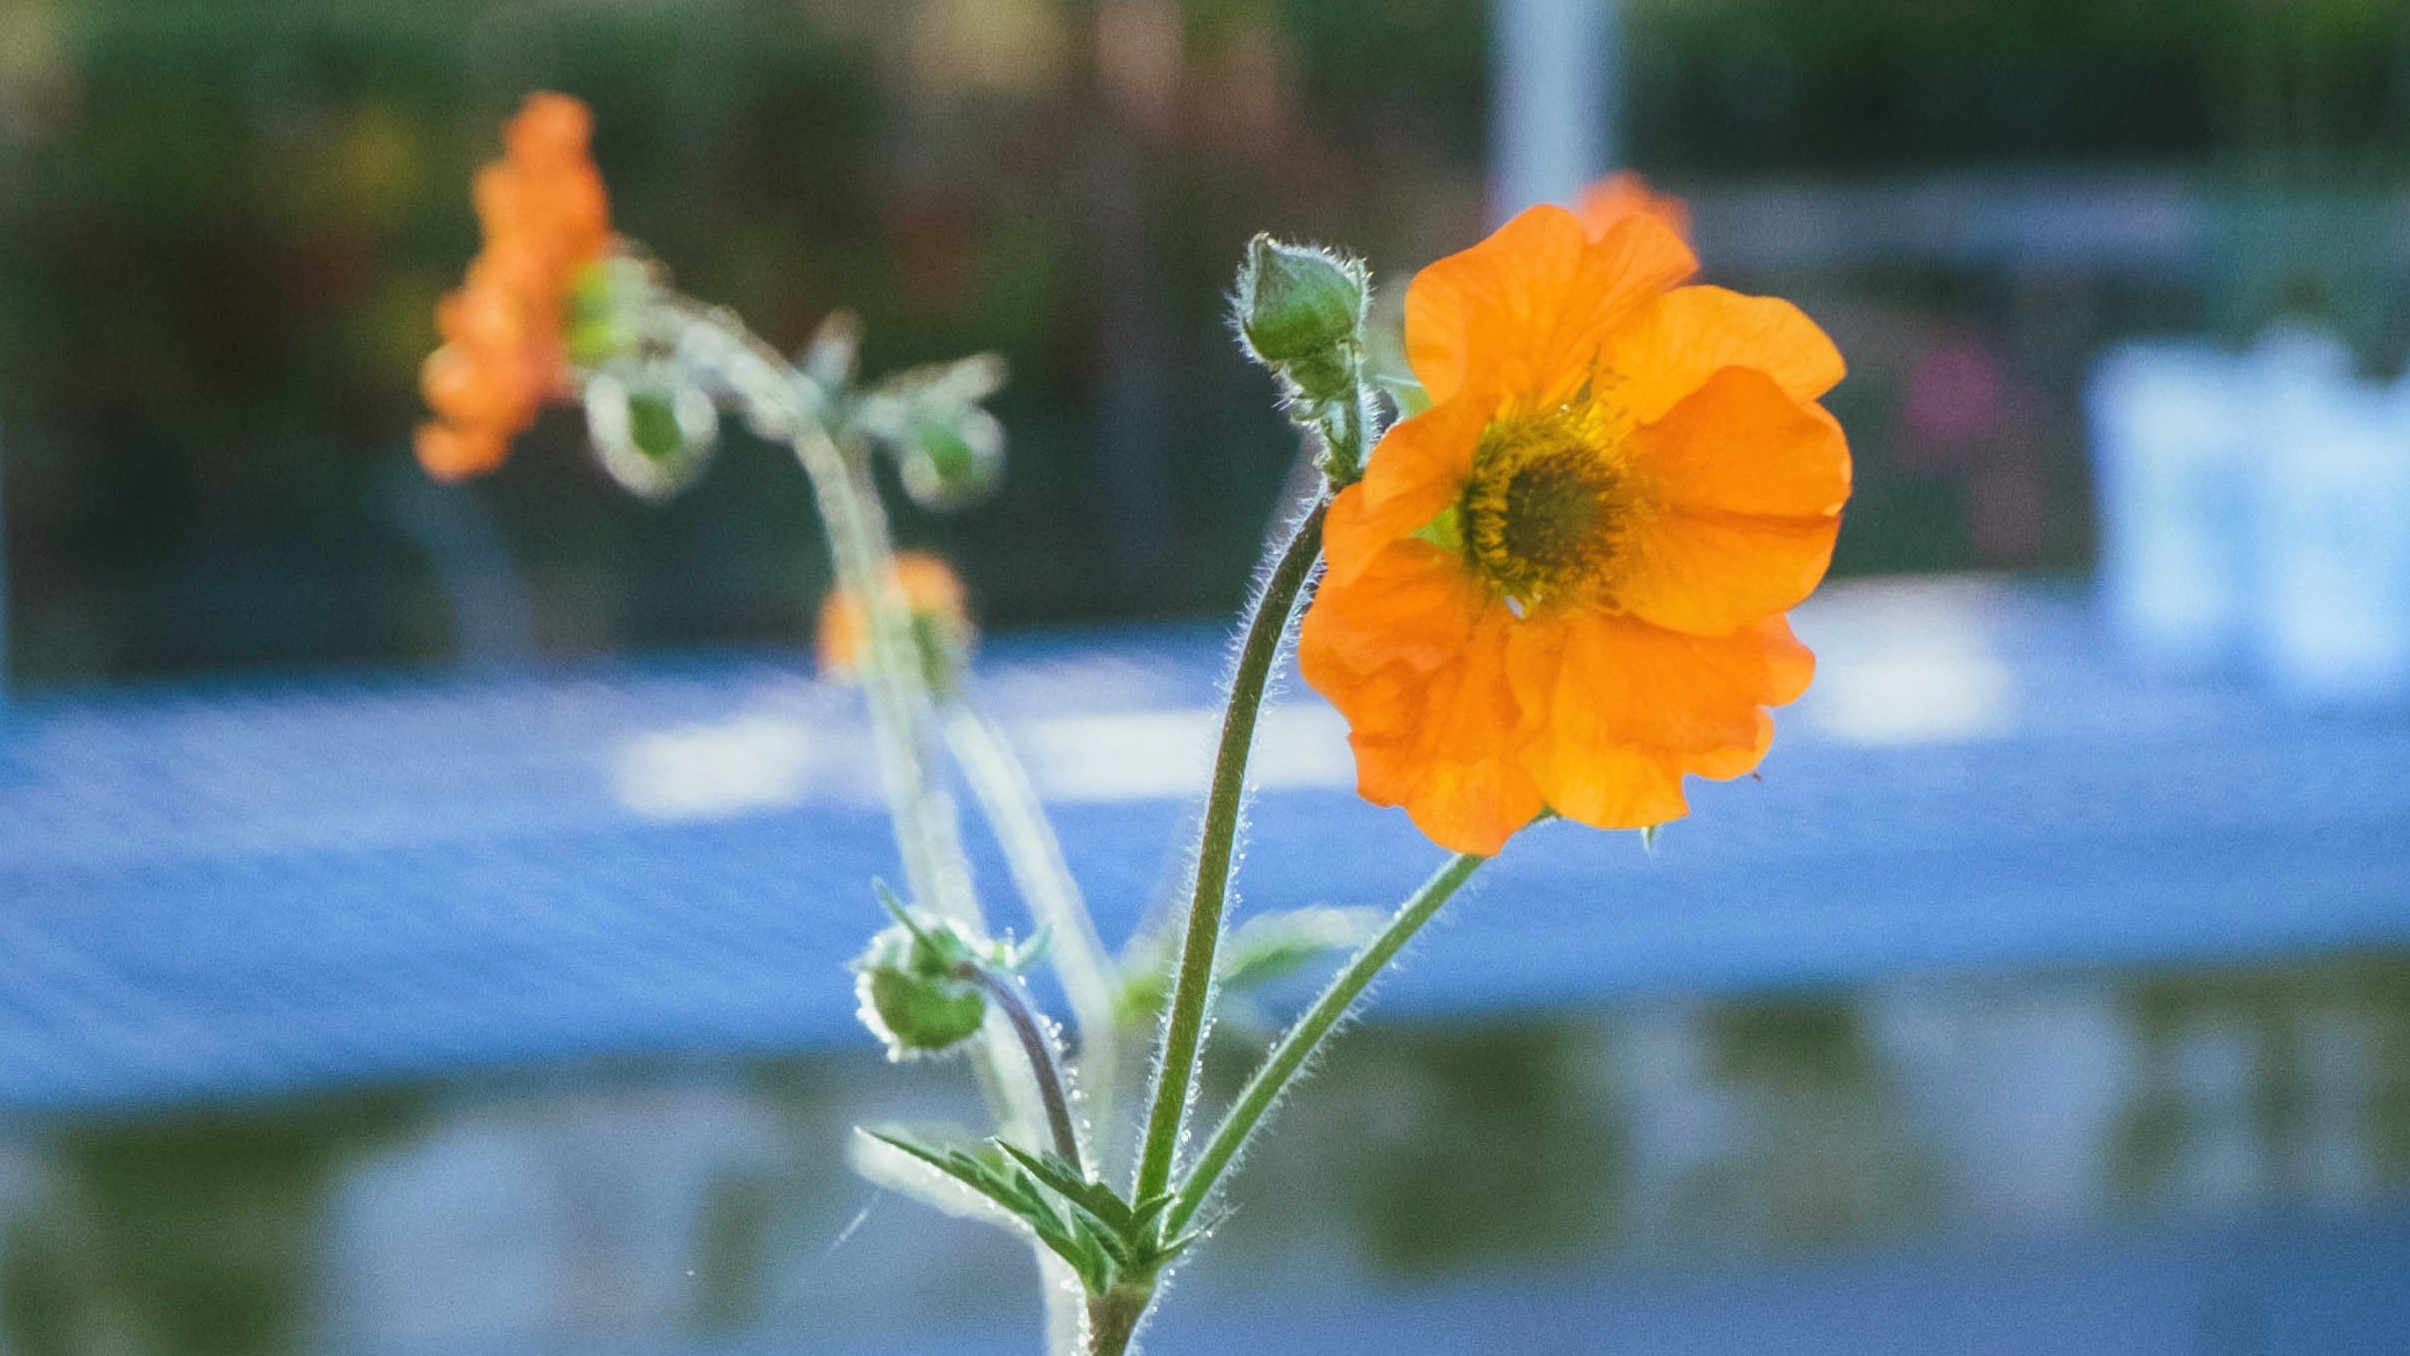
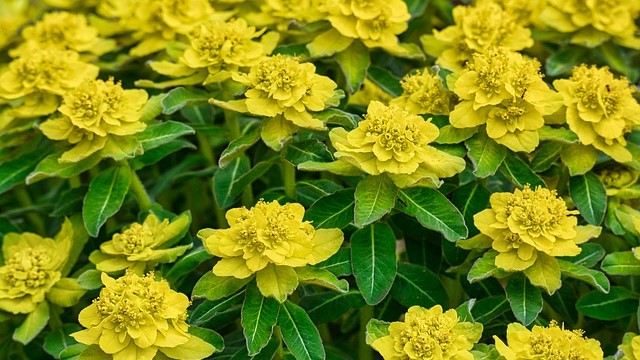
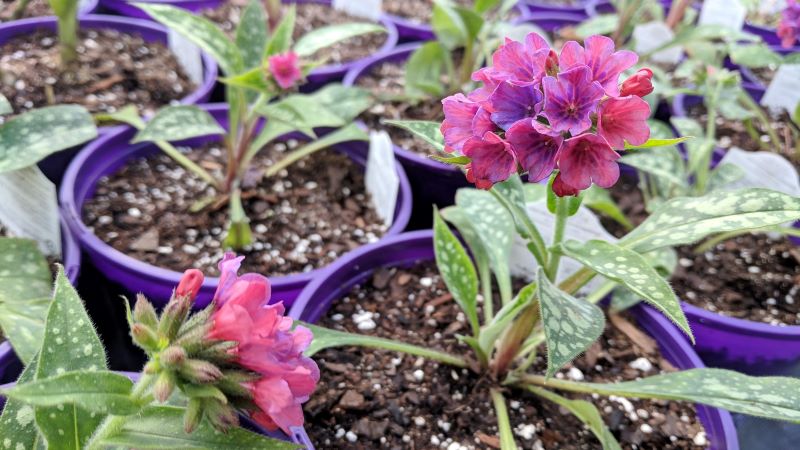

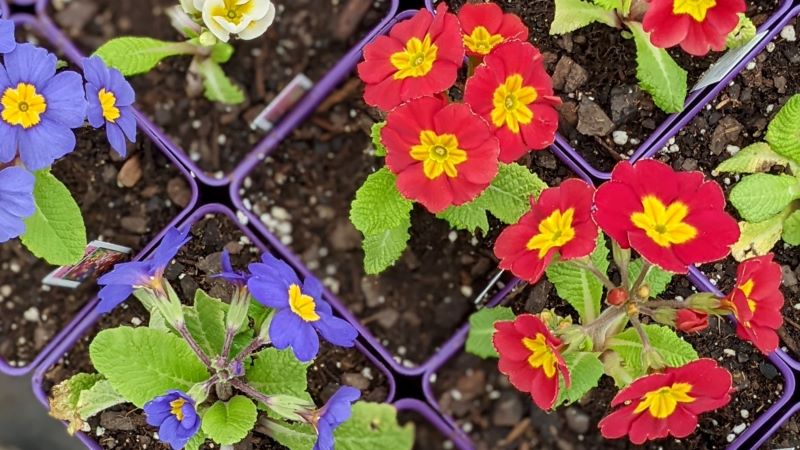


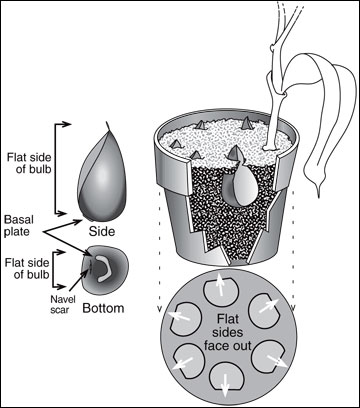


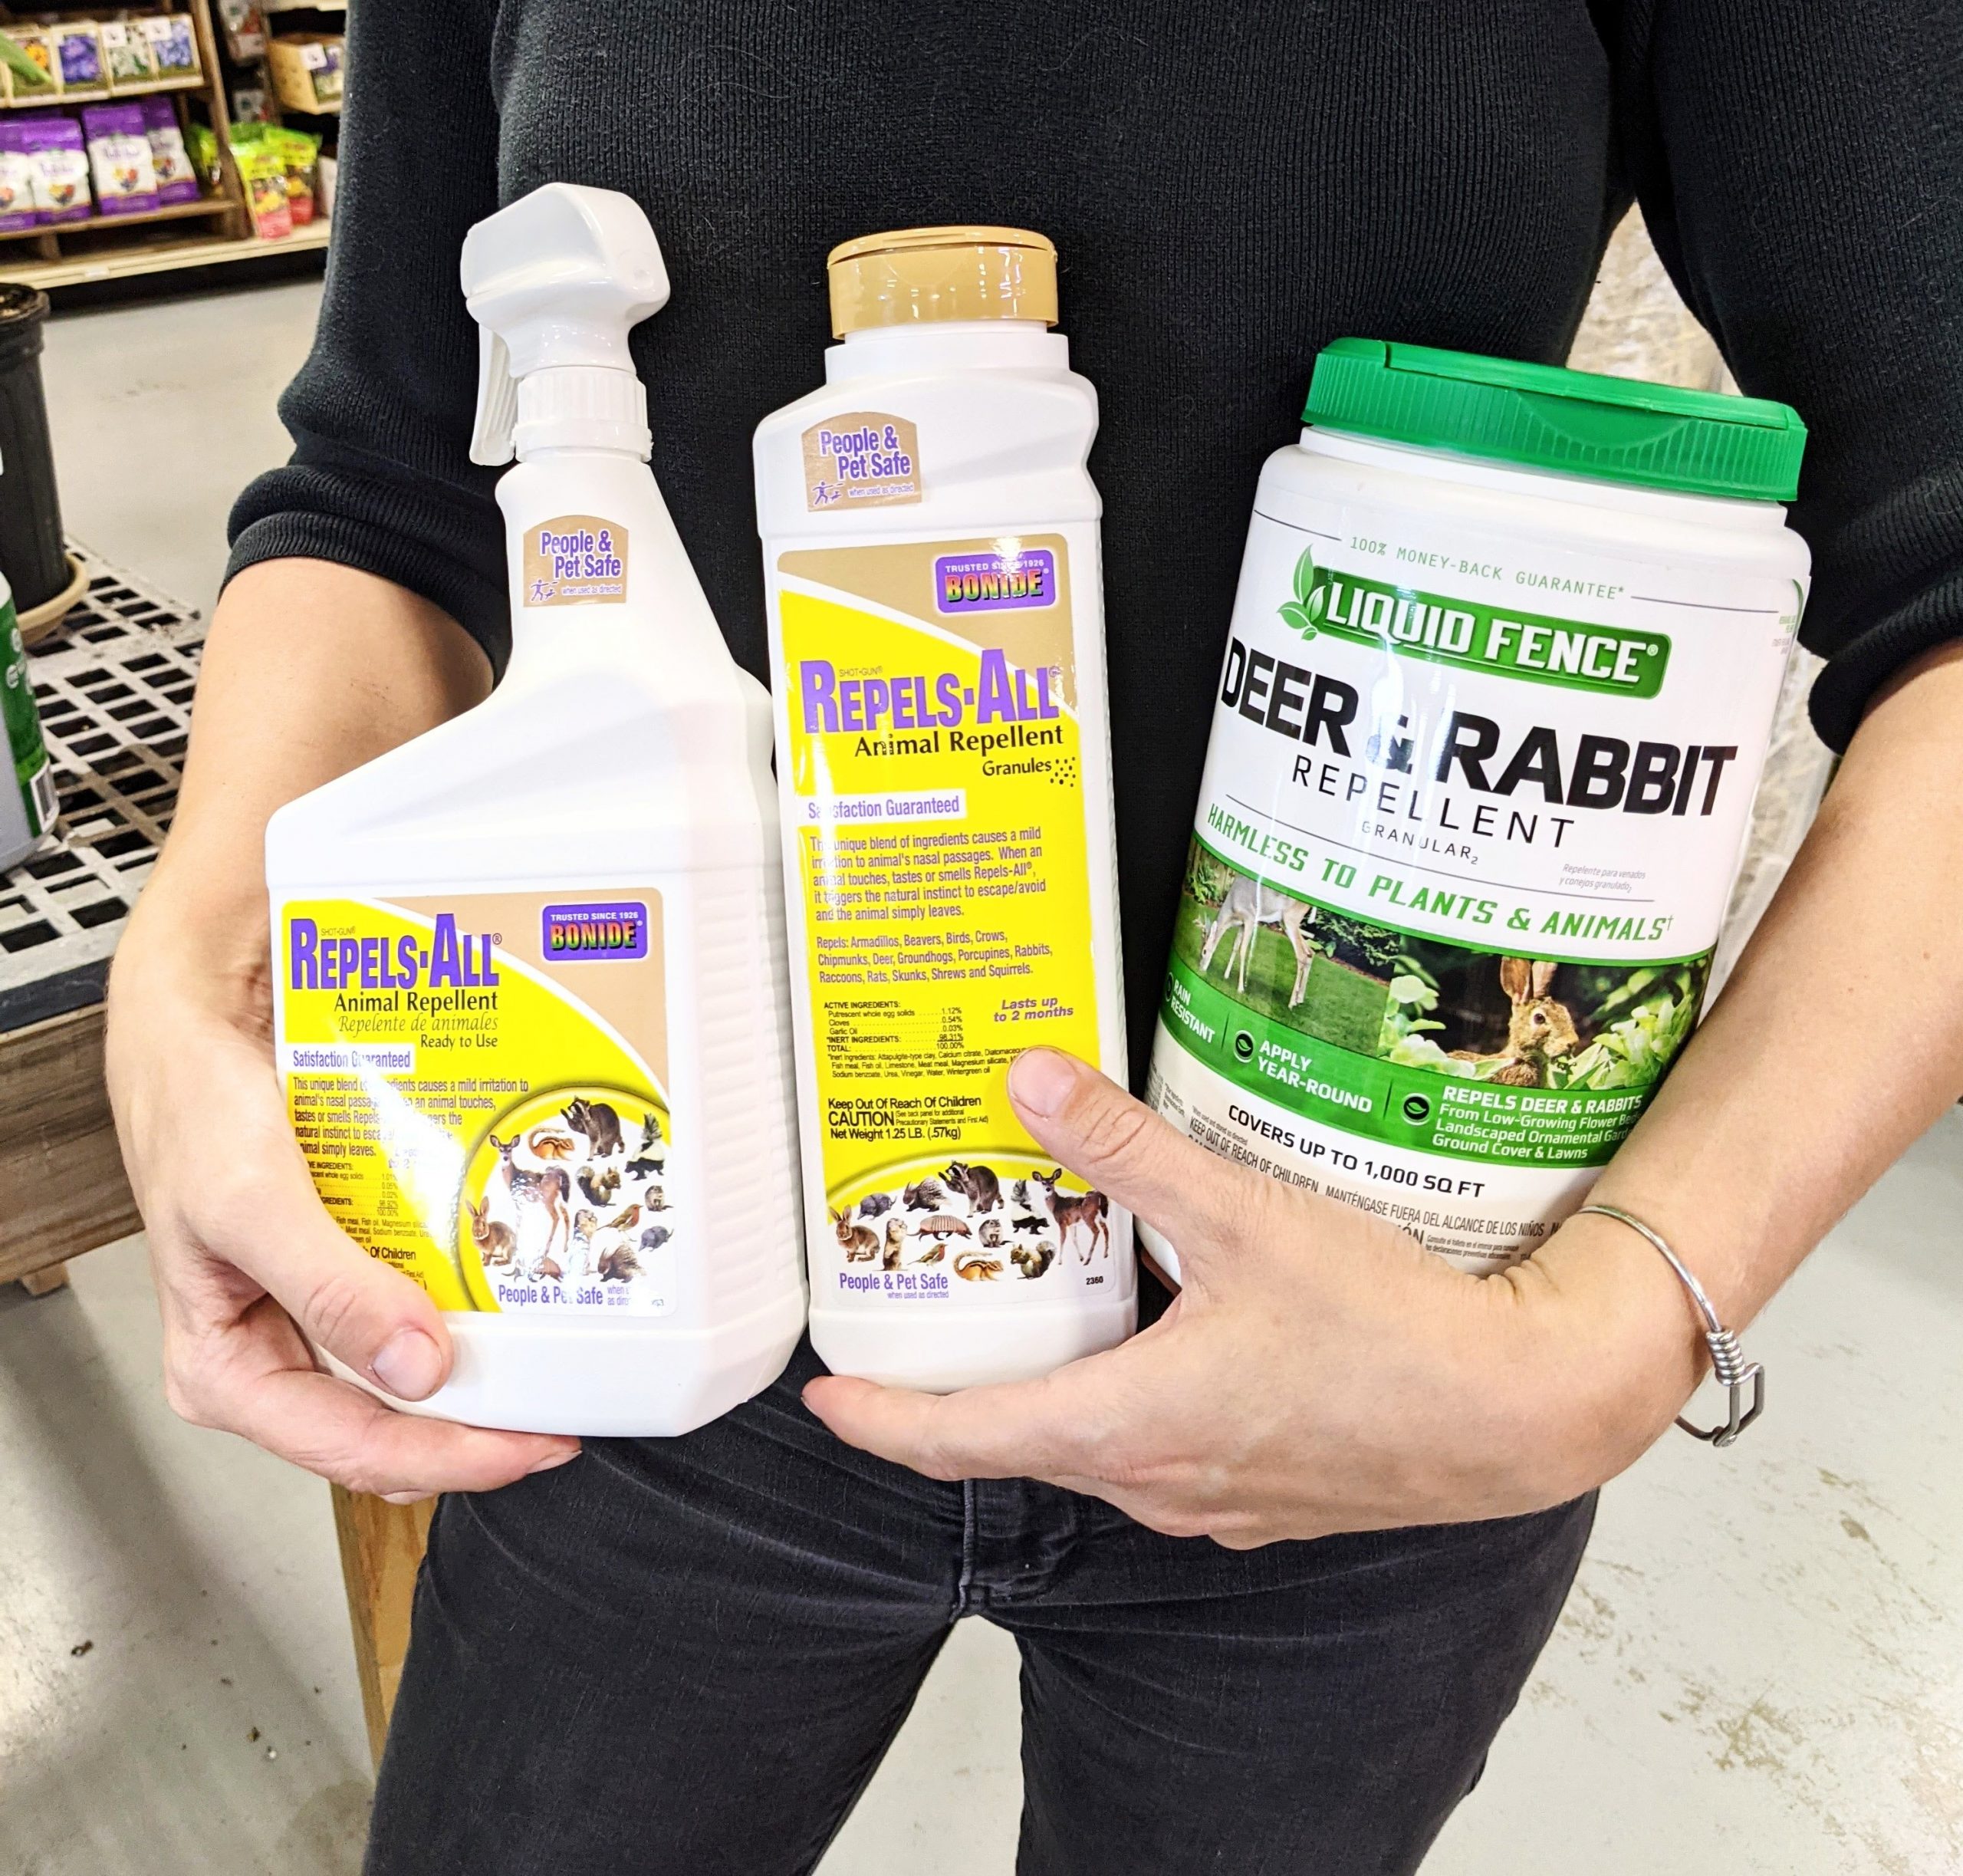
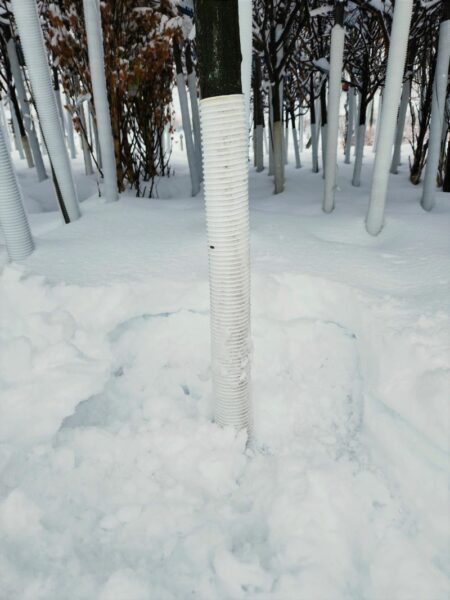


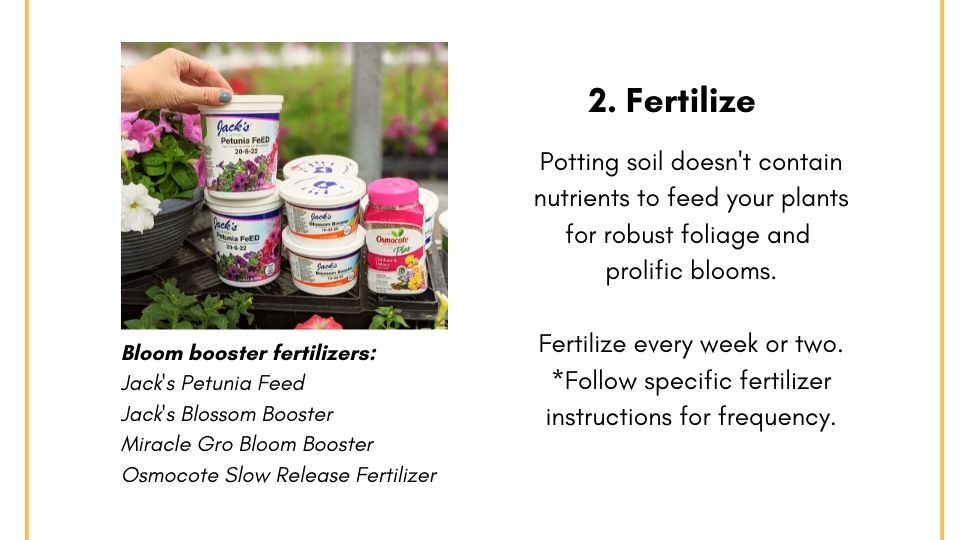
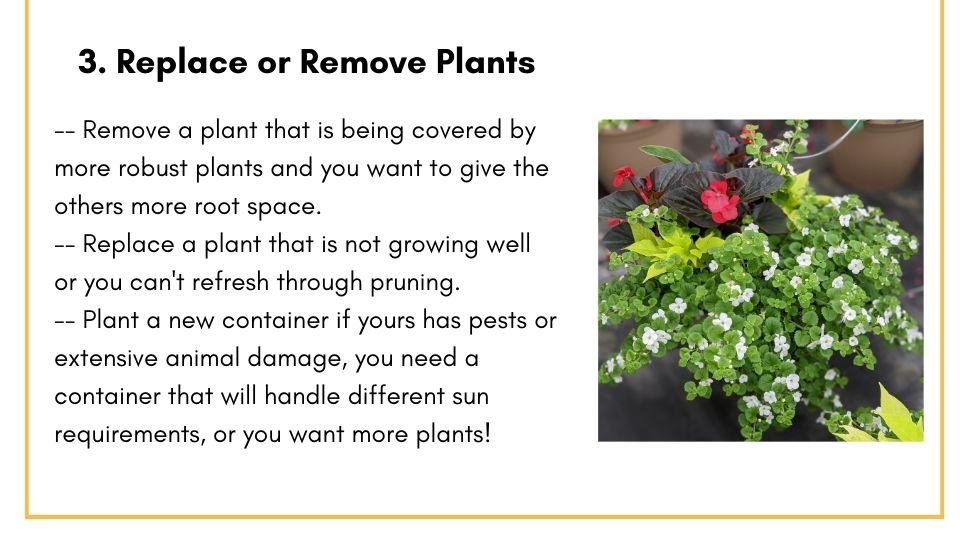


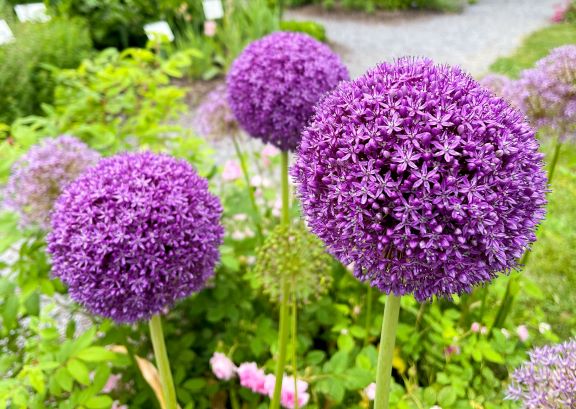


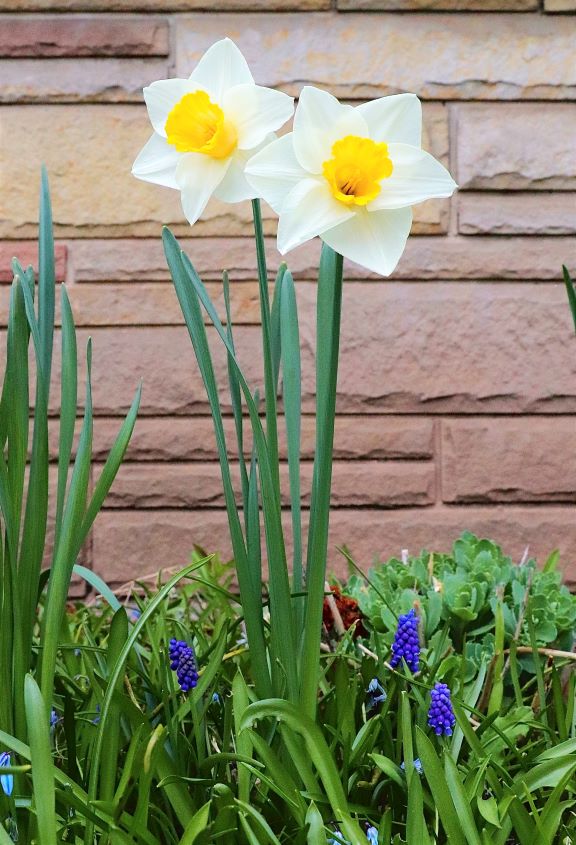
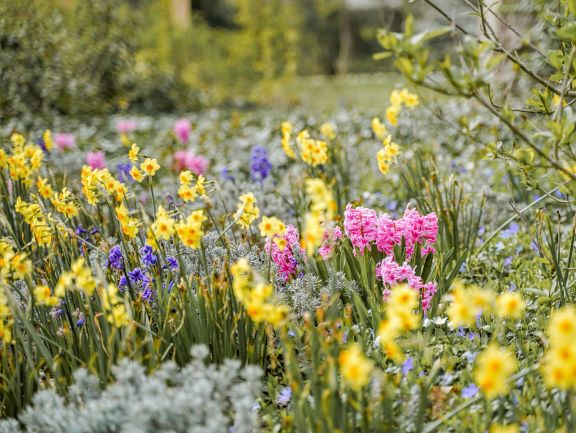
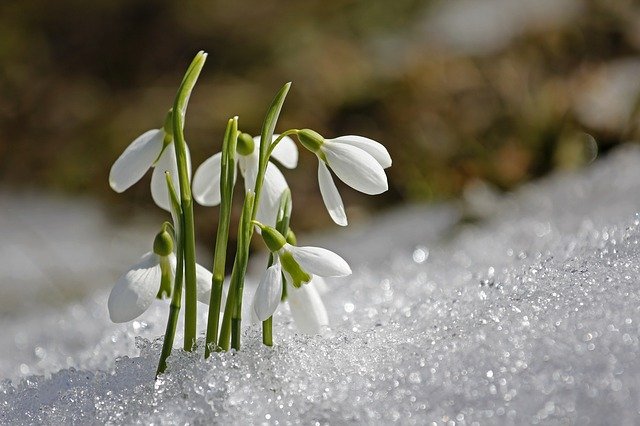
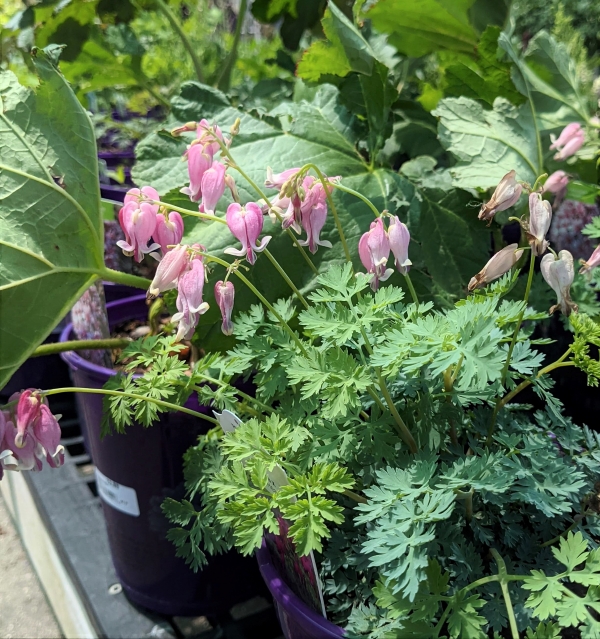
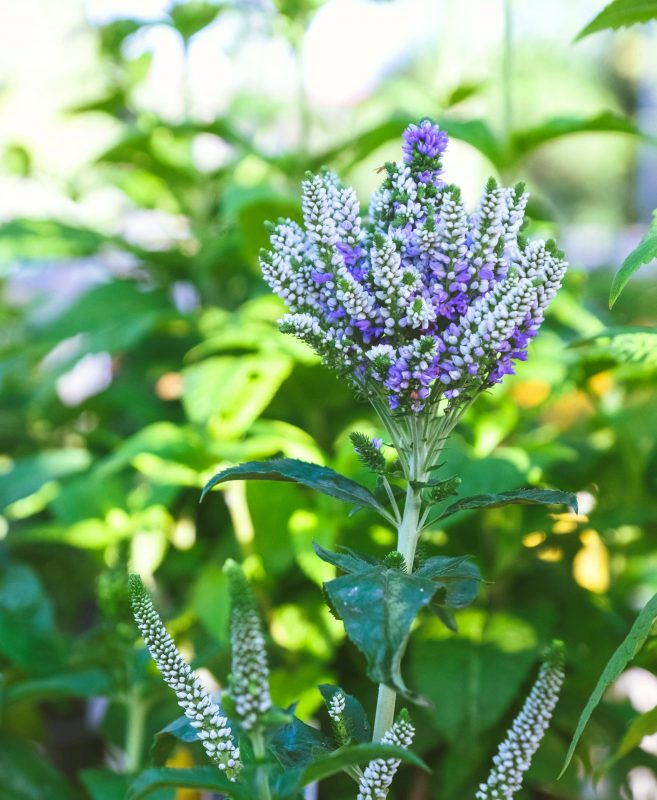
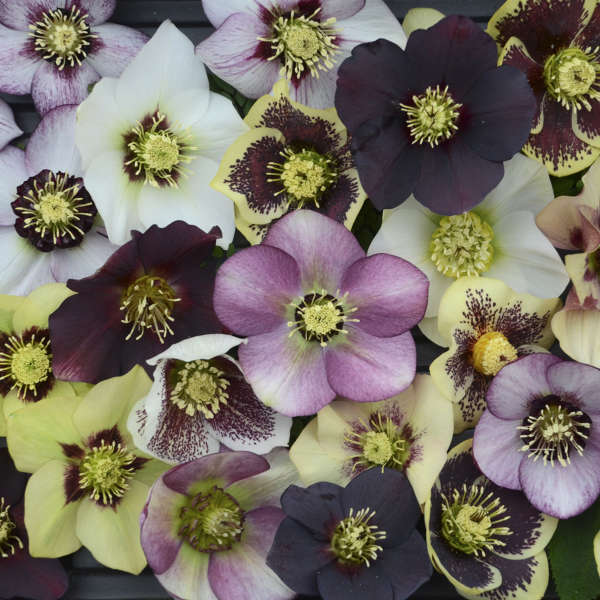
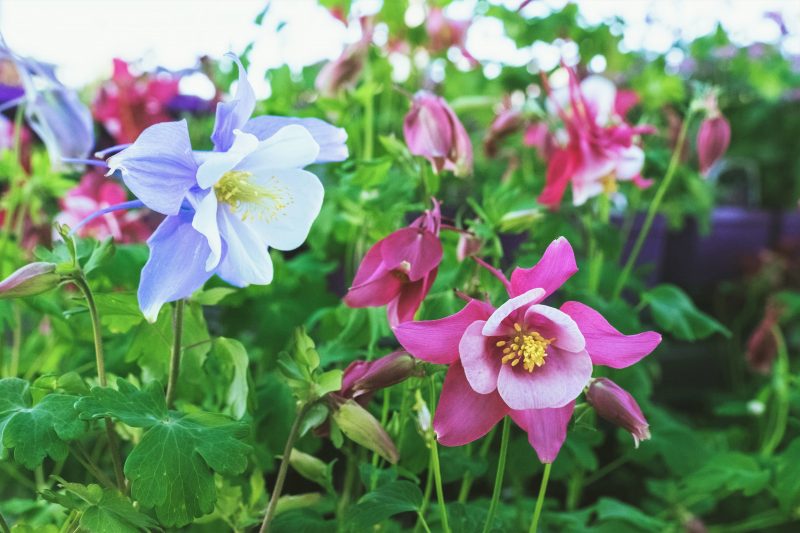

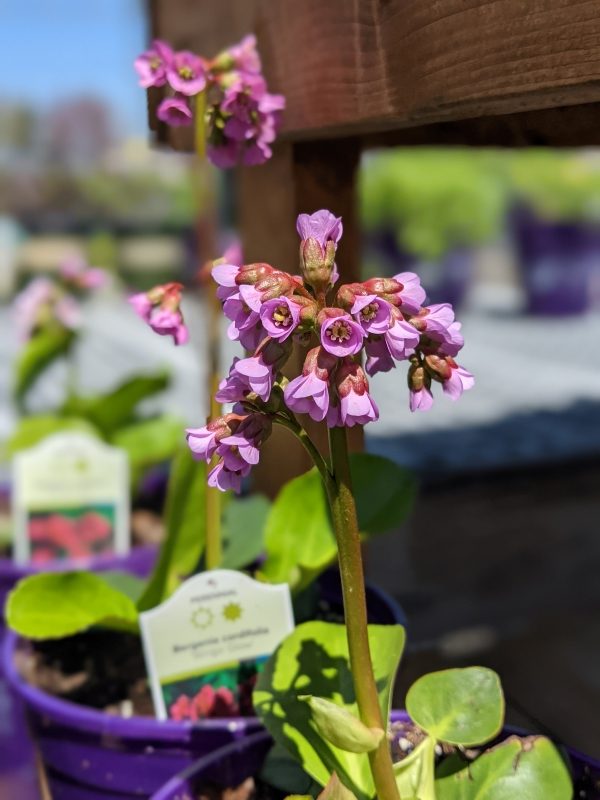
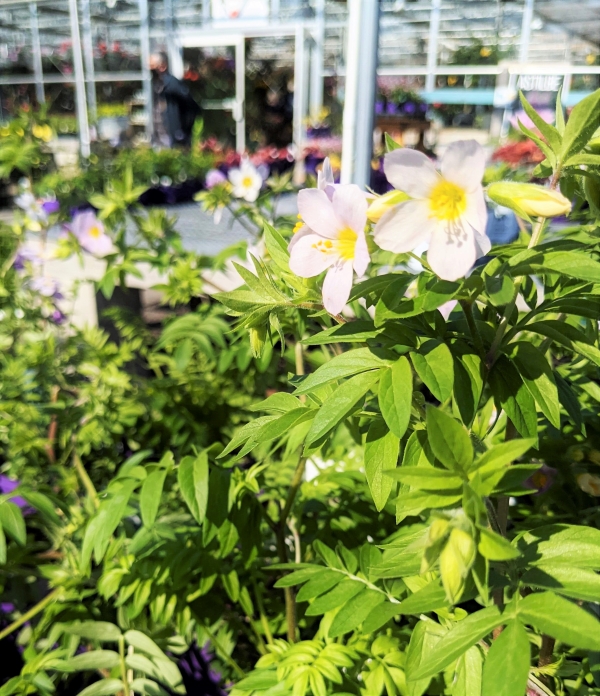
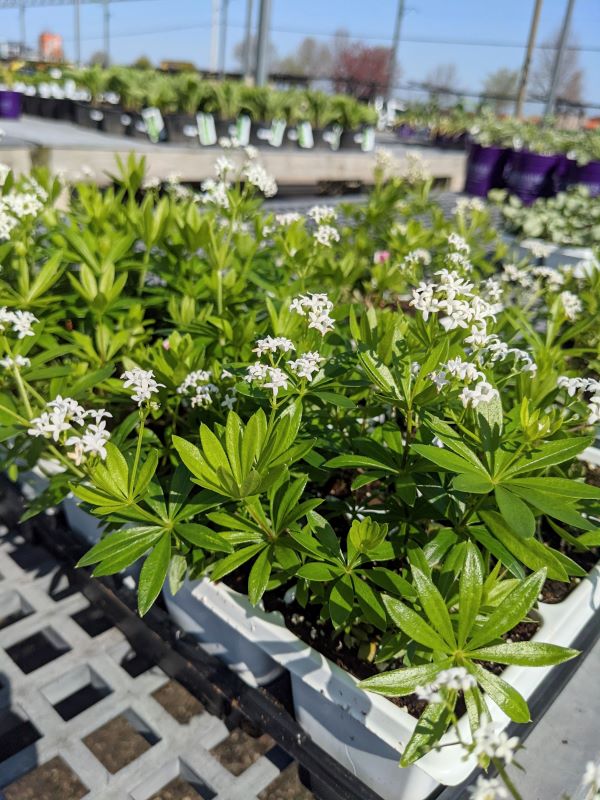
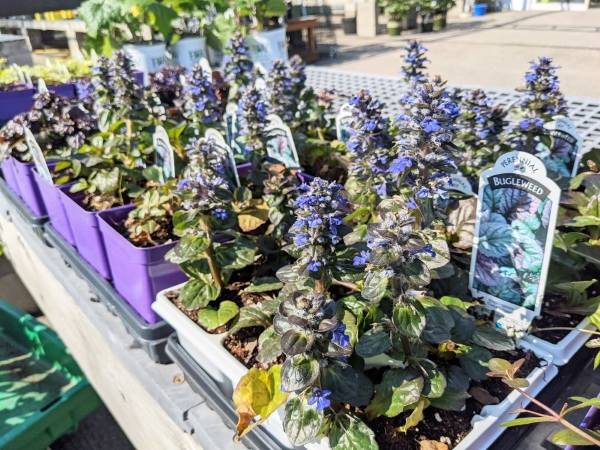
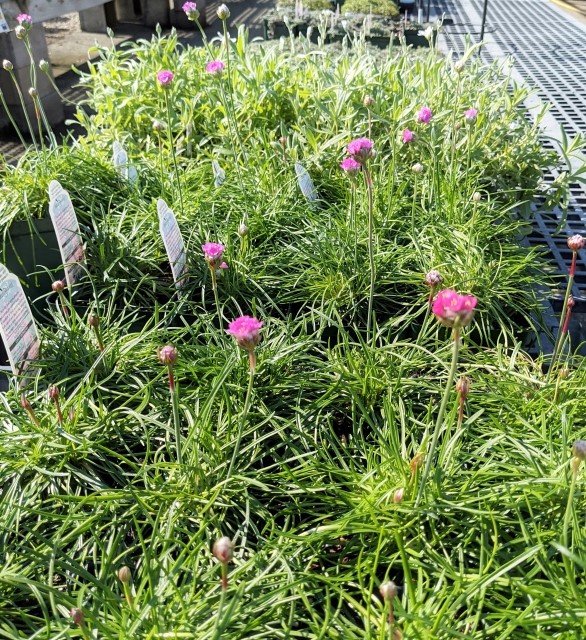
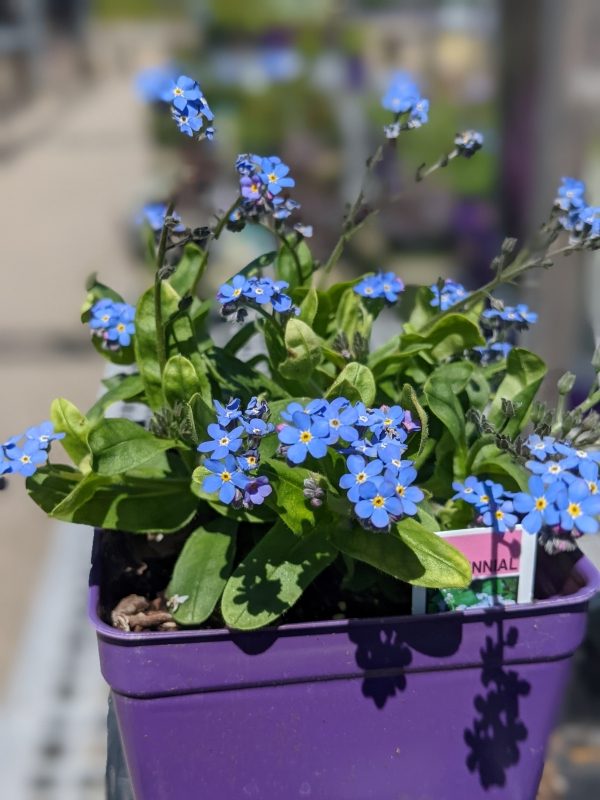
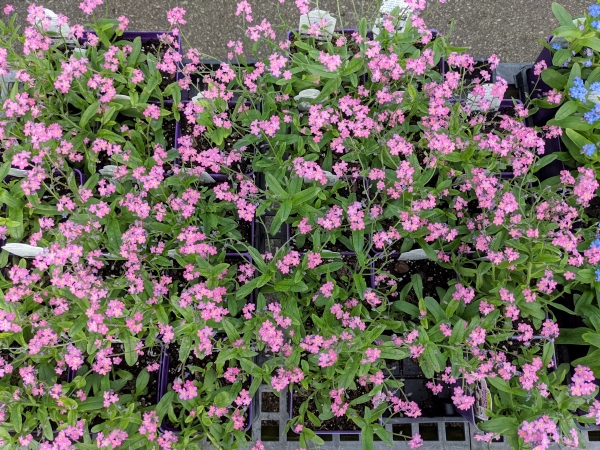
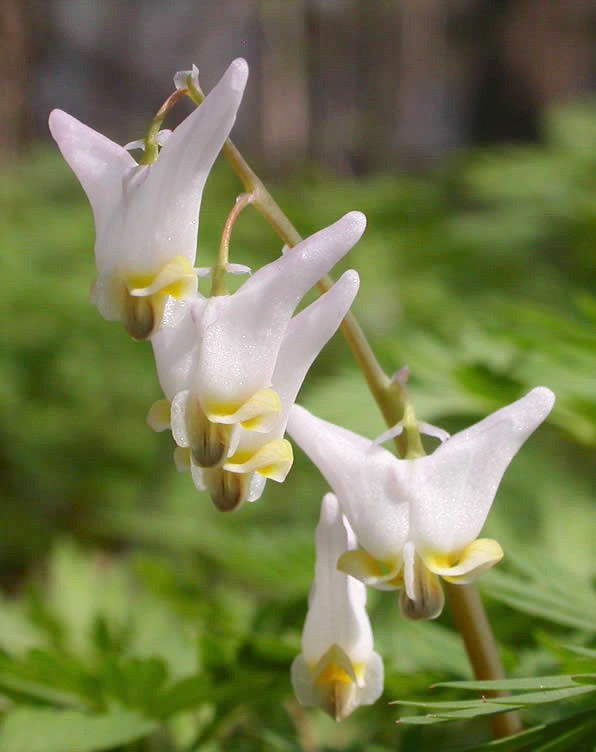
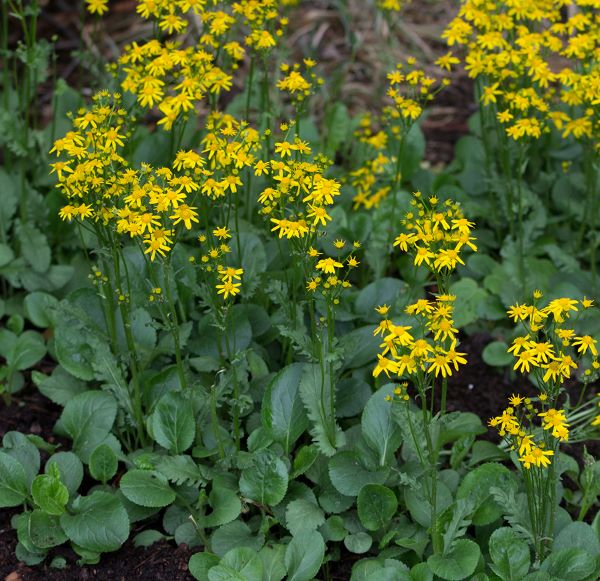
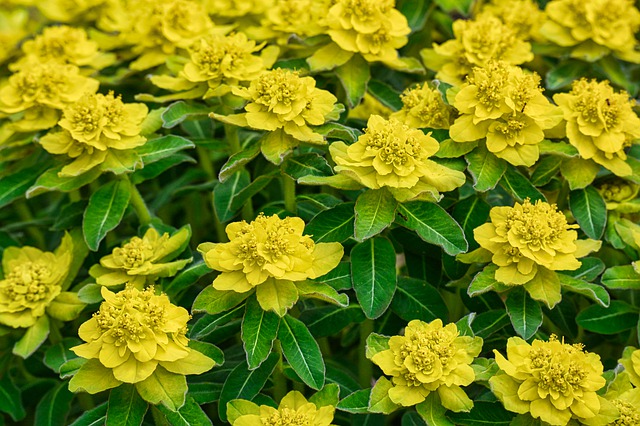

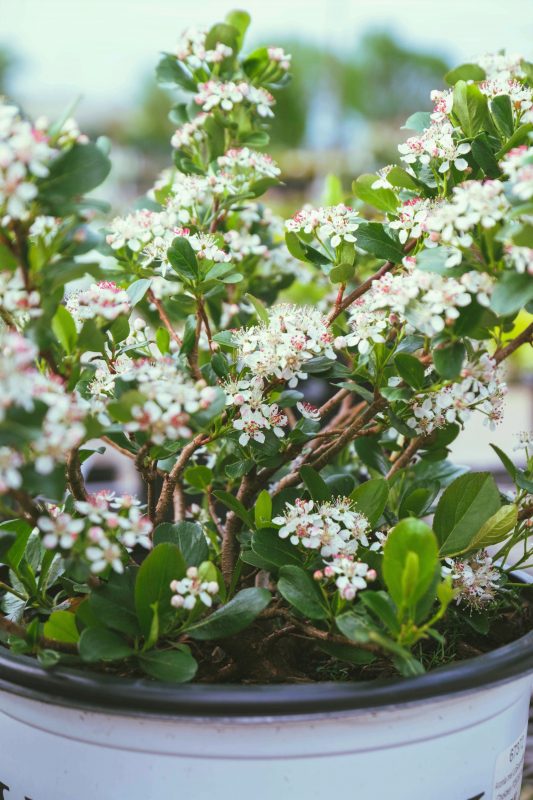
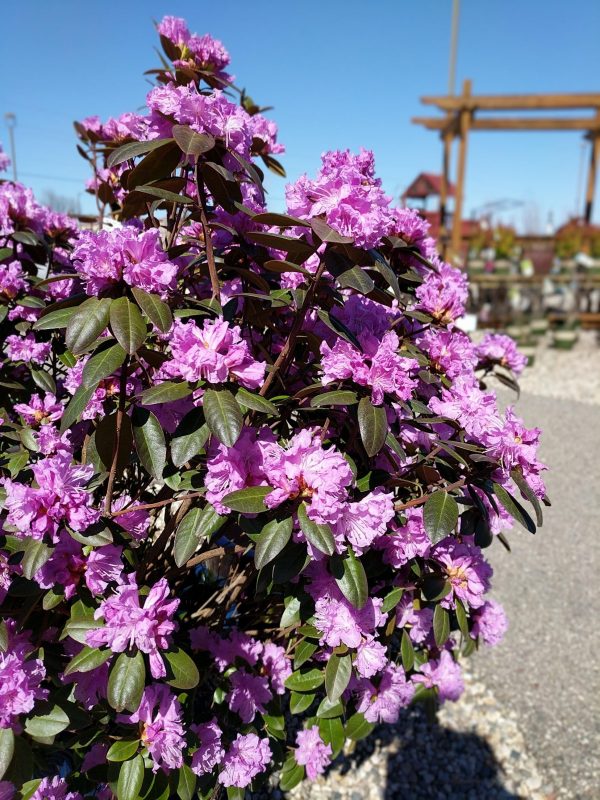
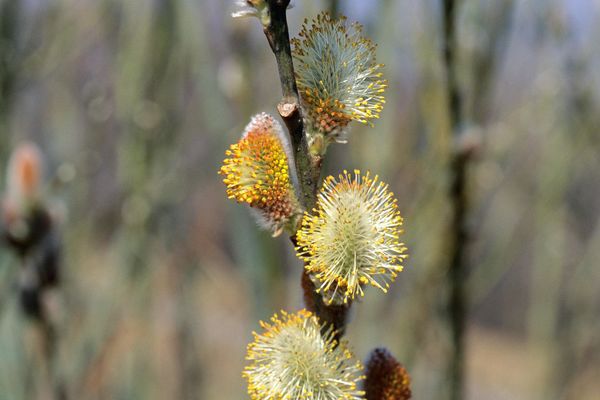
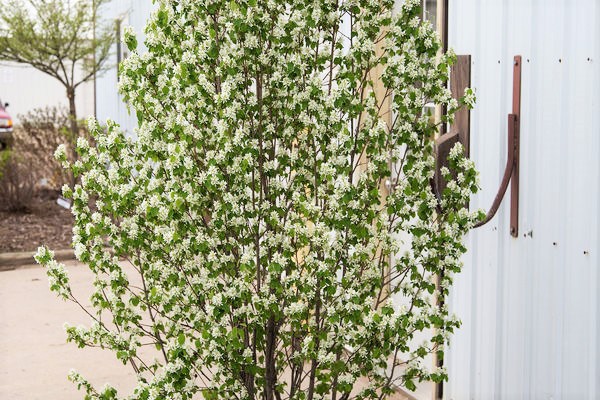
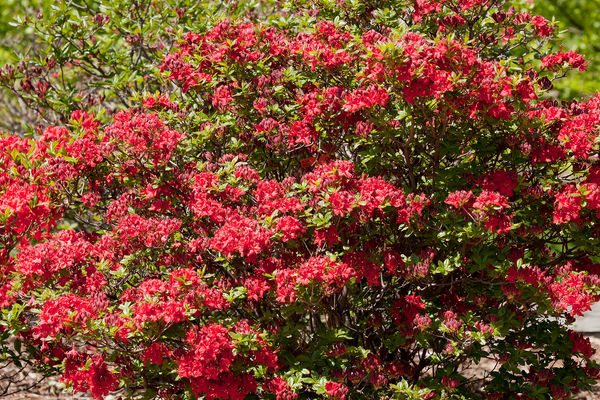
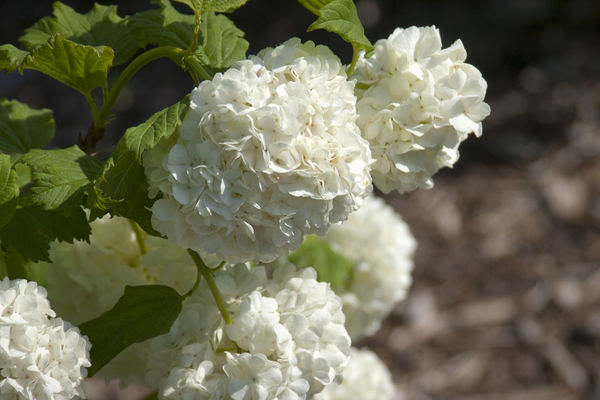
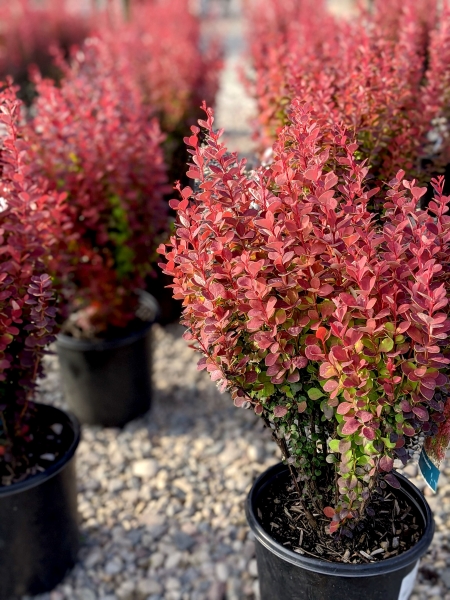
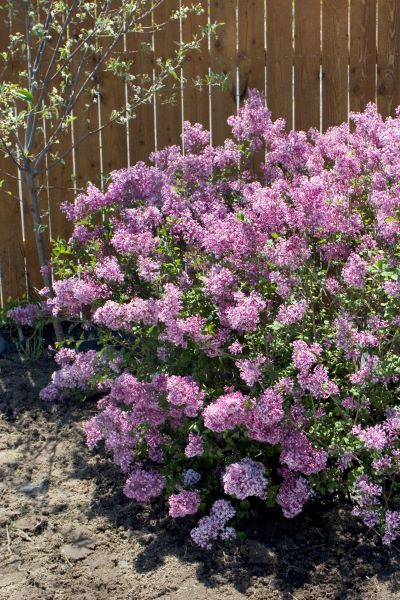
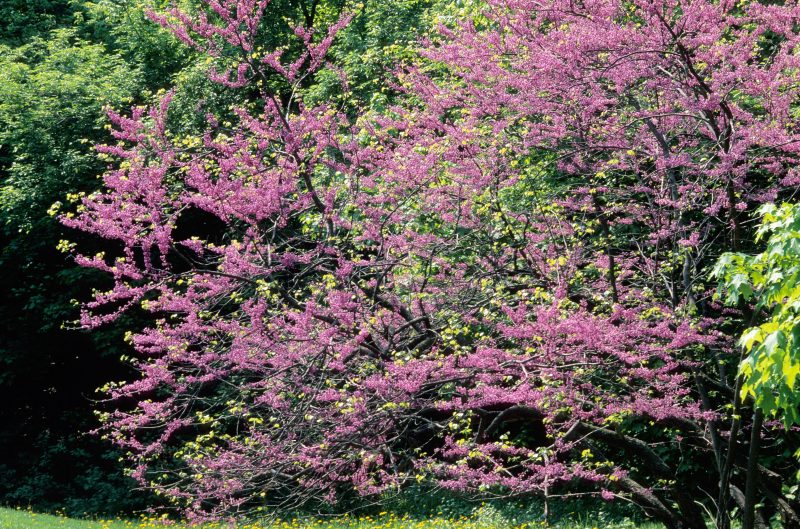
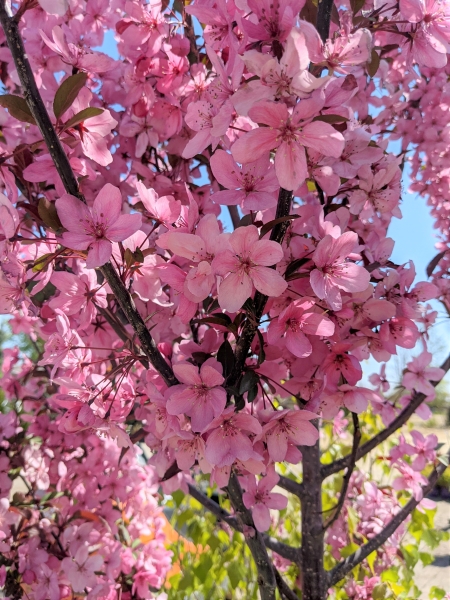

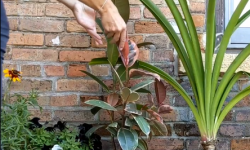

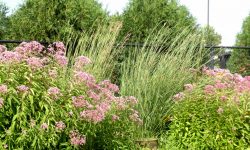
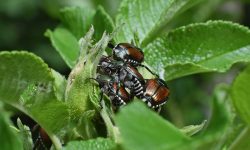

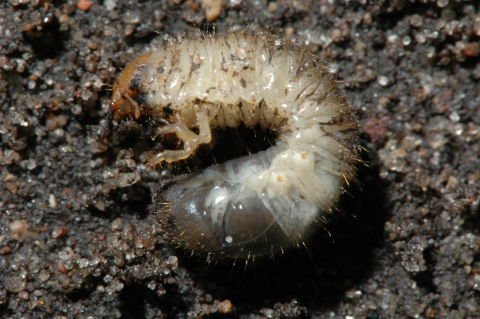
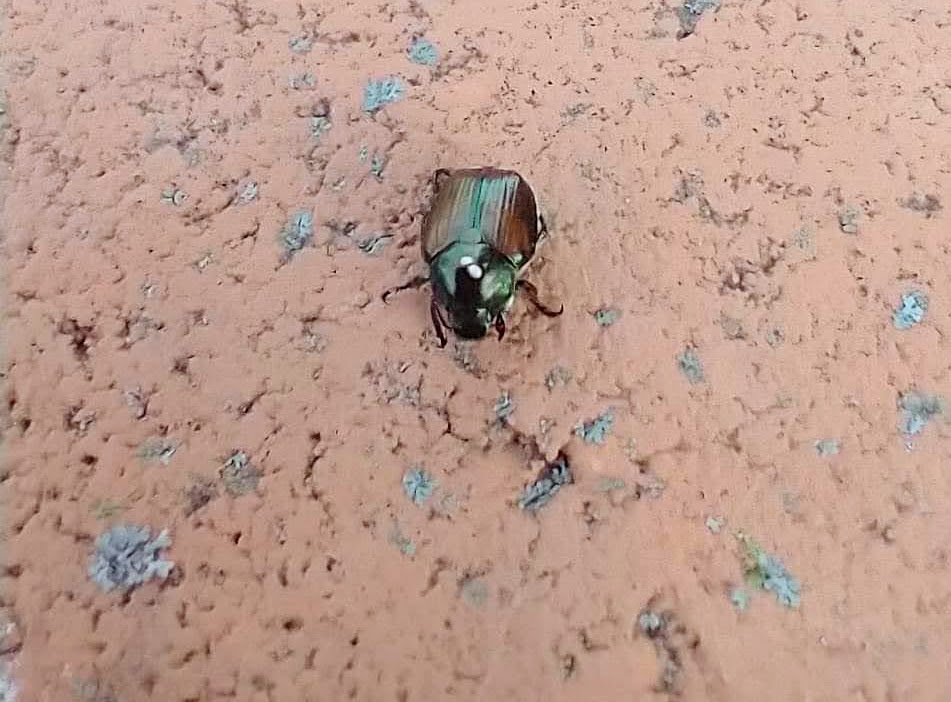


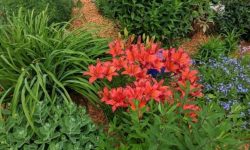


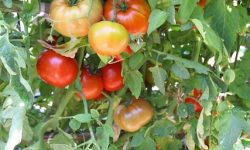


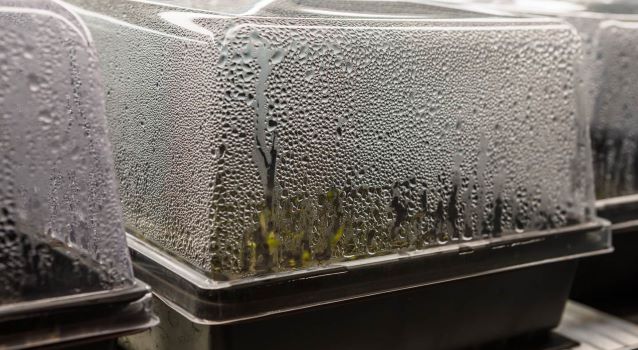


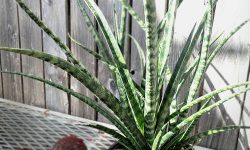

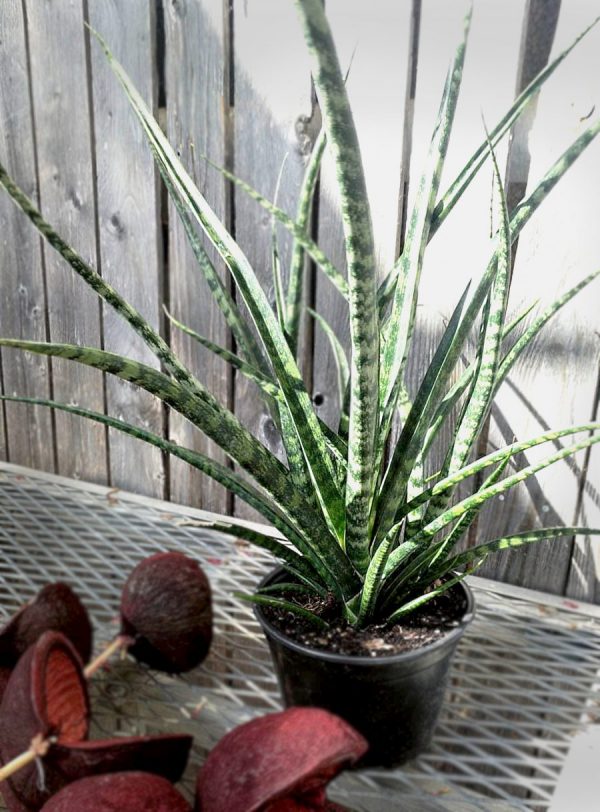

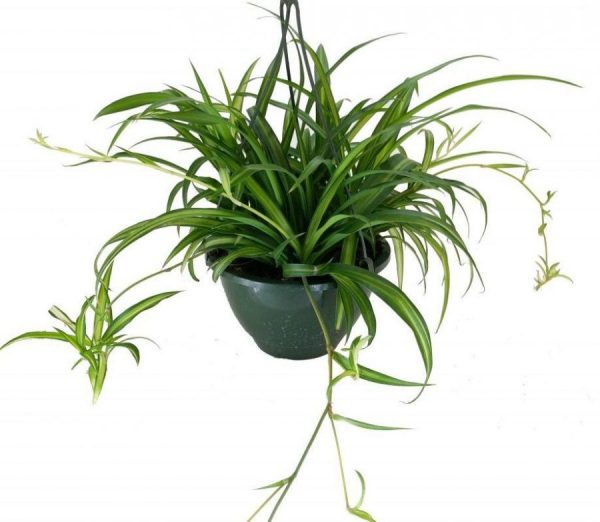


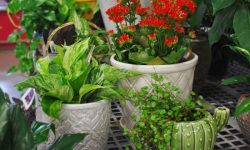


 “a fungus that grows in association with the roots of a plant in a symbiotic or mildly pathogenic relationship”. Imagine a network of fungi that connects plants to one another and their relationship to eachother as mutually beneficial.
 without Biotone. Incredible difference!
 dried grass clippings, use that! If you have leaves, use that! It is important to note that any diseased foliage should not be used as mulch.


 1. Eating Herbs


