Be on the lookout for signs of pest damage, such as holes in leaves or wilting plants, and address the issues promptly. Japanese Beetle damage is usually seen starting end of June, which looks like your leaves have turned to lace.
The frequency of fertilizing your annual plant containers can vary depending on several factors, including the type of plants, the quality of the soil, and the type of fertilizer you are using. However, as a general guideline, it is recommended to fertilize annual plant containers every two to four weeks during the growing season. Choose a fertilizer that is specifically formulated for flowering plants or general-purpose fertilizers with balanced ratios of nitrogen (N), phosphorus (P), and potassium (K). This will provide the necessary nutrients for healthy growth and vibrant blooms.
Watering and Maintenance:
Check the soil around your plants, especially newly planted ones, to ensure they are getting enough water in the summer heat. If they are dry a few inches down, water early in the morning or late in the evening to reduce evaporation. Remove any weeds that might have sprouted to prevent further spread of unwanted plants. Use a hand trowel or a garden fork to gently loosen the soil around the weeds and carefully remove them, making sure to get the roots out as well.
Harvesting:
If you have a vegetable or fruit garden, now is a great time to harvest ripe produce. Pick ripe fruits and vegetables such as tomatoes and berries. Regular harvesting encourages continuous production and ensures your plants stay healthy. If you have birds or other critters eating your raspberries, consider netting your berries while they ripen.
Pruning and DeadheadingAnnuals:
Regular pruning and deadheading of annual plants promotes healthy growth and flowering of your annual plants. Use sharp and clean pruning shears to remove the excess growth. We recommend to only prune 1/3rd of the plant size. Additionally, deadhead any faded or spent flowers to encourage new blooms. This will not only keep your garden looking tidy but also stimulate the growth of more vibrant flowers.
Think of your fall vegetable garden in July!
In the month of July, it’ll be time to start broccoli, cauliflower, brussel sprouts, and cabbage seedlings for fall planting. Many frost tolerant annuals should be started 6-10 weeks before first predicted frost date. In Zone 4, that is September 21st-October 7th.
Remember, specific tasks might vary depending on your location, climate, and the types of plants you have in your garden. Always adapt your gardening tasks to suit the unique needs of your plants and the current season.
Read Beneficial Bugs Not all insects are cause for worry. In fact, many insects are beneficial. Attract the beneficial bugs with plants to help mitigate the non-beneficial bugs. This is a must read if you want to cut back on insecticides and create a balanced ecosystem.
Read TOP 5 TIPS for Summer Plantings The hot weather and drought conditions may give gardeners pause before they add to their gardens and landscape. With these top 5 tips you can make summer garden planting successful
Meet the Annual Plant Grower: Gardener Discussion & QA with Geri
Gardener QA with Annual Grower
March 4, 2023
10:00 am - 11:00 am
We're sorry, but all tickets sales have ended because the event is expired.
Try new plants this year and get the info you need to grow the annuals and vegetables you want!
Animal Repellents and Plant Protection
We all love animals but sometimes they go where we don’t want them to or damage our landscapes and gardens. They can chew, eat, scratch, and damage plants throughout the year. When animals get hungry, they may not spare much. Protecting your plant investment is about protecting them from extensive damage that will severely stress or kill your plant. If you end up with a few bites are scratches, luckily your plants will be fine and will heal.
There are animal and human safe products available to repel mice, squirrels, voles, moles, raccoons, deer, and rabbits.
First we will look at what animal damage looks like so you know what you’re dealing with if you see it.
Rabbit chew marks on a tree.
The two most common animals that damage our plants are deer and small rodents like rabbits and voles. Deer will rub against the bark and leave gashes (see main post image). They will even chew off the top of shrub branches.
Rodent damage will have cleaner cuts. Rabbits can chew down into the cambium layer of shrubs and trees and chew off small branches. It’ll look like a 45° angle cut as shown in the image above. The cambium layer is where water and nutrients are taken up. If the damage to the cambium layer goes around the entire branch or trunk, it will kill the plant and is called girdling. Voles can eat the roots of plants, bark, and dig tunnels that wreck lawn grass.
It’s important to reapply repellents as directed and after heavy snowfall. Make sure rabbits can’t get above the tree guards to nibble on the bark higher up the tree.
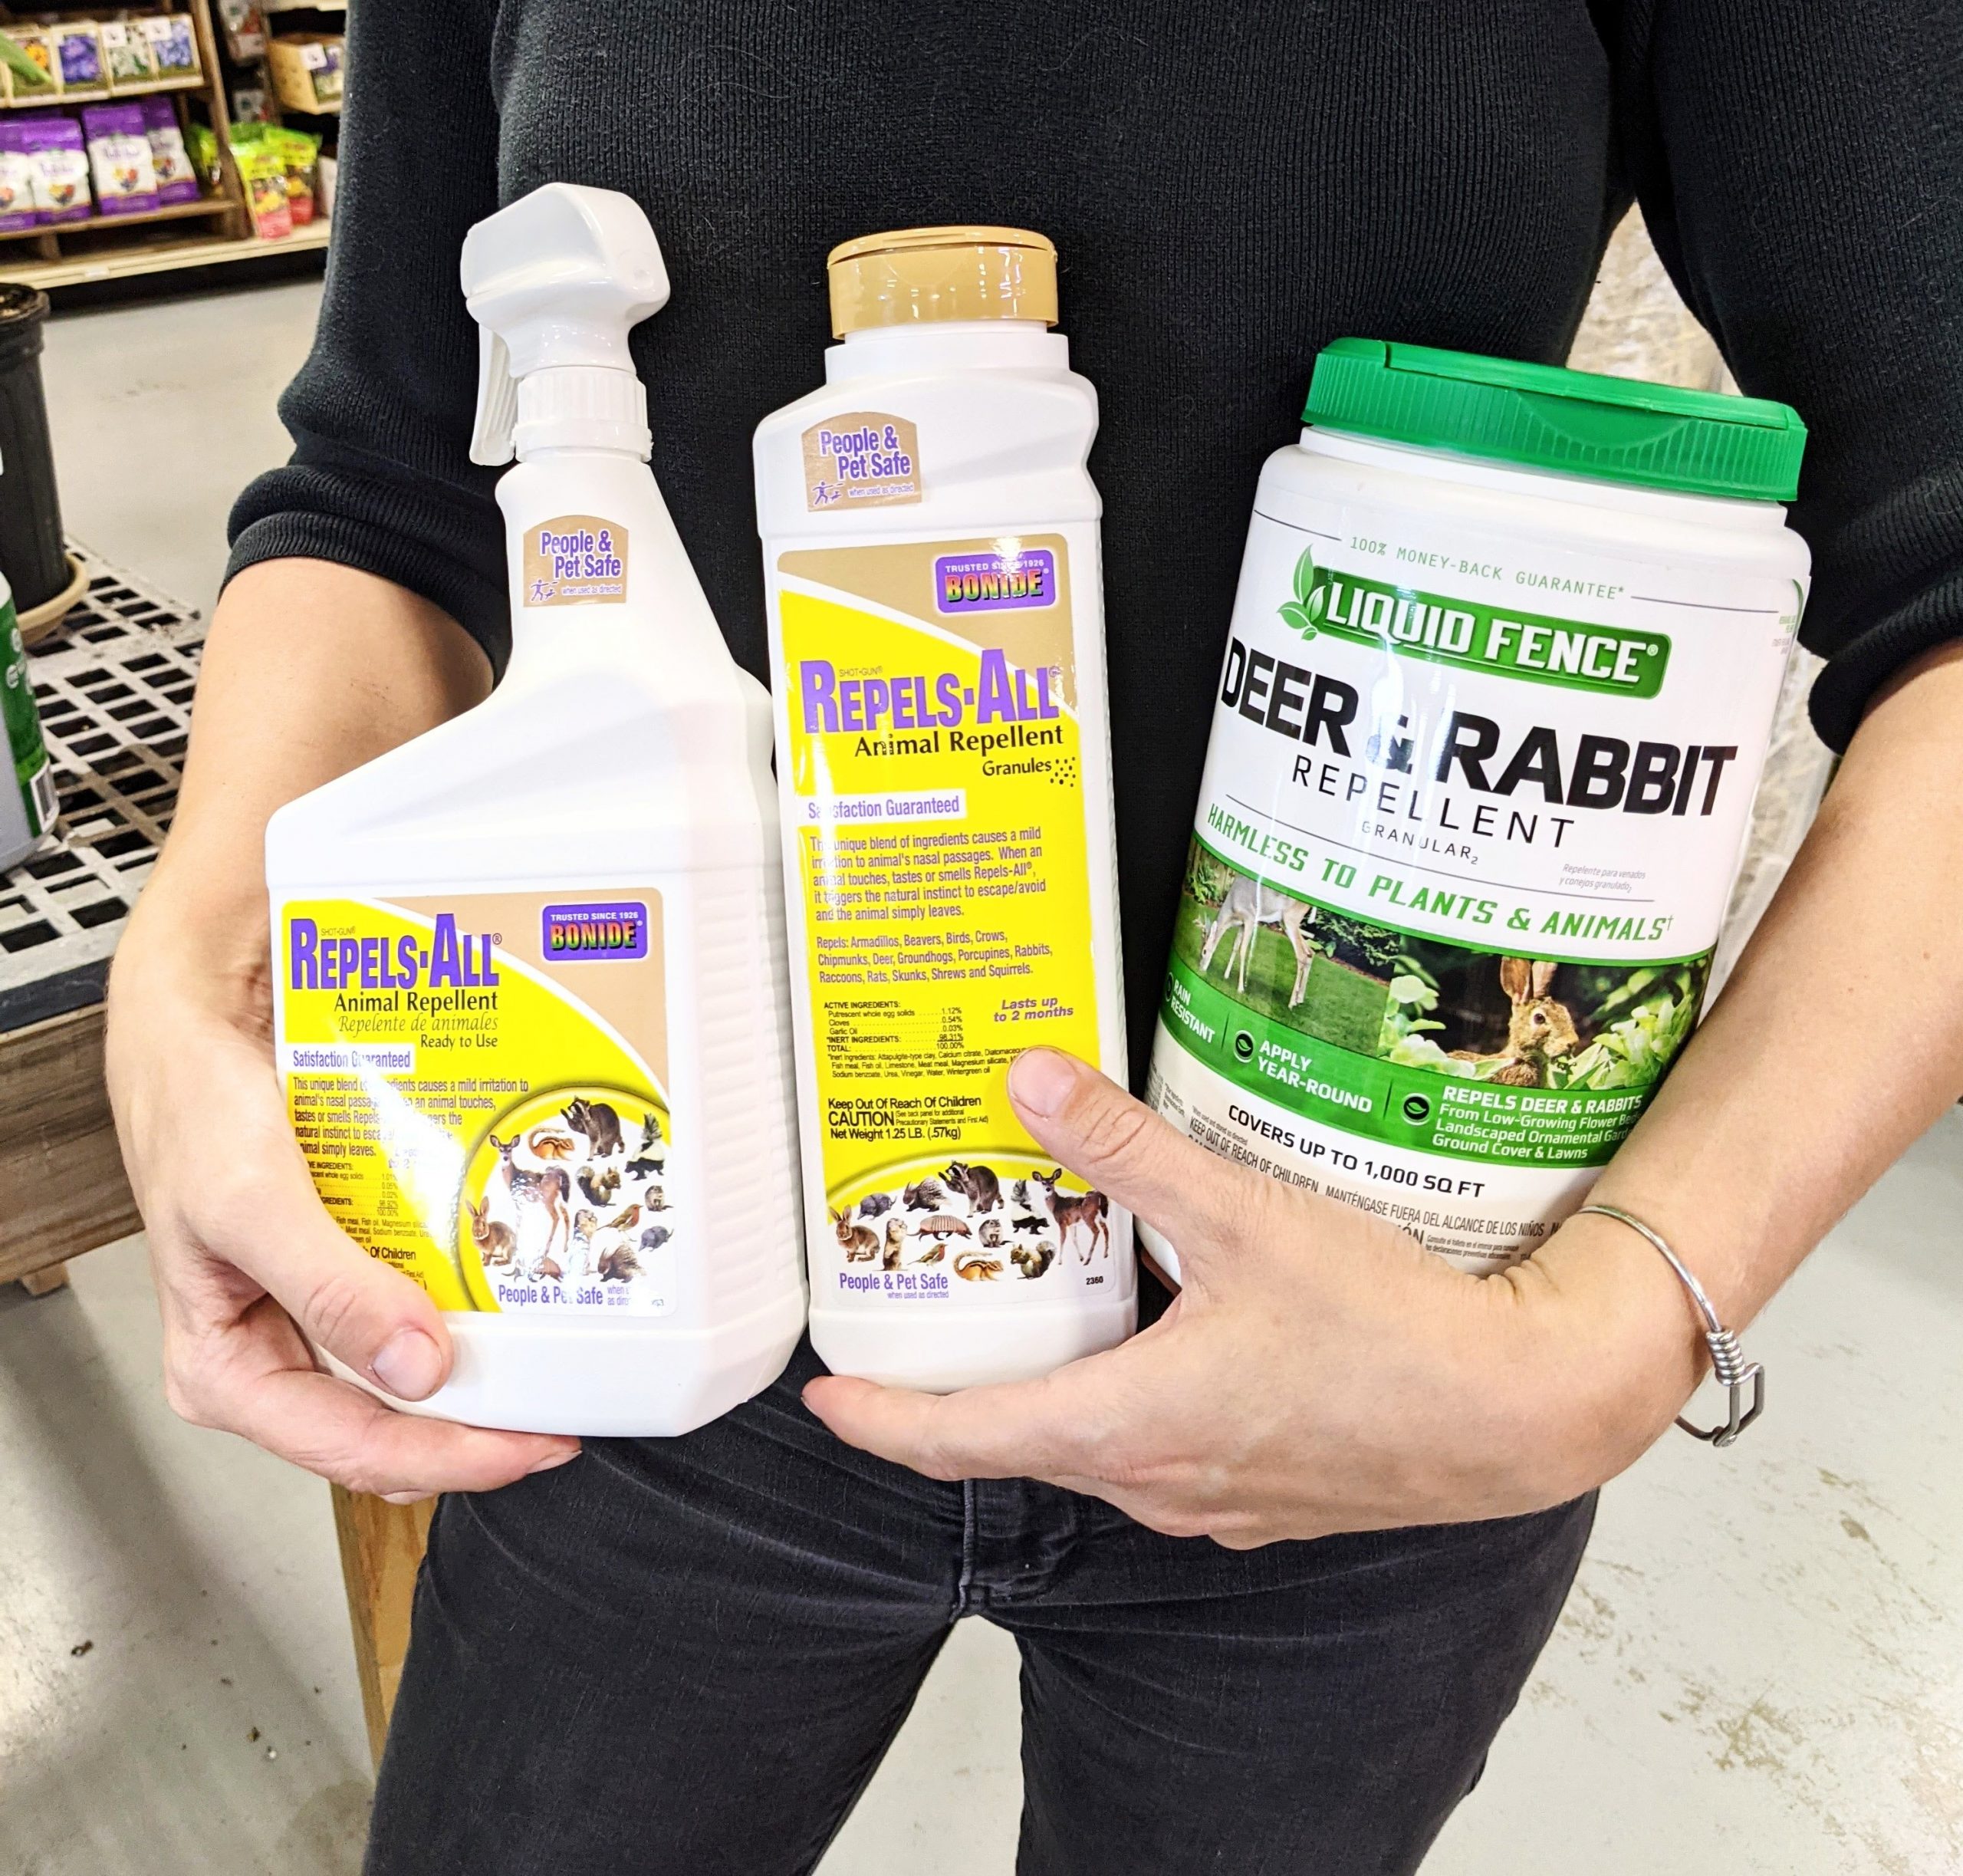
Scented Repellents
Examples of a few animal repellents.
Various sprays and pelleted product contain scents and tastes that the animals are repelled by. The products contain all natural ingredients. They could contain clove oil, cayenne, peppermint oil, spearmint oil, putrefied egg, and possibly others. All of them are safe to use around your home and gardens.
Unfortunately, if animals are hungry enough, they will eat despite any offending smells that typically keep them away.
Animals can also get used to certain stinky smells. Alternate products that contain different ingredients to avoid them becoming used to the smell. Repellents will also need to be reapplied frequently and the frequency depends on the product instructions and weather.
When choosing between a spray or granular we do recommend getting both. Spray works best in the spring-fall and granular does better in the winter. Avoid spraying animal repellents on plants when the temps are below freezing.
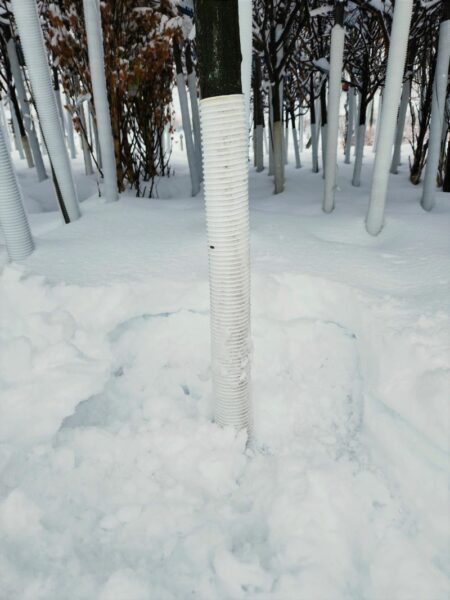
Physical Barriers May Be the Best Bet
Snow dug out around white tree guard to prevent rodents from reaching tree trunk.
Install fencing or netting around your plants to prevent animals from accessing them. You can also use row covers to protect your plants from pests like insects and birds during the growing season.
One common physical protection for trees in the winter is a white plastic tree guard. They have two benefits. One is to prevent sun scald and frost cracks and the other is to protect tree bark from deer and rabbit damage. This is a great physical barrier to use every winter especially on young trees that have thin tender bark. There are also mesh tree guards to put around tree trunks that can be used year-round as they provide adequate air flow around the trunk. Those will not prevent winter weather damage.
If you use physical barriers, the snow may build up around them and allow animals to reach above the barrier. Dig out snow around the barrier if it’s creating a platform for the animals to perch and have a snack. * See image above of snow removed from around the tree trunk.
Covering your evergreens with burlap to prevent sunscald or winter burn during the winter will also help protect your evergreen from animal damage if they can’t dig under the burlap.
What To Do After the Damage Is Done
If a rabbit has eaten the entire cambium layer of a tree or shrub, the plant may be severely damaged and may not survive. However, here are some steps you can take to try to save the shrub:
Prune the damaged area: Use sharp, clean pruning shears to remove any damaged or broken branches. This will help prevent further damage and allow the shrub to redirect its energy to healthier areas.
Water: Give the plant plenty of water to help it recover. Make sure the soil around the plant stays moist but not waterlogged.
Apply fertilizer: Apply a balanced fertilizer to the soil around the plant to provide it with the nutrients it needs to recover.
Protect: Protect the plant from further damage by installing a fence or guard around it, or by using repellent sprays or other deterrents to keep animals away.
Monitor: Keep a close eye on it and watch for signs of recovery. If the plant does not show signs of recovery after several weeks, it may be best to remove it and replace it with a new one.
Remember, the extent of the damage will depend on how much of the cambium layer was eaten and how quickly you take action. In some cases, the tree or shrub may be too damaged to save, and you may need to replace it with a new one.
If animals, like deer, ate some of the plant or chewed it down to a shorter height, the plant will survive if you follow the care steps above.
If you have an animal eat herbaceous perennials as they start growing in the spring, they can recover if they didn’t eat them all the way to the ground. Even if they did, it still may survive if it’s in it’s active growing period with a well-established root system.
Repel Mice and other Rodents from Nesting
You may have a barn, camper, boat, wood piles, sheds, decks etc. that you want to keep little critters like mice away during the winter and summer. There are repellents like Mouse Magic and Rat Magic that are safe to use around children and pets and won’t harm rodents or anything that eats them like some poisons do. They smell nice as well!
If you distribute the packs or granules around the areas that they may want to nest, along wall edges, and where they may enter, it should repel them away from those areas. If you have a lot of rodents, you may need to use more.
Rat Magic has a few more ingredients in it to help repel squirrels and chipmunks as well. Try sprinkling it around your garden if you have them digging up your bulbs or creating holes for their food stash.
Digging Deeper – Late Spring Gardening
“What is one to say about June, the time of perfect young summer, the fulfillment of the promise of the earlier months, and with as yet no sign to remind one that its fresh young beauty will ever fade.”
– Gertrude Jekyll, On Gardening
This post is about late spring/early summer gardening tips and things to look for that may be showing up soon in your garden.
Fertilizer
Don’t forget water soluble fertilizers for container plants. Container plants are in a potting soil that do not contain enough nutrients for all season. Depending on the plant, you will need to add fertilizer to the water or use a slow release fertilize like Osmocote. Follow directions of product and individual plant needs for fertilization. Top dressing containers with compost can also be done to add some nutrients.
Boost for New & Established Plants
Most in-ground soils will benefit from adding organic material like compost and a starting fertilizer like Biotone Starter before planting or Plant Tone after planting. Top dressing the established perennials/shrubs with compost in the spring will give them an extra boost of nutrients. Plants like butterfly bush, delphinium, and clematis like if you put a mound of compost around their root ball.
Watering
Newly planted plants in the ground need deep watering so their roots reach down and establish themselves before winter and reduces stress on the plants. Water deeply a couple times a week. If it rains a little (pay attention to how many inches you get with a rain gauge), you can water around your new plants a little more to get water deep into the soil. It helps you conserve water and save time watering. 1″ of water per week is the recommended amount of water. Pay attention to the soil and if it is wet looking, hold off for another day. Best method is to stick your finger in the soil and if it’s dry a couple inches down, it’s time to water.
Weeding
Remove weeds now while they are small, as they grow quickly. Weeding is easy when soil is damp since it’s easier to pull the whole plant including the roots. Be careful not to walk on soil around your plants to avoid compaction of the soil.
Prevent Fungal Diseases
With rain and warming weather you need to be proactive about fungal diseases. It’s best to prevent it, instead of treating it because once it starts, you can’t get rid of it completely. Treat your plants that have a higher chance of fungal issues with a fungicide before you see signs of it. For example, tomatoes usually get blight so best to treat with Bonide Revitalize or Copper Fungicide before it starts. Make sure to water your plants at the base and water in the morning when possible so the water can dry before it cools off at night. Mulch around your plants as well to help prevent fungus from the soil splashing on your plants.
Insect damage is going to start. Keep an eye on your plants for damage to their foliage. It’s important to remember, a little bit of insect damage is not bad and if you see an insect, it doesn’t mean they are bad. We need to move passed the thought that bugs are icky and nuisance. There are very important insects that are good for the garden and actually improve plant health.
Look for these invasive species instead:
Japanese Beetles: Metallic looking green/bronze beetles flying or munching on landscape plants. They love roses, hollyhock, cherry trees, plums, grapes, blackberries, and linden trees. They can be found snacking on other plants as well. Read more about them here. Incorporate plants that repel Japanese beetles such as catnip, chives, garlic, nasturtium, and white geranium around your susceptible plants. Jumping Worms: Although we haven’t had any recordings of jumping worms in our area, these can be very detrimental to lawns and gardens. There are sightings of these worms in the Minneapolis/St. Paul area so if you are doing any transplanting of plants from that area, purchases of mulches and soils, or any plant swap around our area. Read more about them here so you can know what to do to avoid them or if you see them, how to alert the U of MN Garden Extension. There are no proven ways to eradicate these worms yet.
Getting rid of insects isn’t always easy and great care should be taken if you choose to spray with insecticides, even ones labeled organic. It’s still an insecticide made to kill insects.
*Quick side note about fungus since we have been having cool springs the last couple years. With cool/wet weather you may encounter anthracnose on your plants. If you are seeing brown spots on trees and shrubs early in the spring it may be this.
Shamrock Plants – Luck’o the Irish!
This post is dedicated to the lucky Shamrock Plant! The official plant of St. Patrick’s Day!
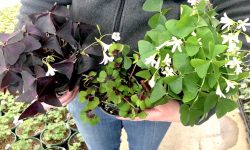
Oxalis Info
You may call them Shamrock plant, but it’s latin name is Oxalis regnellii. These plants are part of the wood sorrel family, Oxalis, and you can even see other cultivars in the wild that are hardy in MN. For example, Oxalis stricta (Yellow Wood Sorrel) is a native wildflower. They look very similar to Trifolium repens L., the White Clover, which is the true shamrock plant. White clover is a beneficial pollinator plant and soil nitrogen fixing plant, as well as ornamental interest with its cute blooms.
The ornamental Shamrock Plant you see blooming in late winter in garden centers is known as the false shamrock because of the similarities of the three heart-shaped leaflets of clover, has small white blooms, and is a perfect plant for St. Patrick’s Day.
Oxalis typically grow to around 6″ tall and can grow quickly. The leaves will open and close according to the light throughout the day, called nyctinastic movement. The leaf colors vary between cultivars and typically the burgundy and green varieties are seen in garden centers.
Another plant you will see often is Oxalis tetraphylla, the Iron Cross, a.k.a as the Good Luck Plant. These plants have four leaflets, that are green with a dark purple blotch at the center. When you can’t find a four-leaf clover in the wild, just get yourself a whole plant with four leaflets!
How to Grow Oxalis
The Oxalis plant grows from rhizomes ( like a bulb ) in the soil. A big difference between these and other houseplants is that it can go dormant in the summer. Other ways that may promote dormancy is if the soil is dried out too many times, the inside temperature gets too cold, or it doesn’t receive enough sunlight. We will cover dormant care after the basic care of oxalis.
Light
After you pick out your Shamrock Plant and bring it home, put it in bright indirect light. It can take full bright light during the winter months in the morning. The bright light will promote more blooms. Speaking of blooms, these plants are known to bloom on and off all winter and one of the easiest plants to bloom! Too dark and your plant may not bloom. It may also go into dormancy.
Watering
The soil of your plant should be lightly moist at all times. You can let the top of the soil dry before watering. Frequency will depend on the humidity of your home, size of the plant, and container it’s in. If you let it go completely dry multiple times it may signal to the plant that it needs to go into dormancy. If you water it again after it goes completely dry and the foliage keeps dying back, let it go into dormancy to avoid rotting the rhizomes.
Dormancy
As stated above, your plant may go into dormancy and is likely at some point during its life. If the rhizomes are not soft and squishy, an indication of over-watering, your plant is just taking a rest. Dormancy can last a few weeks to a few months depending on the environment and variety.
Clean up the dried up foliage and stop watering and put the pot in a cool dark place. The plant will naturally want to come out of dormancy when it’s ready. If it’s been dormant all summer or for a few months, you can bring it out to the light, give it a little water and it should promote new growth! Some people have been successful by letting it go dormant only a few weeks and then bringing it back out to the bright light.
Be sure the soil doesn’t get soggy before the foliage starts popping out because it could rot the rhizomes. You should start seeing new foliage in no time with the sunlight and light watering!
Now that you know more about the Shamrock Plant we hope you give it a try! It’s a fun plant to gift for a little luck during the late winter and for St. Patrick’s Day!
Annual Flower & Plant Care
Annual Flower & Plant Care
July 25, 2019
5:30 pm - 6:30 pm
We're sorry, but all tickets sales have ended because the event is expired.
Event Phone: 507-388-4877
Get detailed care instructions for multiple varieties of annual flowers and plants!