If you are a houseplant parent, it’s inevitable that you will have to deal with insects at some point. It’s important to keep on eye on your houseplants and check the tops and bottoms of leaves when you can to make sure you don’t have an infestation of the common insects found on houseplants and catch them before they get out of control.
Mealy Bugs
Signs of infestation: Plant leaves have fuzzy white spots. Look in the nooks and crannies of leaves and stems as these are their favorite spots. You can see these insects easily.
Step 1: Try to wash the Mealybugs off with a steady stream of water. When they have developed their hard outer shell, this may be difficult. Dip cotton balls in alcohol and remove all visible mealybugs. Use cotton balls to clean the leaves and cotton swabs to clean inside small gaps. Step 2: Repeat the treatment as necessary. This is best for light infestations. Mix 1 cup of rubbing alcohol with 1 quart (32oz) of water. Pour the solution in the spray bottle or straight rubbing alcohol for thicker, hardier leaves. Step 3: Spray the whole plant, not only where mealybugs are visible. Spray leaves well on their tops, under leaves and stems. Repeat the treatment once or twice a week until the issue is gone. Alternative sprays for heavy infestation that may work better: Insecticidal Soap Spray, Neem oil or pyrethrins are other sprays that can be used if alcohol wipe isn’t working and often times a quicker way to kill pests.
Spider Mites
Signs of infestation: Plant leaf gets a “dusty” look in an area. They can be yellow or red in color. Often found on the underside of leaves. Spider mites are seen more often in the winter inside because they prefer dry and warm environments. Raised humidity, keeping away from heat source or locating plants in higher humidity areas helps in prevention but not guaranteed.
Step 1: First dislodge mites with a steady stream of water outside or in the shower. Dip cotton balls and swabs in alcohol and remove all visible mealybugs. Use balls to clean the leaves and swabs to clean inside the gaps. Step 2: Mix 1 cup of rubbing alcohol with 1 quart (32oz) of water. Pour the solution in the spray bottle. Step 3: Spray the leaves wipe off or use a houseplant insecticidal spray. Some people use Neem Oil that can help but an insecticidal spray works the best and will take less time to get rid of them. Step 4: Treat any plants that are nearby as well since they spread easily or at least rinse off their leaves and spray with alcohol. *For any spray you can test a leaf to make sure it doesn’t damage the leaf and avoid spraying the leaf during the sunniest part of day or if the plant gets direct light. Step 5: Repeat the treatment once or twice a week until the issue is gone.
Fungus Gnats
Signs of infestation: Tiny small black bugs are flying around the soil of your plants. They do not feed on your plants but take advantage of moist soil to lay their eggs within the first couple inches of soil.
Step 1: Change your method of watering. Water your plants by setting them in water and they will take up water from below. Leave the top 2 inches of soil dry. Alternatively, only watering your plants once the soil is dry a couple inches down and try to prolong between watering until reduced signs of adult gnats are seen. Step 2: Use BT- bacillus thuringiensis powder. It’s a natural bacteria that produces proteins that kill insects. Sprinkle BT on the top of soil of your plants. It is safe to use around humans and mammals but avoid ingestion of any product. Step 3: Control flying adult population with sticky traps placed around your plants.
If you see signs of any other insects on your leaves, most insects can be controlled with above methods of wiping leaves off, use insecticidal spray and systemic insecticide.
Please note: If you are worried about any spray treatments damaging a specific plant since some may be more sensitive than others, test the spray on one leaf first and look for signs of damage. Never spray in direct sunlight as that can result in sun scald marks due to the moisture on the leaves
If you have any questions about identifying an insect, please email us a picture of your plant if there are signs of insect damage to info@drummersgardencenter.com.
What You Should Know About Raspberry Plants
Summer-bearing raspberries and fall-bearing raspberries are two types of raspberries that differ in their fruiting habits and growth patterns. Here’s some information about each:
Summer-bearing raspberries:
Fruit production: Summer-bearing raspberries, as the name suggests, produce fruit during the summer season. They typically bear fruit on the second-year canes (also called floricanes) that grow during the previous year.
Harvest time: The harvest period for summer-bearing raspberries usually starts in early to mid-summer, depending on the variety and climate. The fruiting season typically lasts for several weeks.
Growth habit: After summer harvest, the second-year canes that produced fruit start to decline and should be pruned down to the ground. New primocanes (first-year canes) then grow during the summer and fall.
Pruning: To maintain healthy growth and encourage fruiting, it’s important to prune summer-bearing raspberries properly. Remove the old canes that have fruited, leaving the new primocanes for the next season’s fruiting.
*IMPORTANT FOR NEW PLANTS* Your new small raspberry plants may look like they died if you only had a cane up that was fruiting the last season. Wait for a bit into spring to see if new canes pop out of the soil before digging them up.
Fall-bearing raspberries (also known as everbearing or autumn-bearing raspberries):
Fruit production: Fall-bearing raspberries have a different fruiting habit. They produce fruit on both the primocanes of the current year and the floricanes of the previous year. This means they can produce two crops in a year.
Harvest time: The first crop of fall-bearing raspberries typically starts ripening in late summer or early fall, like the summer-bearing raspberries. However, the primocanes continue to produce fruit until the first frost, allowing for a second crop in the late fall.
Growth habit: Fall-bearing raspberries grow primocanes throughout the summer and fall, and these canes carry the first and second crops. After the second crop is harvested or frost occurs, the entire plant is pruned to the ground in late winter or early spring.
Pruning: Since fall-bearing raspberries bear fruit on both primocanes and floricanes, the pruning process is slightly different. In late winter or early spring, remove all canes that have fruited the previous year, leaving the new primocanes for the upcoming season’s fruiting. This promotes better airflow and prevents diseases.
Both summer-bearing and fall-bearing raspberries require well-drained soil, full sun exposure, regular watering, and adequate spacing for optimal growth. They are generally easy to grow and can provide a delicious harvest of sweet and tangy berries. The choice between the two types depends on your preference for a single abundant harvest (summer-bearing) or two smaller crops (fall-bearing) throughout the growing season.
Raspberry Management Information (pruning and training raspberry plants)
In this Elements of Landscape Design Series post we are focusing on landscape design using evergreens as a sustainable plant that is one of the most versatile plant groups.
Partnering evergreens with shrubs and perennials
Evergreens create structure, pretty living privacy screens, backdrops, form, texture and rhythm. A single evergreen can be a focal point or a complimentary backdrop to other plants, garden decorations and resting areas.
Architectural simplicity, which is very popular right now, can be easily created with a row of evergreens with the pop of colors of blooming shrubs in front. Add another layer in front of those shrubs with a repetition of one or two perennials and you can have a three-layer balanced look. Have even more fun with the spaces in-between the perennials with annuals so you can have flexibility with color schemes year-after-year. A gradual transition in heights creates a pleasing effect compared to an abrupt tall and then short plant in front. Of course, if you like contrast that may be exactly what you are going for.
Evergreens can make an intentional space for any combination of plants. The use of an evergreen that can easily be shaped, like boxwood, can create borders and frames that create rhythm and support other plants. Plant herbs, perennials, flowering annuals, grasses, and bulbs to create moving swaths of color among resilient and structured evergreens.
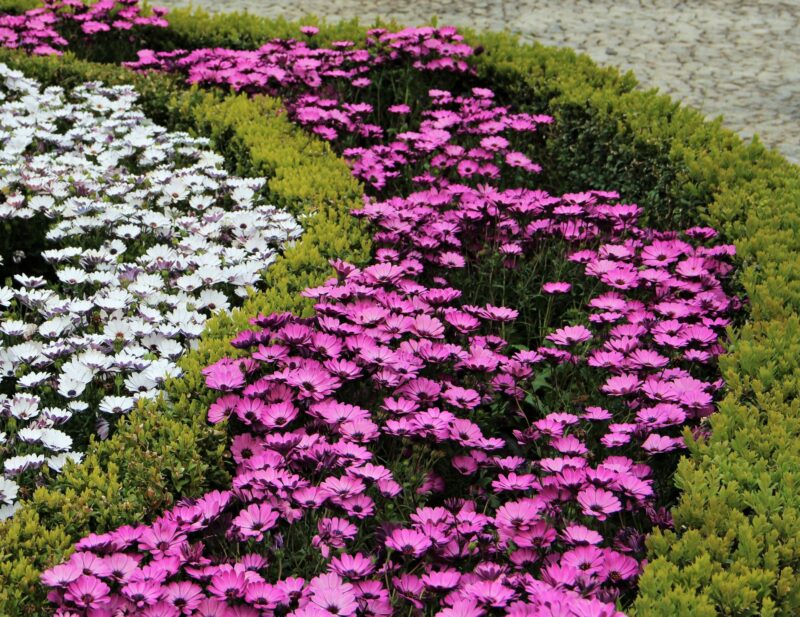
A sculptural use of an evergreen is to use one as accent plant and focal point to create a special moment where your eyes stop and rest.
With all their different uses and bold structure, no wonder they’re commonly called the backbone of a landscape.
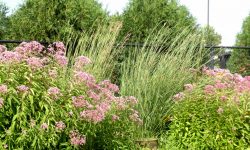
First image : Use evergreens as accent plants in a naturalist garden. Photo credit: Canva
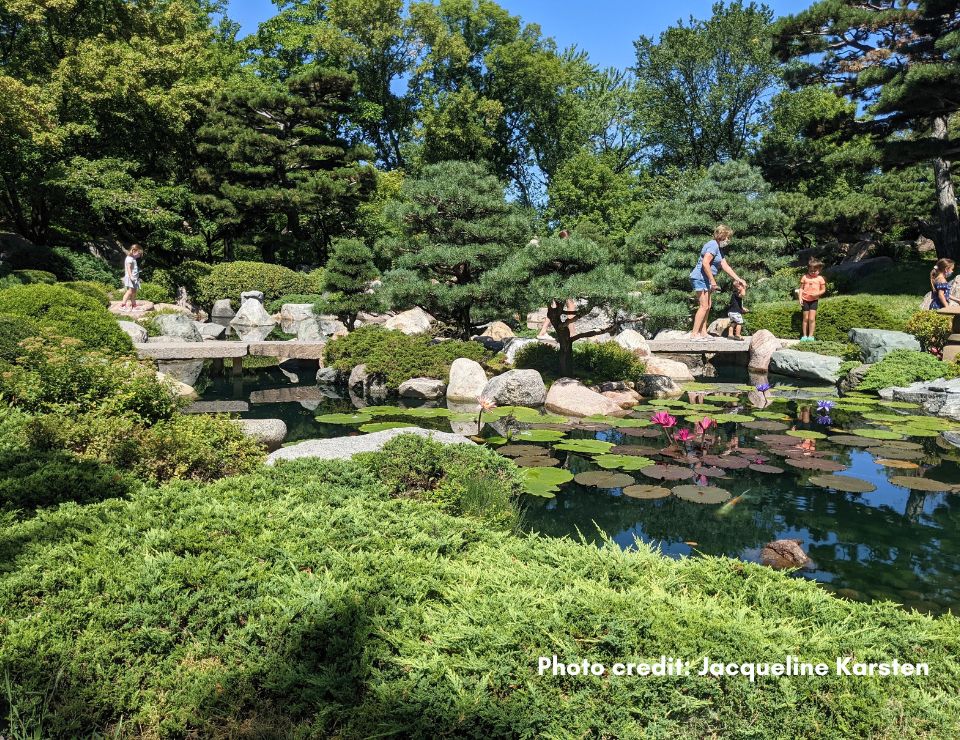
Second image: Use repetition of an evergreen as a frame to other plants. Photo credit: Canva
Impact of evergreens on their own
Evergreens will also create a changing and diverse looking landscape on their own.
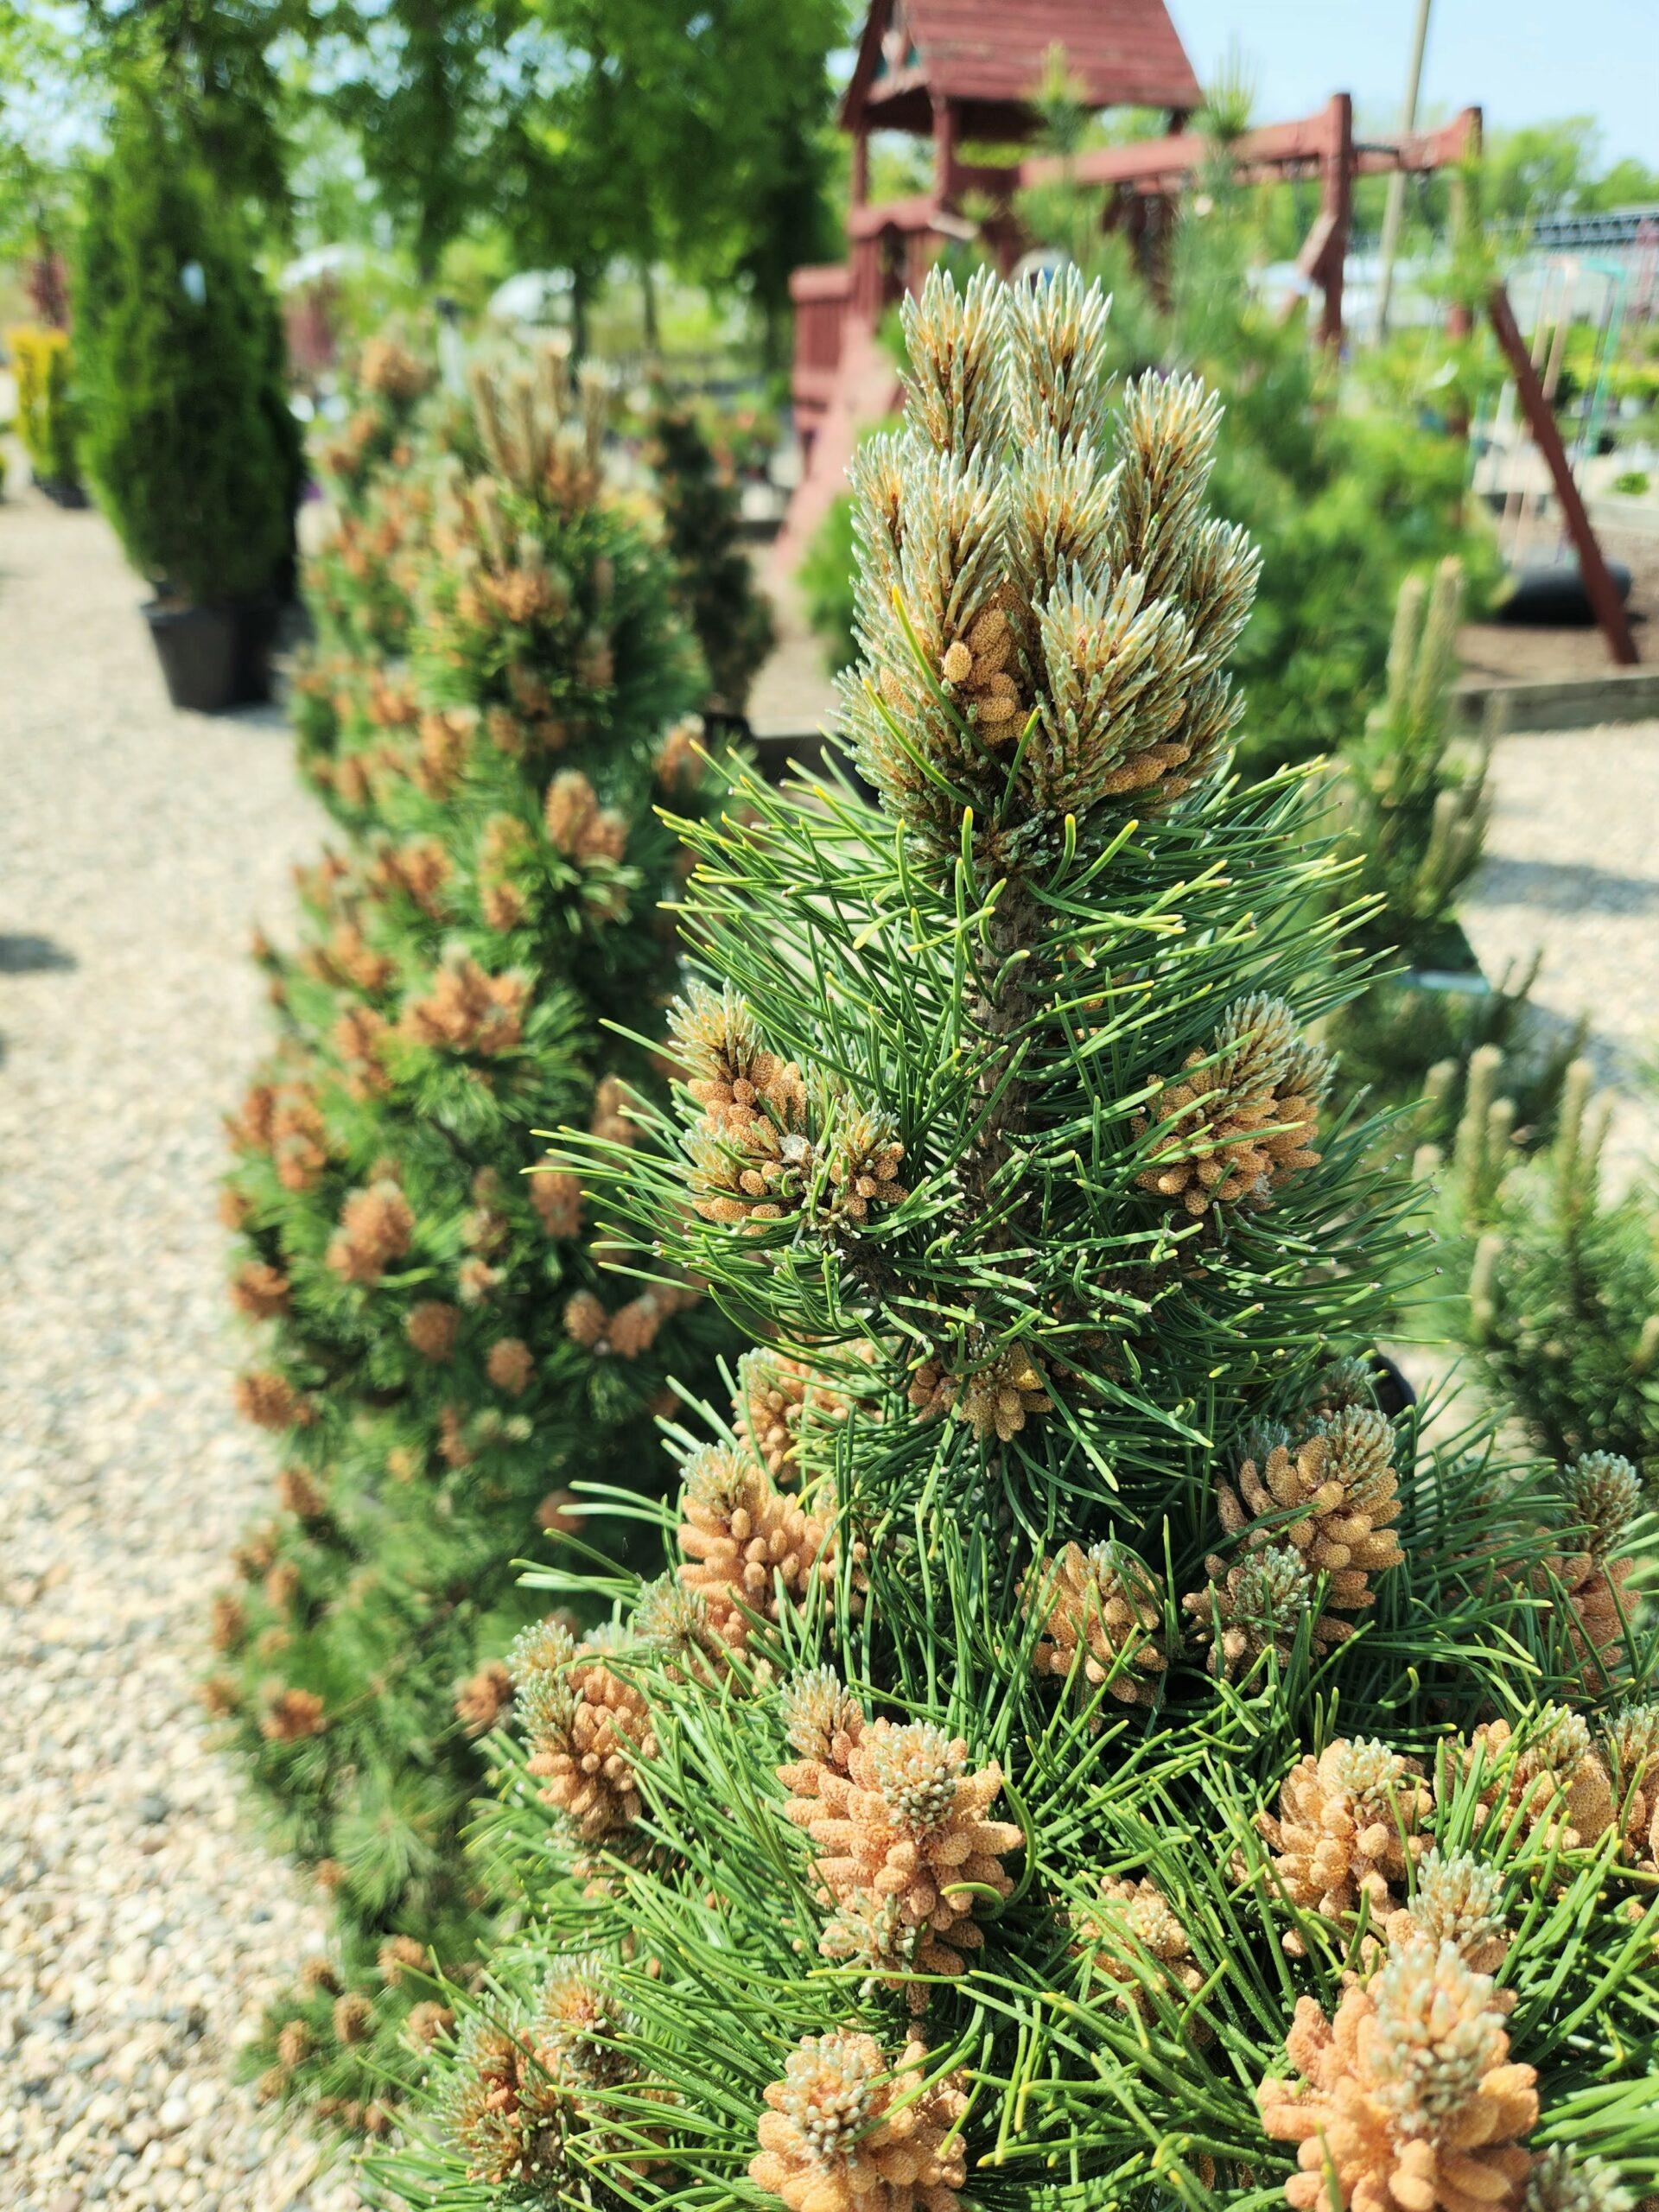
The lovely lime green new spruce growth ( Image 1 ) and tan colored pine cones ( Image 3) show how an evergreen can change color and texture during its lifetime and season so read the tags and look at pictures to be aware of how your evergreen may look throughout the seasons.
Foliage of particular evergreens can change color during the winter months and will create pretty privacy fences all year. Layering tall, medium, and spreading ground cover evergreens with different textures and color can also create a big impact with a verdant color palette. ( Image 2 ).
Add flowing tall grasses and deciduous trees to create softer and billowing texture behind or intermixed with evergreens.
Image 1: Rainbow’s End Alberta Spruce new lime-green spring growth.Image 2: Evergreens used as groundcover, hedging, and accent plants.
What to consider when choosing evergreens
1. Color and textures of needles, leaves, nuts and cones. This includes becoming familiar with how they shed heavy loads of old foliage. Pine, arborvitae, spruce, and cypress can have brief periods of brown foliage on the inner mature foliage before they drop. This is a natural process and it allows them to grow new green growth the next year.
Image 3: Dolly’s Choice Mugo Pine with new pine cones.
2. Sunlight requirements. Full sun: 6+ hours. Part sun: 4-6 hours. Shade: Less than 4 hours.
3. Size and shape at maturity. Ex: Large pyramid-shaped pine varieties can lose their bottom branches when they get large and create a space underneath.
4. The soil type you are planting in. Ex: clay, sandy, loamy, holds water, well-draining, etc.
5. Location you want to plant. Ex: open south side or north areas that get a lot of cold north wind will be harsher winter conditions so hardier evergreens may be needed.
6. Purpose of the evergreen. Ex: pretty living fence, wind block, shade, backdrop for other plants, home for wildlife, accent plant, hedge, or add texture and color for the winter. Evergreens have so many uses!
Think about creating a balanced landscape when shopping for new plants and when walking around your gardens. When you’re looking at plants that you are drawn to, like the blooming hydrangea, dark bronze-leaf ninebark, towering coneflowers, or the low-lying annual which blooms all season; think about how an evergreen will be the strength those plants need to highlight their stunning colors and textures.
Spring Blooming Shrubs
These shrubs bloom during the early growing season and are great design backbones to any garden or landscape. Add these spring blooming shrubs behind a summer blooming garden to have sequential flowering.
All blooming shrubs require part-sun to full-sun for best bloom production.
When you live in a state that has snow and ice it’s inevitable that part of the yard will be exposed to deicing salts when the snow melts. As the snow melts the salt is incorporated into the ground water that the plants use when the ground thaws. The accumulation of salt will inhibit the plants ability to uptake nutrients and eventually lead to death.
Deicing Salt Plant Damage
There are a few signs that your plants have been damaged by salt. You may see brown needles on evergreens, grass along a road or sidewalk that isn’t growing back and stays brown, and stunted growth or death of plants that were planted near the salted area. Salt buildup can happen over multiple years so death may not be within one winter season.
Salt Tolerant Plants
Switching the type of deicing salt to something that is plant safe can be extremely helpful if you want to plant whatever you want around an area that may be exposed to salt. Plant safe ice melt alternatives include calcium chloride, magnesium chloride, or calcium magnesium acetate instead of rock salt or sodium chloride.
If switching your deicer isn’t an option, here is a list of plants that are salt tolerant around your driveways, sidewalks and roadsides. Please keep in mind that if there is an abundance of salt, plants still may exhibit signs of stress even if it’s labeled as a salt tolerant plant.
Grasses: Prairie Dropseed – Native to MN Big Bluestem – Native to MN Blue Fescue Northern Sea Oats Switch Grass Maiden Grass Karl Foerster Reed Grass – Very Tolerant Fountain Grass – Very Tolerant
Salt Tolerant Shrubs
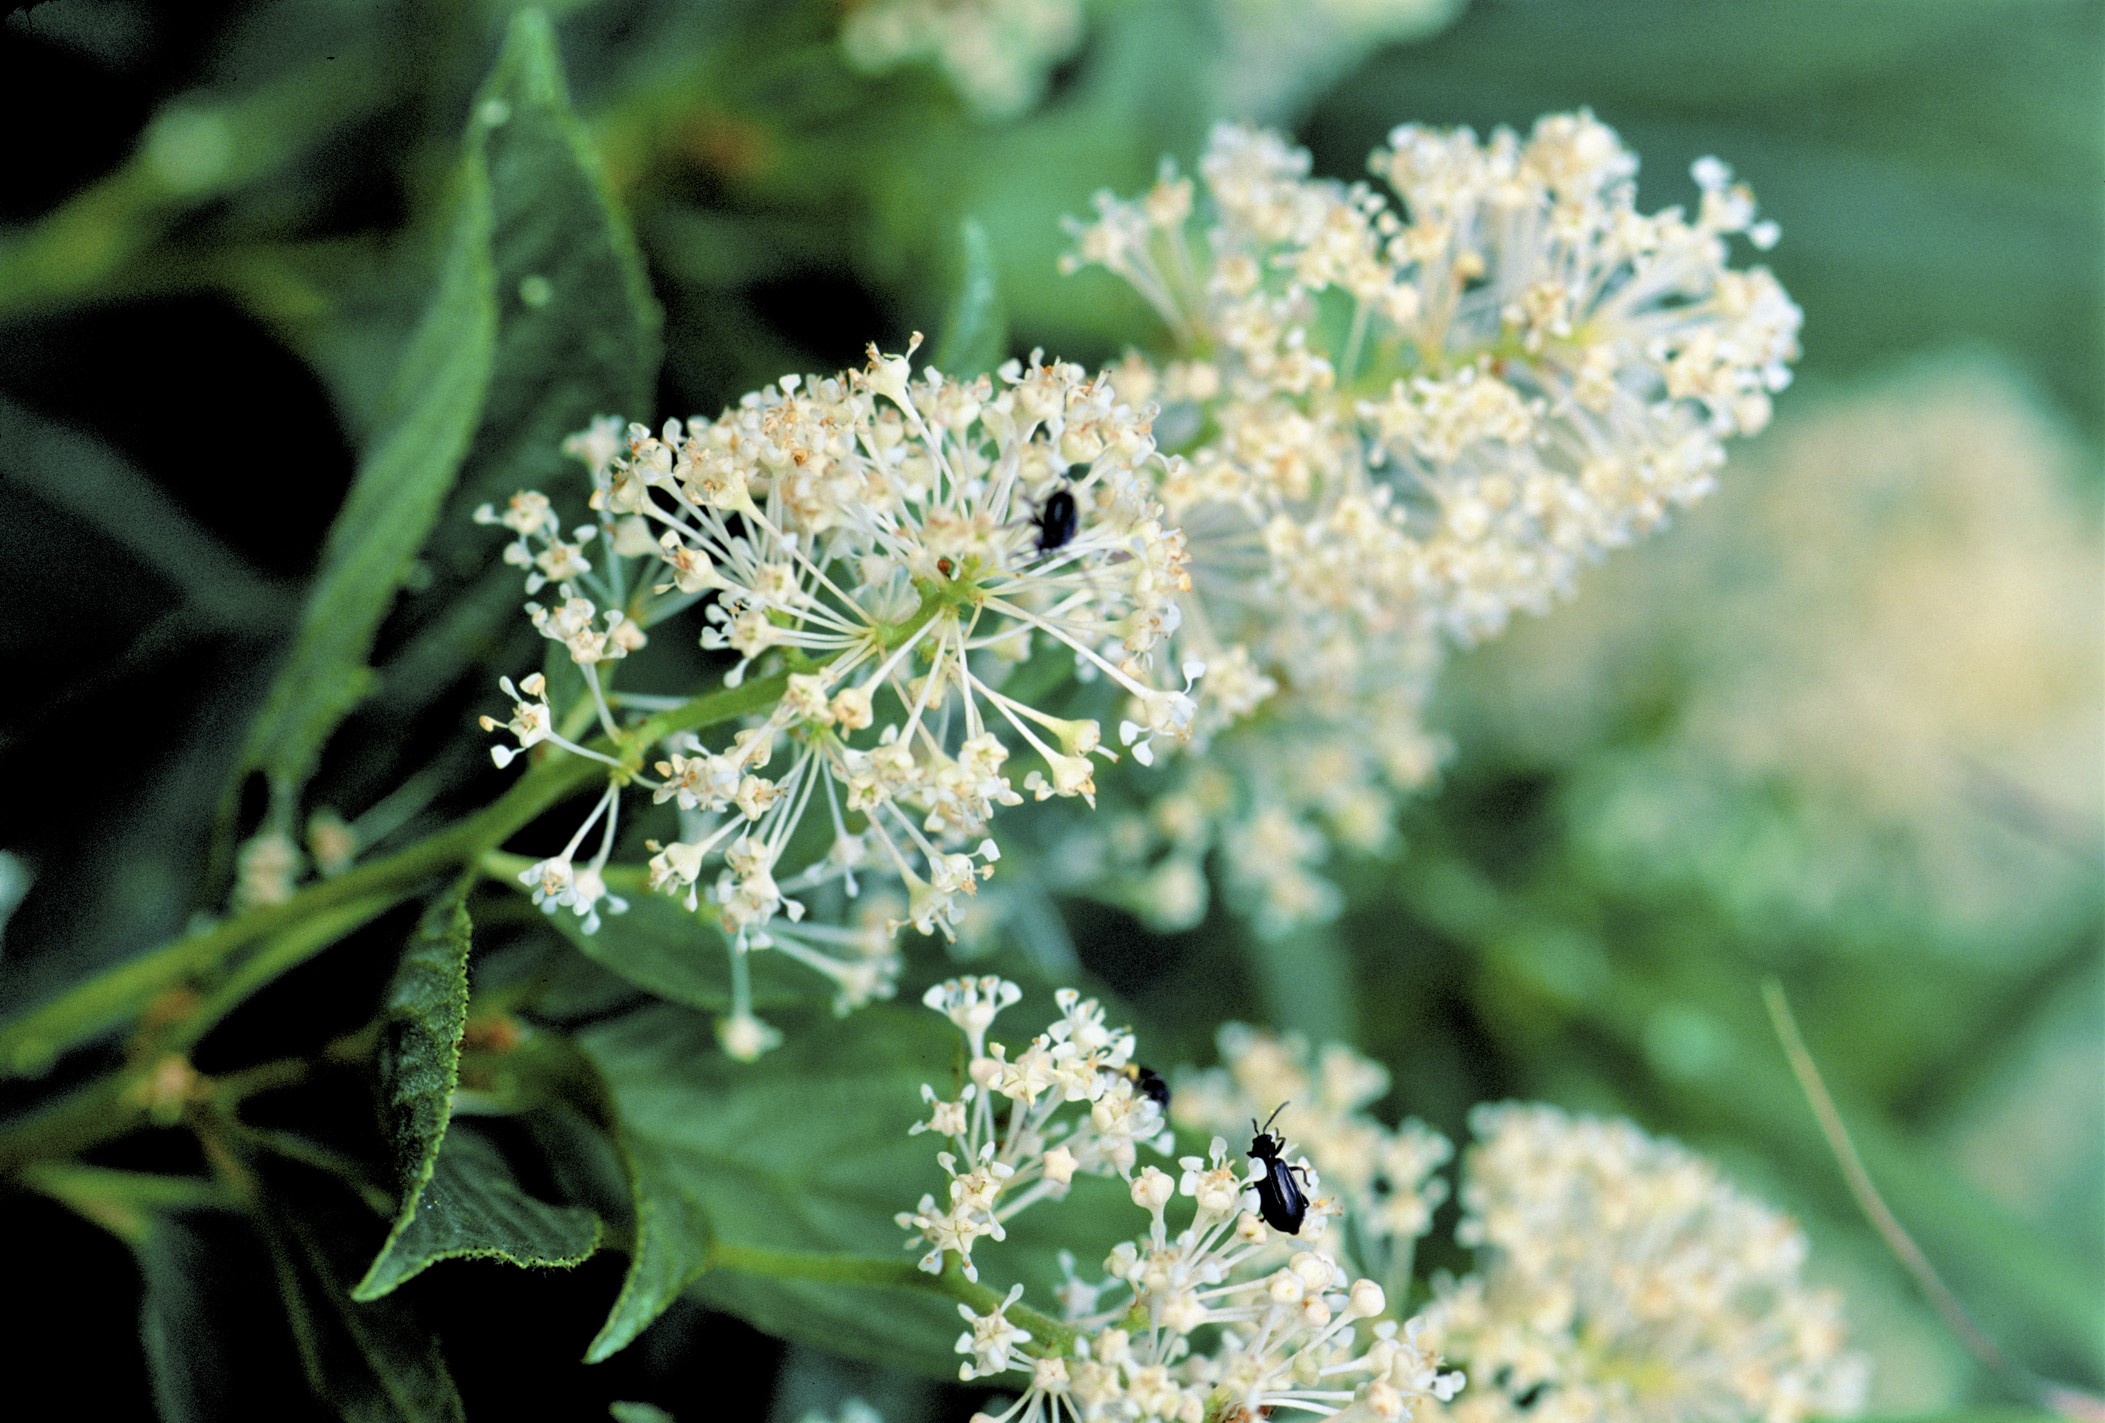
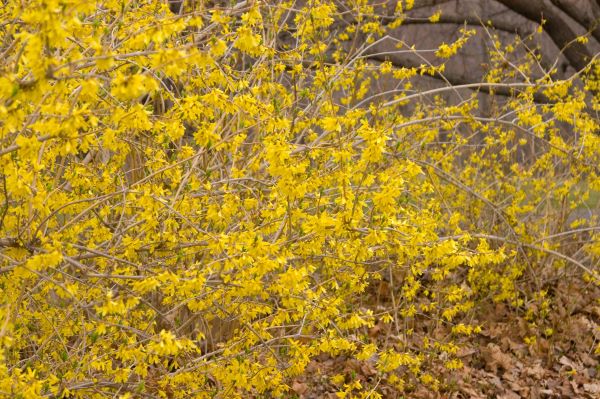
Chokeberry Barberry Forsythia Mockorange Potentilla Arrowwood Hydrangea Spirea Lilac New Jersey Tea – Native MN shrub
Juglone Toxicity Info – Resistant and Susceptible Plants
Black walnut (Juglans nigra) and Butternut trees and closely-related species produce a toxic substance, Juglone, which can be harmful to plants growing in areas nearby the trees or their root systems which can be 50’-60’ radius for large trees. Juglone toxicity inhibits respiration in susceptible plants and the effects can include stunted, retarded or deformed growth or death.
The black walnut tree is the most commonly planted tree in the north. At maturity it reaches 80’tall and 50’ wide. Butternut trees also makes a good shade tree and is grown for its edible nuts. At maturity the butternut reaches 65’ in height and also becomes 50’ wide.
Juglone Damage
Damage due to Juglone depends on how close the susceptible plant is growing to roots of the trees. Root proximity appears to be necessary before harm is done to a susceptible plant. It is also possible toxicity could occur from leaf decay, from nut husks and from moisture dripping through the leaves of the trees. The quantity of Juglone produced by these methods is small and less damaging than root contact.
Control Juglone Damage
The best way to control any damage done by Juglone is to avoid planting susceptible plants near Black Walnut trees and closely related species. With the lack of a chemical control for Juglone, using resistant plants in the landscape and keeping susceptible plants with good resistance from the leaf canopy of these trees is the best physical control.
Tree removal is not recommended because removing the roots is complex and any roots remaining in the soil can still give off Juglone until they decay completely which can take several years. Practicing good sanitation of leaves and nut husks is advised. Rake up the leaves and don’t use them in the compost pile. Avoid using the wood or bark as mulch.
Note about Juglone Plant Lists
The resistant and susceptible plants listed here are generally common plants and both lists are not complete as research continues. Often research is based on observations of what plants do best and what plants do not thrive in the presence of Juglone-producing trees. Get the full list of plants resistant or tolerant to Juglone on this downloadable PDF from K-State Research and Extension.
Plants Susceptible to Juglone toxicity
Trees
Alder Chokeberry White Birch Hackberry Linden (Basswood) Magnolia Pine Rhododendron Silver Maple
Be ahead of the spring and get indoor blooms in late winter!
Forcing fall bulbs to bloom indoors is a simple way to enjoy color before there is any outside. Watch our YouTube video to get visual examples and quick instructions.
First time forcing bulbs? Try Daffodils or Hyacinth first.
Bulbs that work best with the water-growing method: Hyacinth Daffodils (Narcissus) Tulips *smaller bulbs can work when set on top of pebbles.
Required Chill Period
Fall bulbs need to go through a chill period before they bloom. All bulbs should be in their chill period by the end of October. It’s ok if you’re late, it’ll be later than Jan/Feb that you’ll get blooms.
You can chill them in any area that stays between 35F-45F, as long as it doesn’t go below freezing or above 50F. The fridge is the best way to get consistent temperature. If you have a cold storage room or an unheated garage that doesn’t get below freezing, that will work as well.
WARNING: If chilling in a fridge, do not store them with fresh fruits. Ethylene gas that is emitted from fruit will affect flower formation.
At the end of the chill period, you may start seeing foliage and root growth.
Tips for Growing Bulbs in Water
There are specific vases, called Bulb Vases that have an area for the bulb to rest without having to be submerged in water. These are a beautiful addition to table decor. You chill your bulb for the specified period they need and then put them in the vase. It’s that simple and a great way to play around with different varieties of bulbs.
You can also set bulbs on top of pebbles or rocks in any glass container and keep the water level up to the base of the bulb.
Make sure the bulbs are not submerged further up than the root area. Even if the water is slightly below the base of the bulb, the roots will start growing after their chilling period.
After you place your bulb in the vase or glass container, set it in bright indirect light, in the coolest room you have. Once the foliage and bud starts forming you can move it to brighter light.
Once they start blooming, you can set them anywhere you want to enjoy them.
Tips for Growing Bulbs in Soil
You can chill your bulbs in paper bags first and then pot them up or plant them in pots and then chill, if you have the space.
The potting soil needs to have excellent drainage and choose a pot with a drain hole. Plant your bulbs in a 6 inch deep pot. You can plant in shallower pots but may require a bit more watering.
Pots labeled as “Bulb Pots” are shallow and great for smaller bulbs.
The diameter will determine how many bulbs you can plant together. “One large bulb may be placed in each 4-inch pot. Use six tulips, three hyacinths, five daffodils or 15 crocuses (or other small bulbs) in each 6-inch pot.” – Missouri Extension Office
Add enough soil mixture to fill the pot so the bulbs are placed as follows:
Hyacinths and tulips: Allow only the tip of the bulb to show above the soil line. Daffodils: Plant deep enough that one-half of the bulb shows above the soil line. Small bulbs (crocus, snowdrop, grape hyacinth, etc.): Plant so they will be about one inch below the soil line.
You can plant multiple varieties together as long as they get their required chill period. Purchase bulb varieties that have similar bloom times or plant all of the same variety if you want to have uniform flowering.
Keep the soil slightly moist but not soggy, even during the chill period.
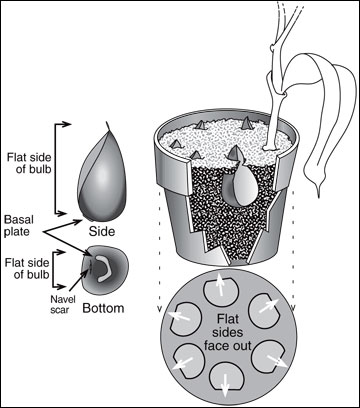
Tulip tip: When planting tulips, face the flat side of the bulb outwards. This is where the main leaf is grown and it will create a uniform look.
Illustration of a pot planted with Tulip bulbs. The bulbs flat sides are facing outward. Courtesy of Missouri Extension.
Signs That Your Bulbs Are Ready After A Chilling Period
If they are planted in a pot, the roots could shoot out the bottom of the drain hole and the foliage may start growing. They are ready to come out of dormancy!
Then, place the pot in the coolest room you have with bright sun. This is mimicking the cool spring air while the buds are forming.
Once they are blooming, put them anywhere you want in your home to enjoy. If it’s warmer and sunny, the bloom time may be reduced.
What To Do When The Blooms Fade
Keep the bulbs in bright sun so their foliage can take in energy. Once the ground is workable you can plant them outside to their required depth. This way they can continue growing until their foliage dies back a few weeks later. Keep the bulbs in the ground and they may bloom next spring for you. Give them a dose of Bulb Tone to help them take in energy for blooms the next year.
If you don’t have a yard, try planting them in outdoor pots in full sun! Once the foliage dies back try planting annuals around them to utilize the soil space. Once fall hits you can take them out or leave in the pot and simulate the chill period again as described above and try to get them to bloom.
RELAXATION TIME
It’s end of summer relaxation time and to treat yourself before winter comes!
Redecorate a space to make it feel cozy and ready for extended time inside.
What to plant for a pretty spring yard
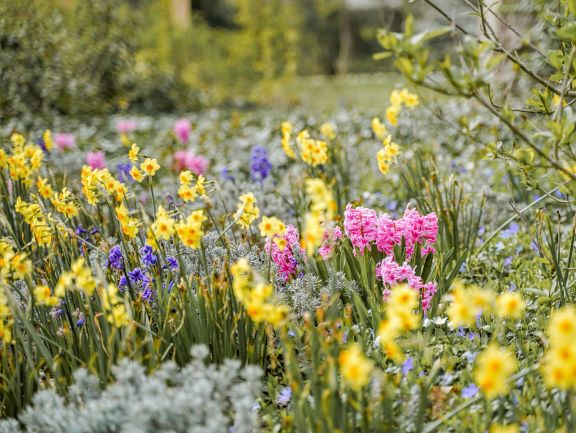
Planting spring flowering plants in the fall creates an even prettier spring yard! Flowering spring bulbs can even show their blooms when snow is melting on the ground. Here is a list of plants that give us a show early-to-late spring. From spring through fall, anytime you add plants, you’ll be happy you did because they will be enjoyed for years to come.
Spring Blooming Bulbs
These bulbs are available in late summer for you to plant in the fall when temperatures start dropping. Bulbs are one of the more popular plants because of how easy they are to plant. Fall planted bulbs need the cold dormancy period of winter before they bloom in the spring. Plant your bulbs around your late sprouting perennials to fill in the area before the foliage grows in to create a succession of blooms. If you have deer around, look for deer resistant logos on the bulb boxes.
GALLERY OF FALL PLANTED BULBS FOR EARLY SPRING BLOOMS
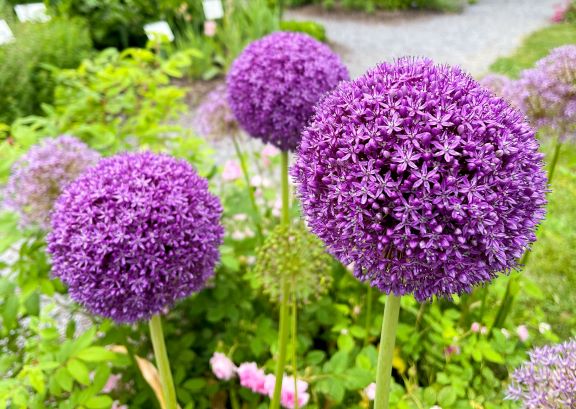
Allium – Purple small or large round blooms
Crocus – Bloom colors include purple, yellow, or white
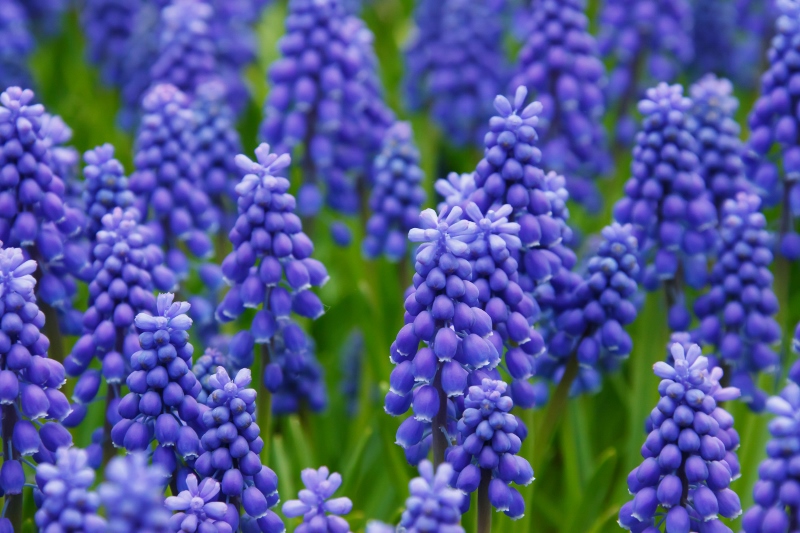
Grape Hyacinth – Purple Blooms
Yellow Daffodils in early spring before perennial plants emerge.
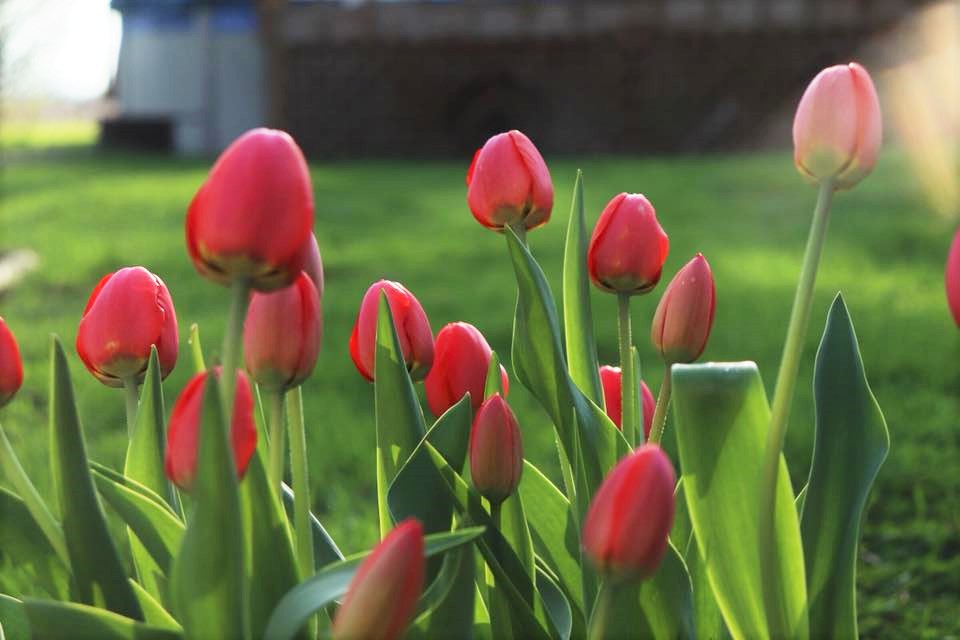
Tulips – Many color varieties of solid or multi-colored!
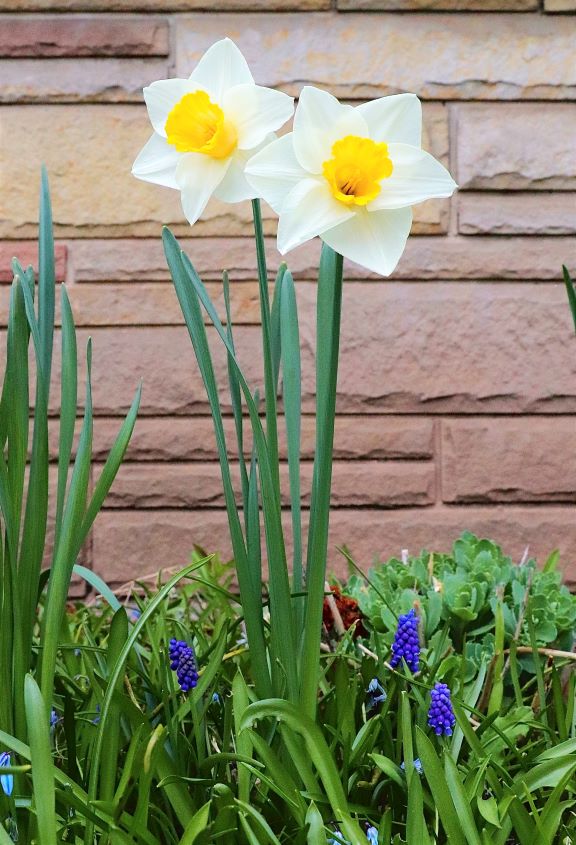
White Daffodils with Grape Hyacinth
Yellow Daffodils with pink and purple Hyacinth
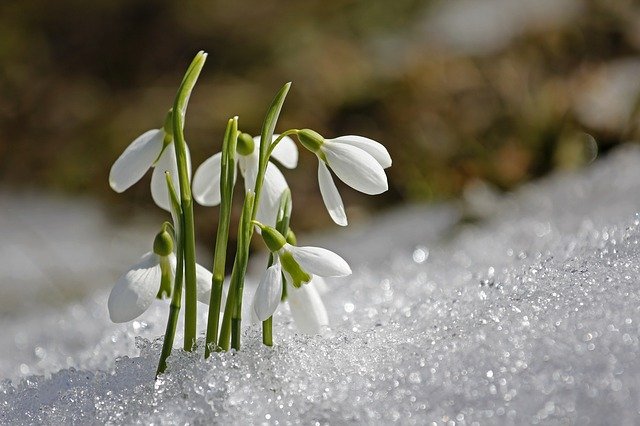
Snowdrop – Blooms are bright white
Perennials
Perennials are herbaceous, which means their foliage dies down each fall and will regrow in the spring. These highlighted perennial varieties come up earlier in the spring and create an early show of color!
GALLERY OF PERENNIALS FOR SPRING BLOOMS:
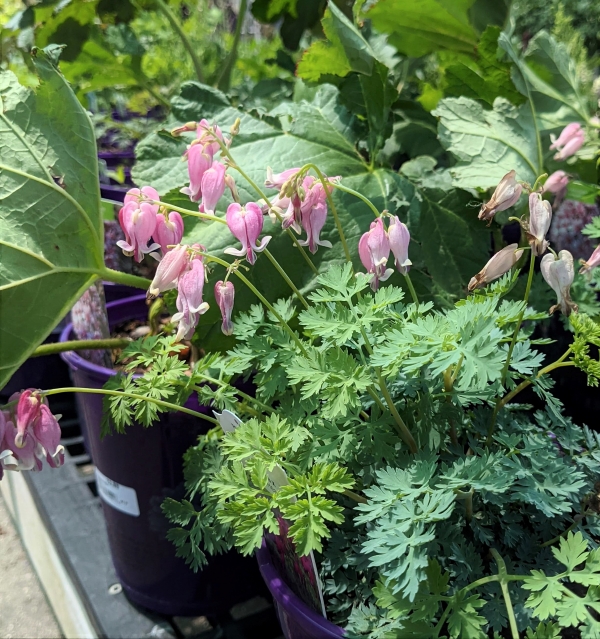
Bleeding Hearts – Variety bloom colors include pink, pink and white, white, or red.
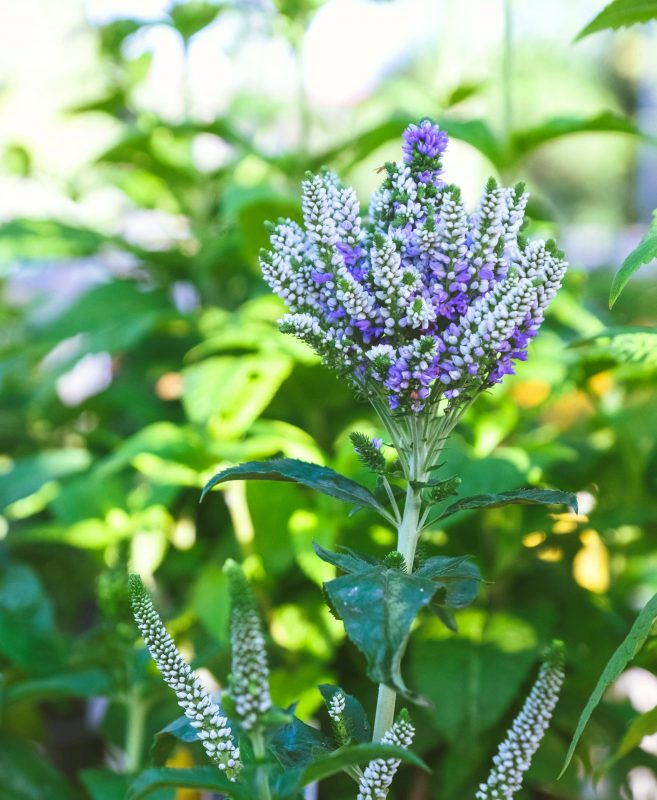
Veronica – Variety bloom colors include blue, purple, white, or pink. Shown: Blue Bomb
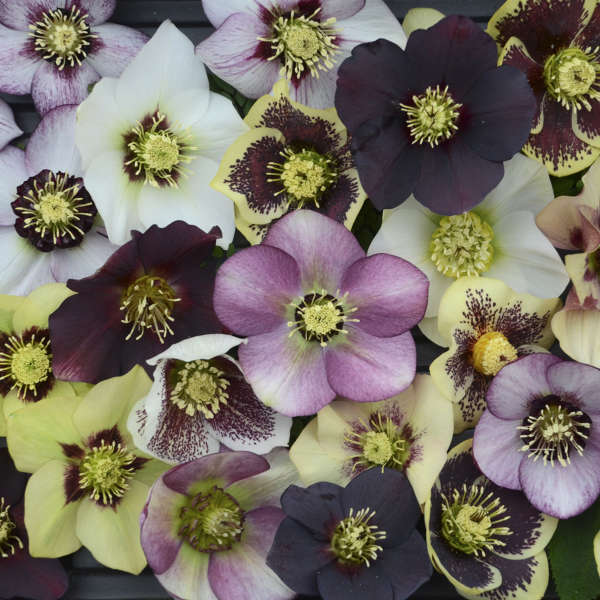
Hellebores are the harbingers of spring. Hellebores – Variety bloom colors include white, pink, purple, or yellow.Shown: Honeymoon Series Mix. Credit: Walters Gardens
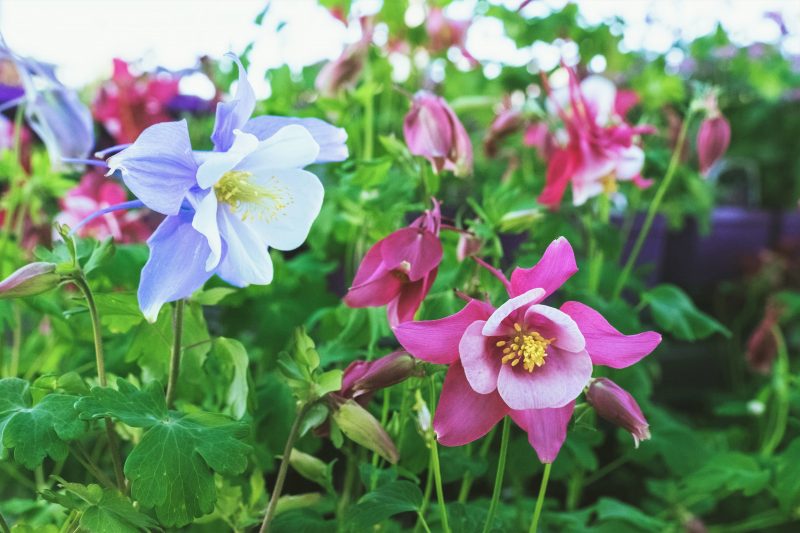
Columbine – Variety bloom colors include pink, red, blue, or purple.
Bleeding Hearts – Variety bloom colors include pink, pink and white, white, or red.
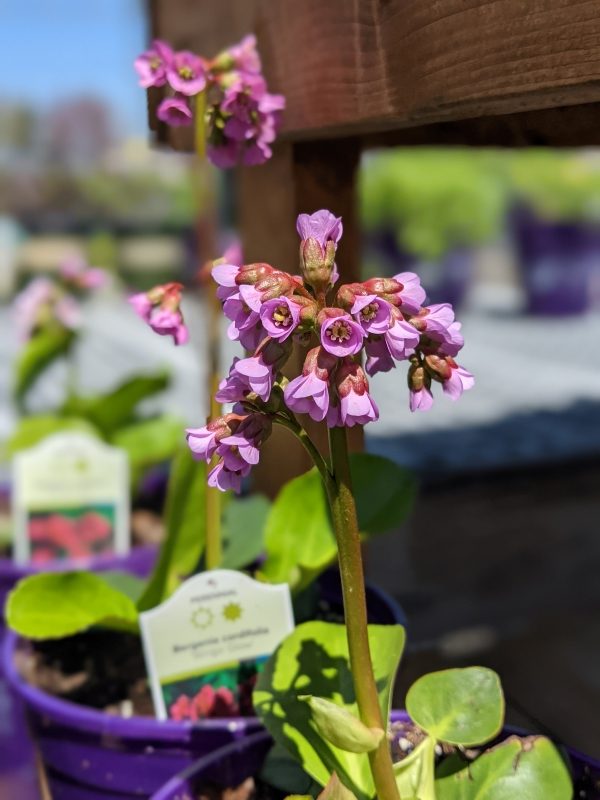
Pigsqueak a.k.a Bergenia – Variety bloom colors vary from white to dark pink. Shown: Winter Glow
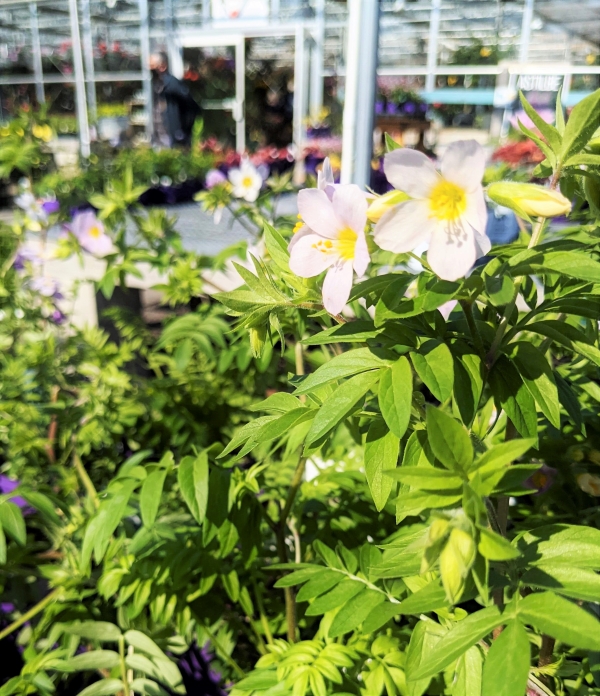
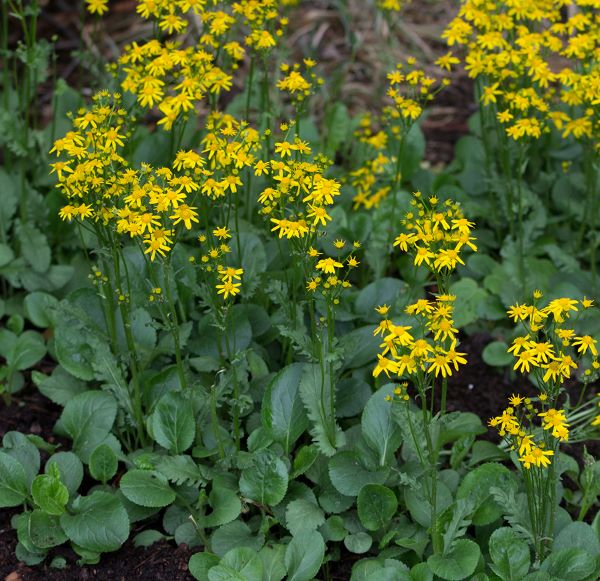
Jacob’s Ladder- Bloom color is white with yellow center.
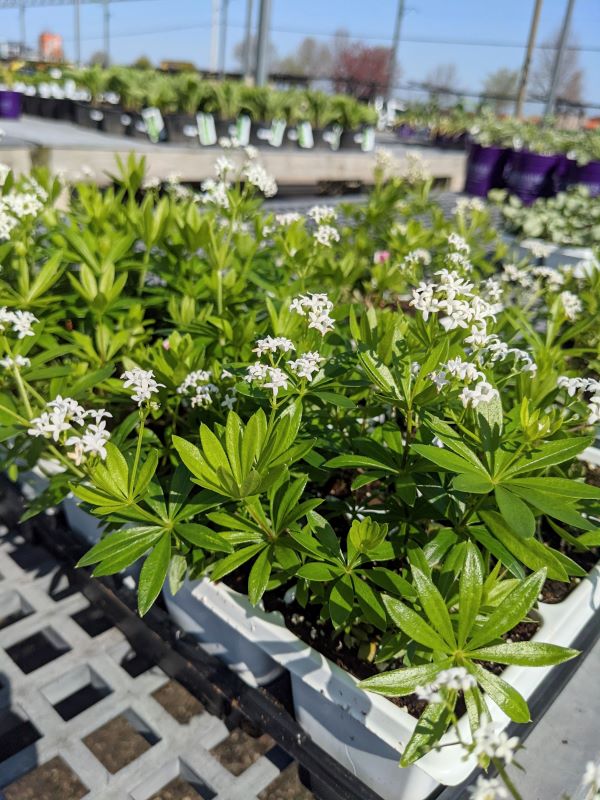
Sweet Woodruff- Small white blooms. Great ground cover.
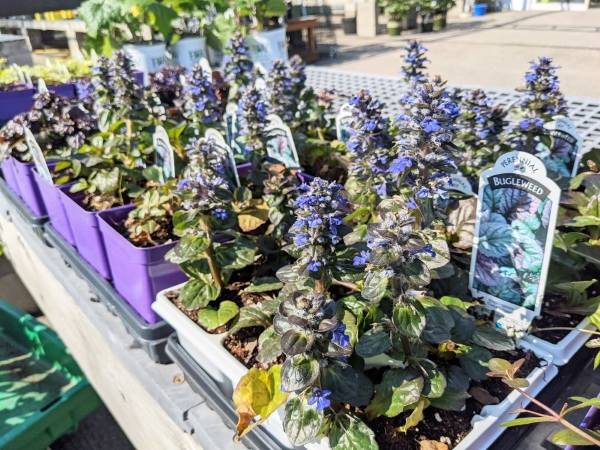
Bugleweed – Small bluish purple flowers. Great ground cover.
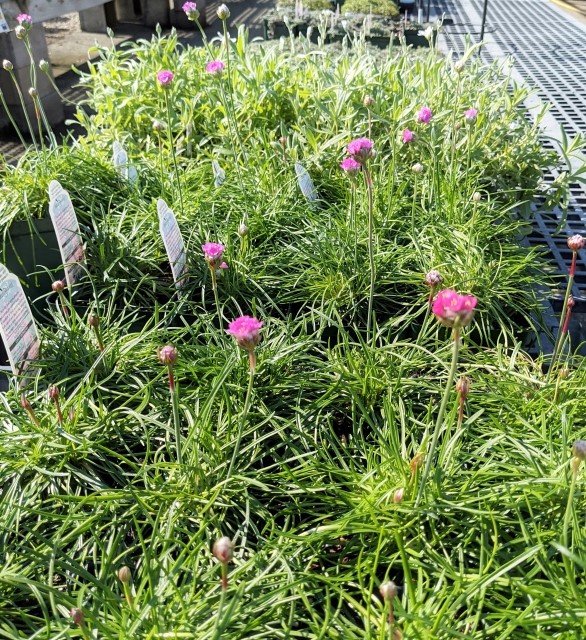
Armeria – Variety blooms colors include pink, white, or red. Shown: Splendens
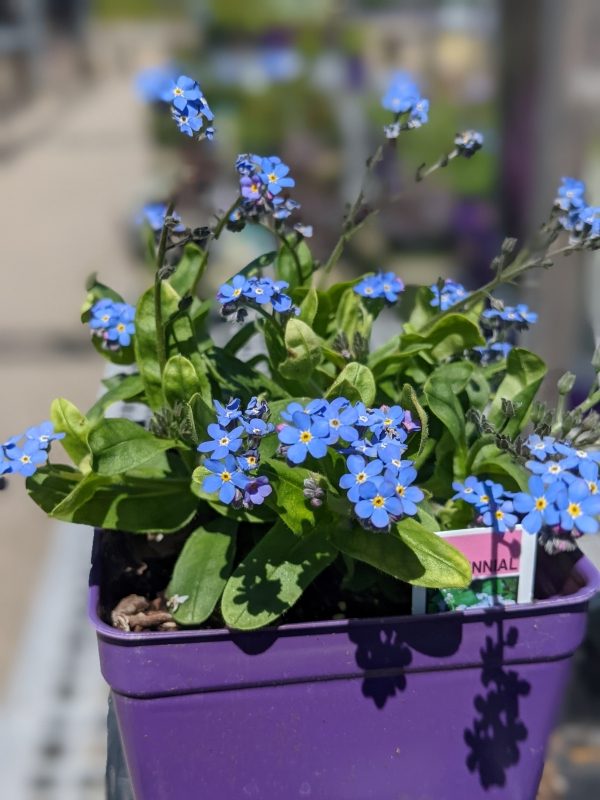
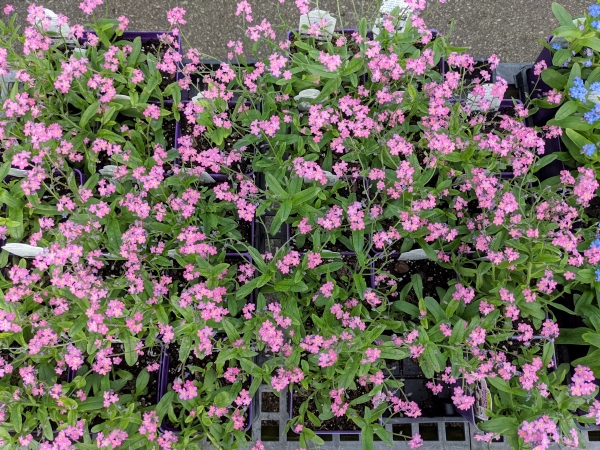
Woodland Forget-Me-Not – True blue bloom color. Great as a spreading underplanting.
Rosylva Forget-Me-Not
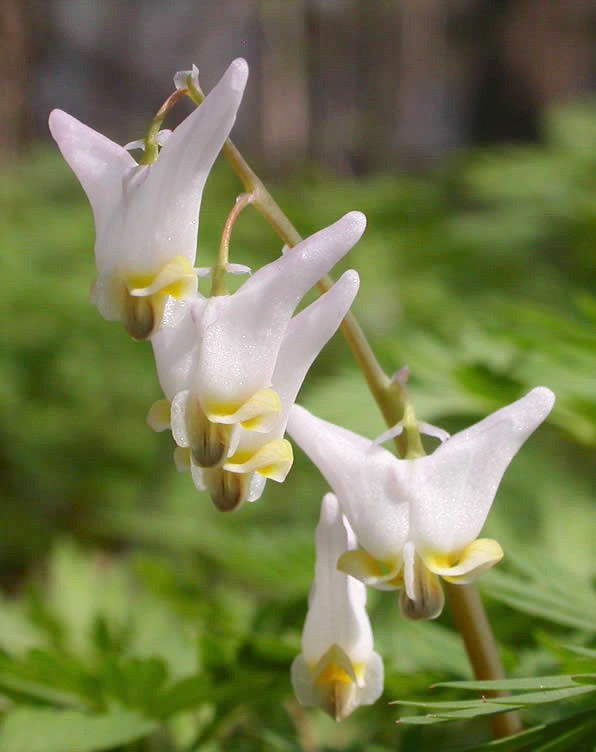
Dutchmans Breeches – Bloom color is white to pink.
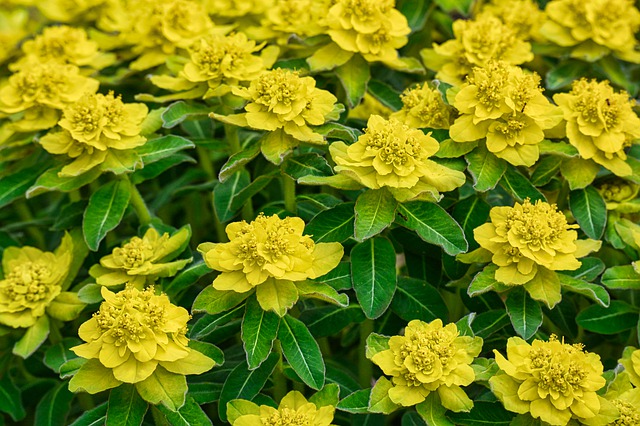
Cushion Spurge – Variety colors include red, orange, white, pink or, yellow. Great fall foliage color as well. Great ground cover.
Shrubs
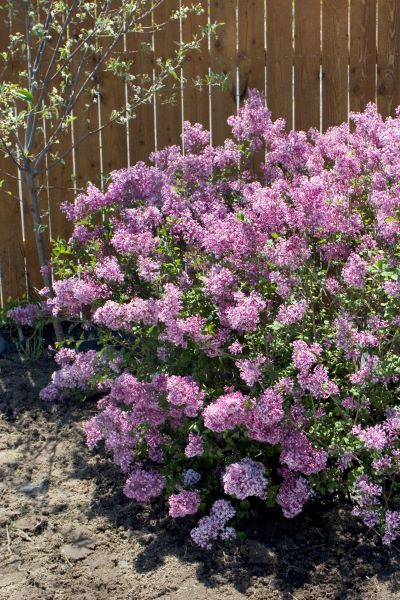
Shrubs drop their foliage each fall unless they are evergreen shrubs. Their woody structures stand over winter, creating winter interest in your yard. Shrubs can create a focal point among perennials and are used to easily create a larger grouping of blooms in the spring. We’ve all seen lilacs blooming in the spring but we’d like to show many other options to consider for an array of blooms in the spring.
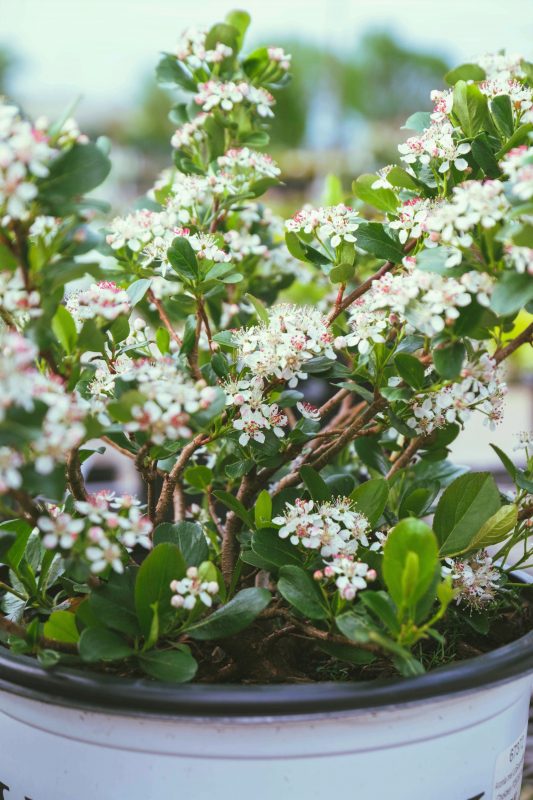
Chokeberry – Blooms delicate white blooms and also has bright orangish red fall leaves. Shown: Mound
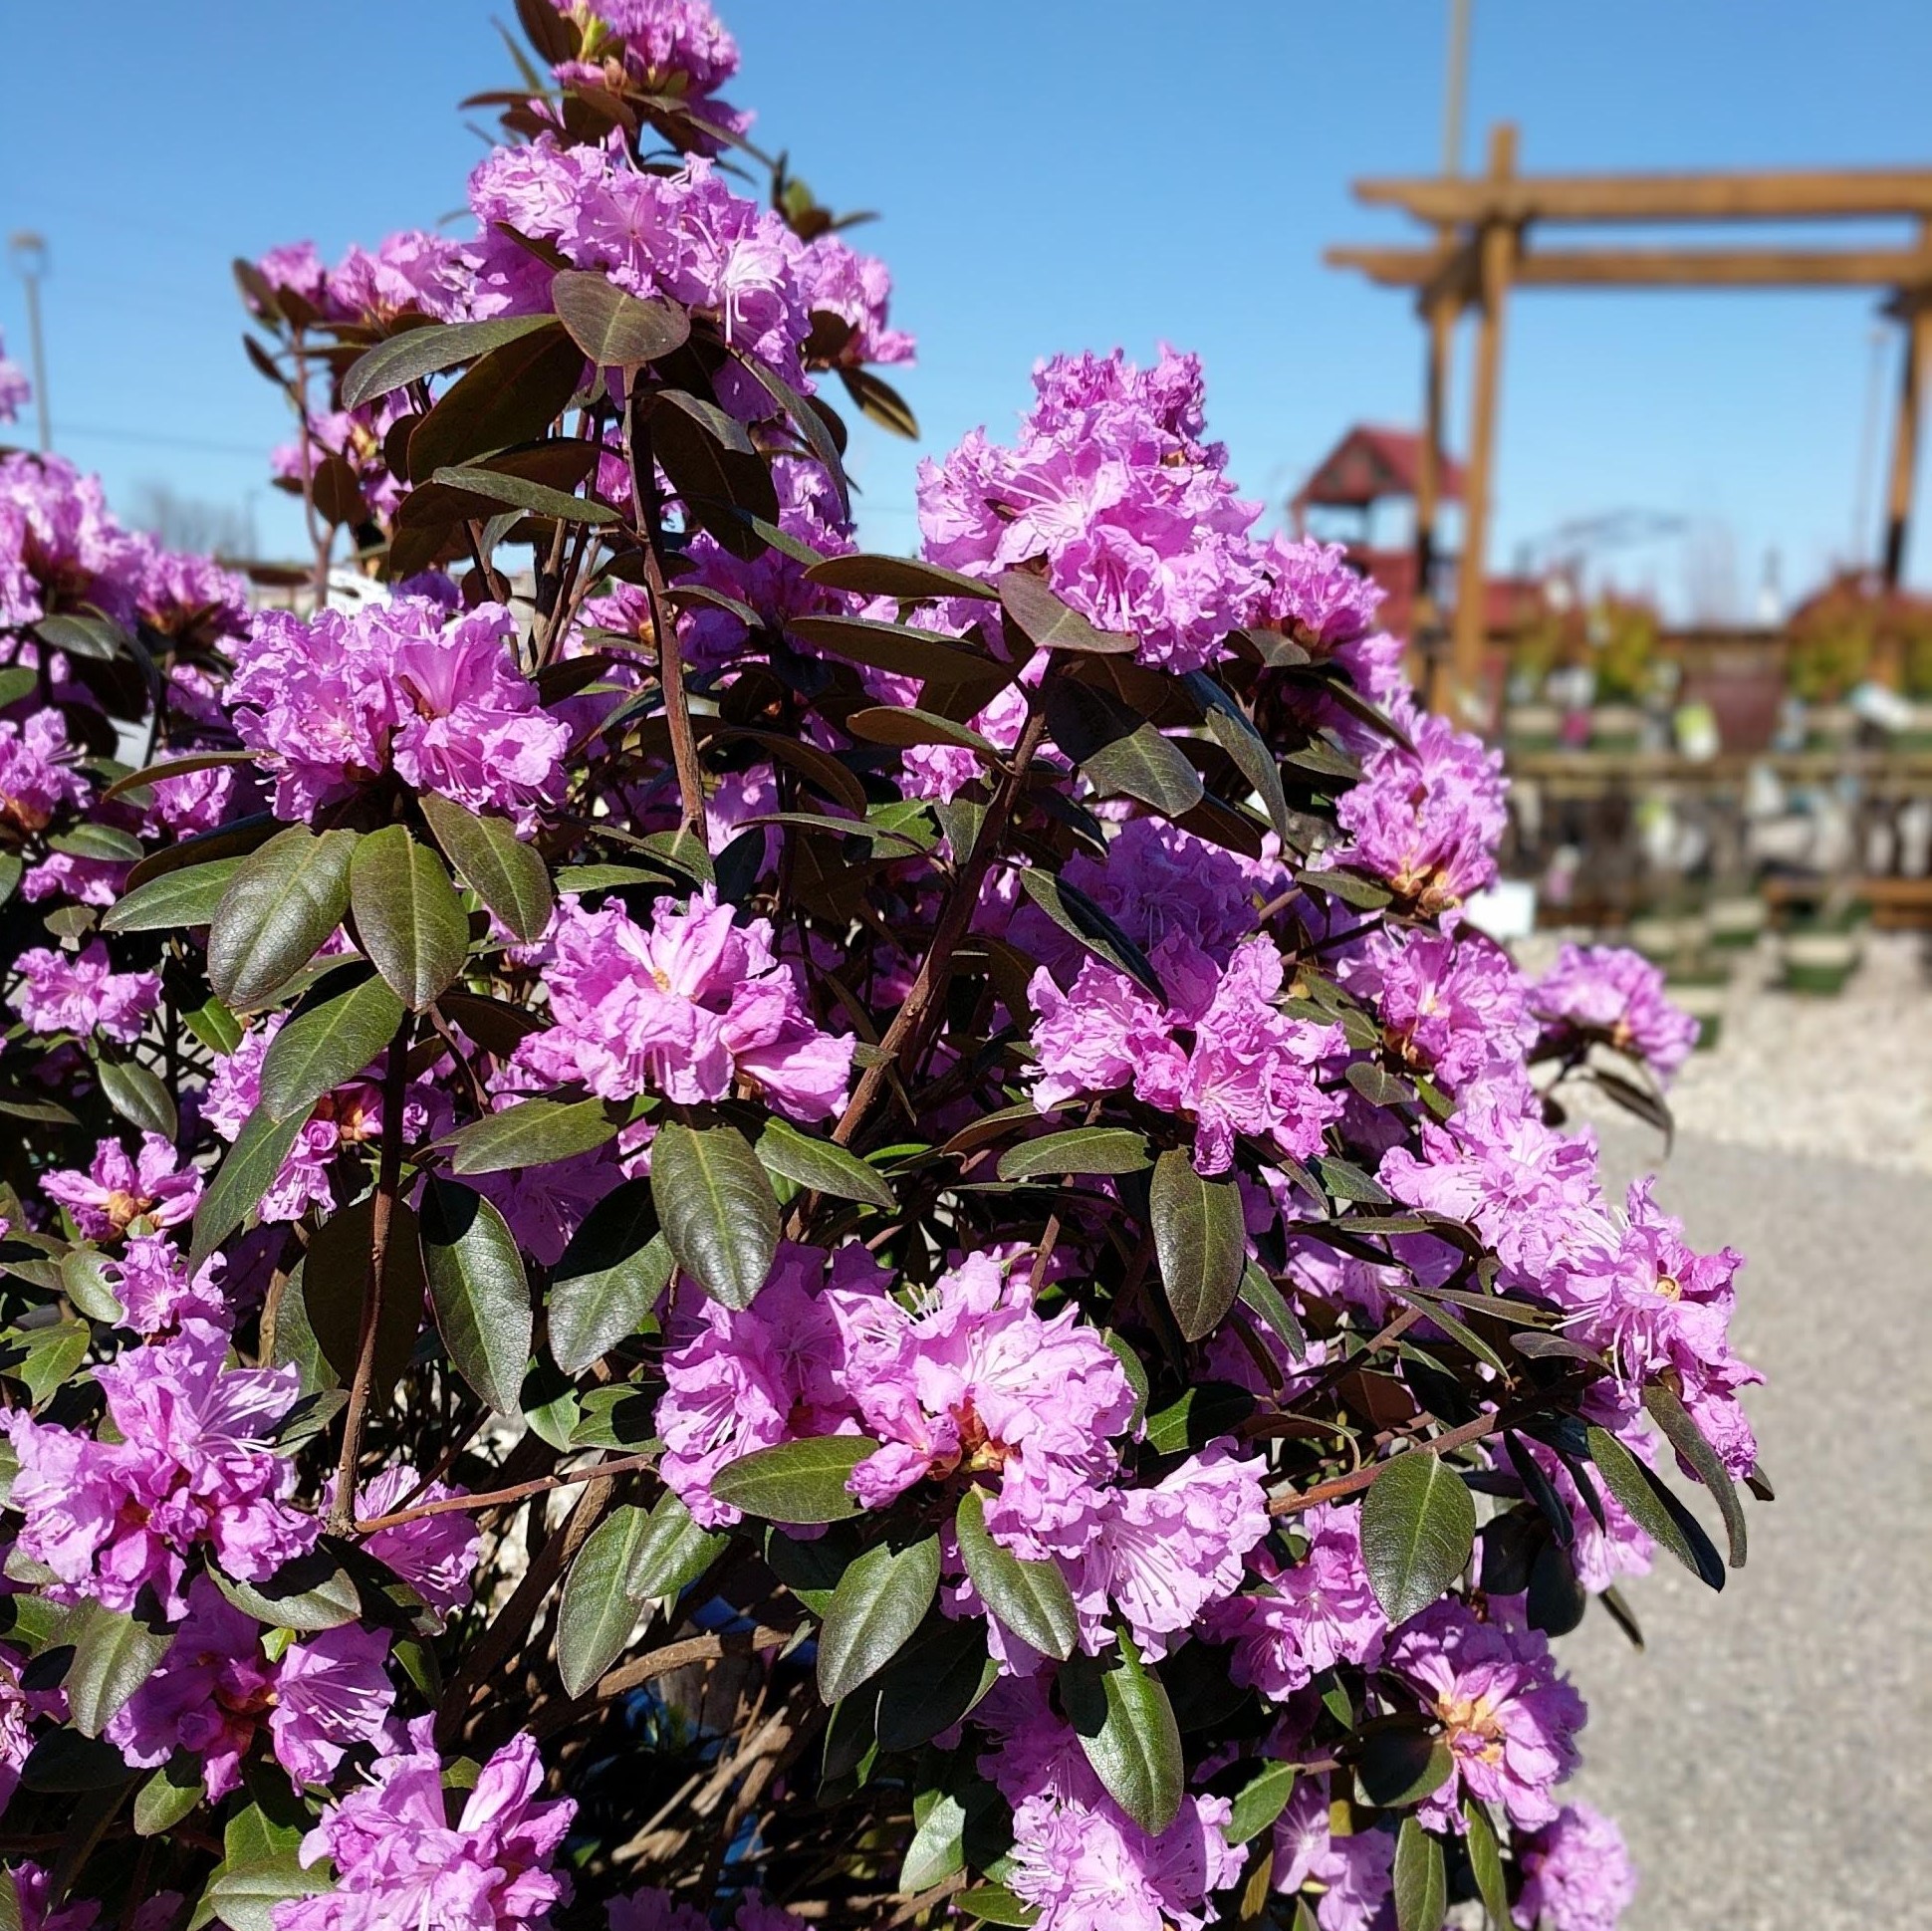
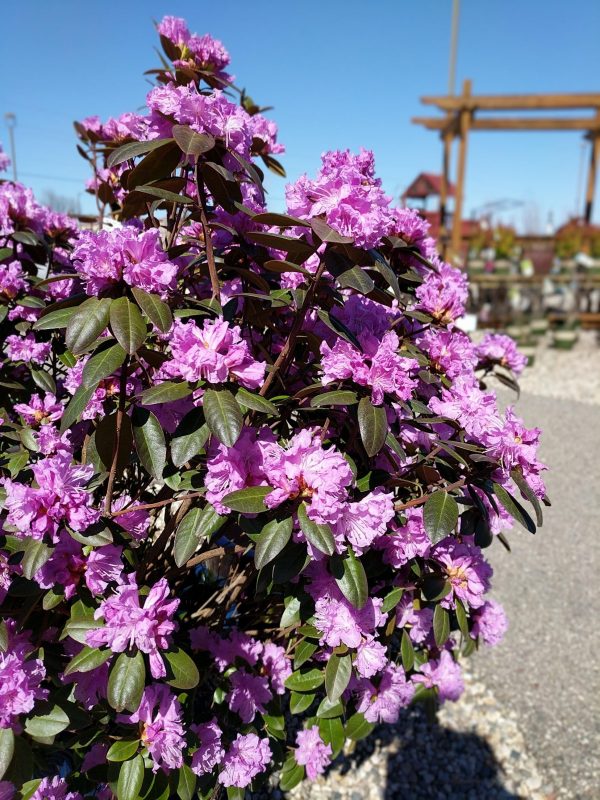
Rhododendron – Bloom colors vary from purple, lavender, peach, or red. Shown: PJM
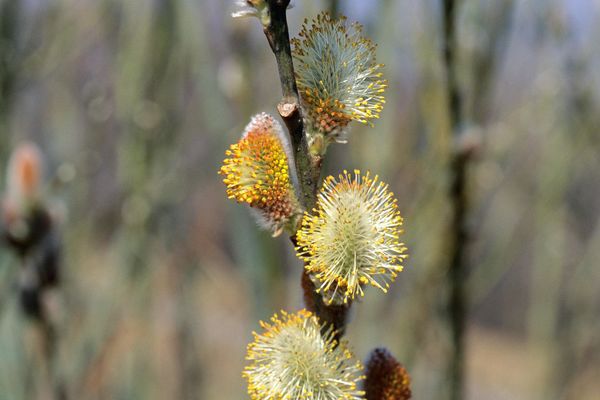
Pussy Willow – Silvery fluffy catkins grow before foliage fills in for lovely texture and contrast in spring. Shown: Salix discolor
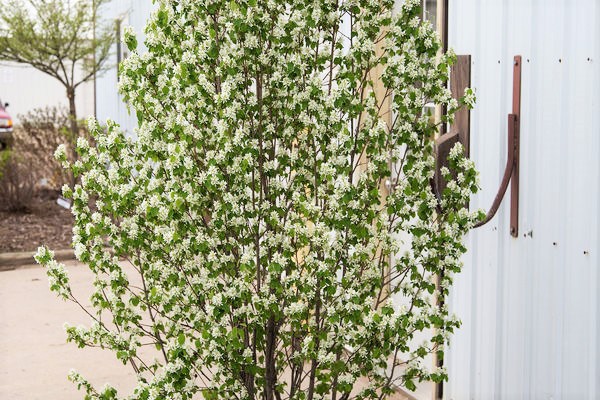
Serviceberry – Blooms white flowers every spring, and produces edible fruit. Brilliant orange and red in the fall. Shown: Standing Ovation
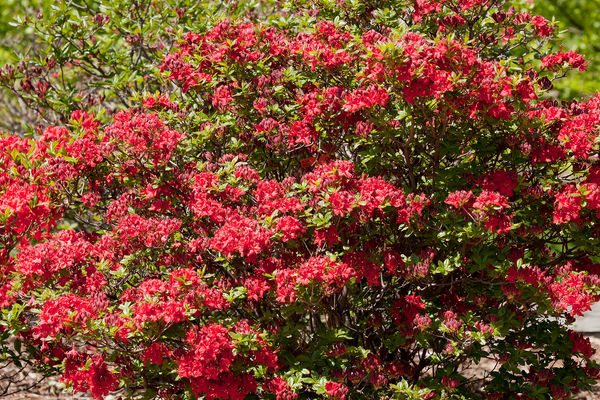
Azalea – Variety bloom colors include red, orange, yellow, and pink. Shown: First Editions® Electric Lights™ Red Azalea
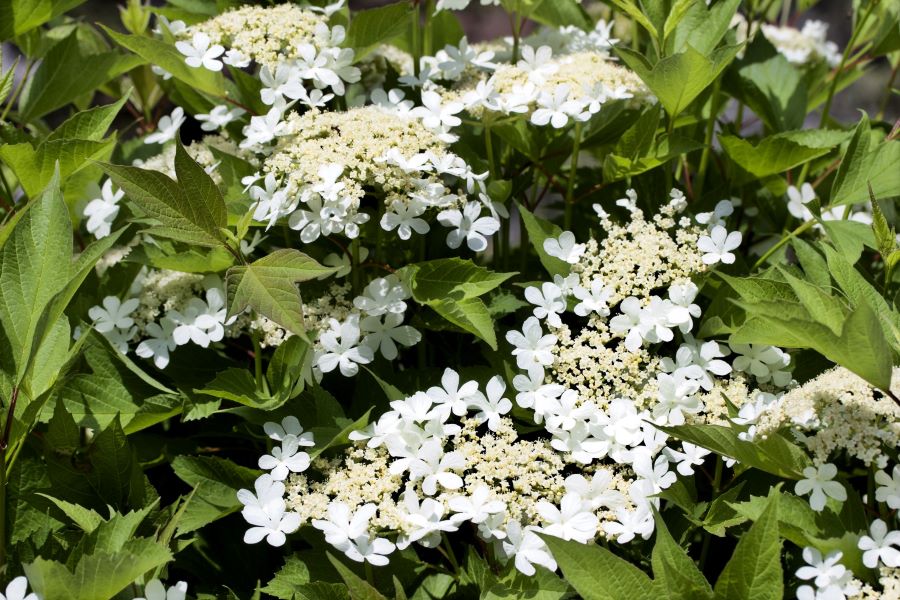
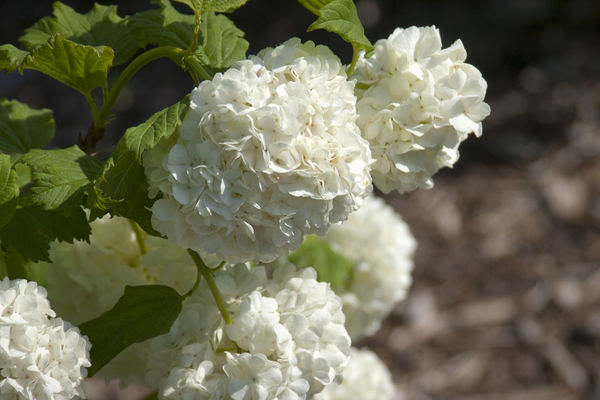
Viburnum – Blooms white flower cluster. Vibrant fall colors as well and some varieties are great for multi-season hedge. Shown: Snow Viburnum
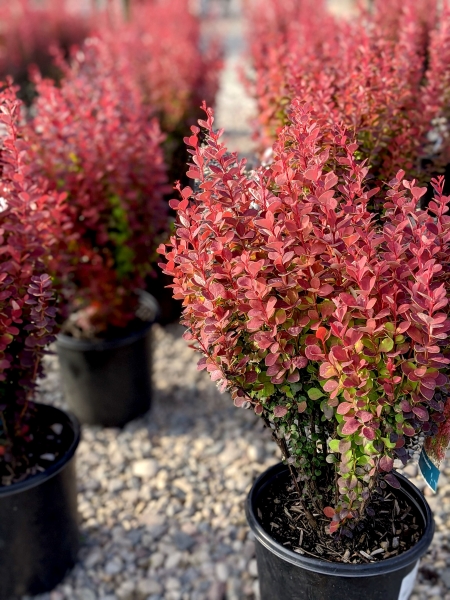
Barberry – The foliage of these shrubs are lovely! Orange, red, lime green, yellow, and purple leaf colors.
Lilacs – Blooms are light to dark purple, tall or compact growing, as well as rebloomers. Shown: Proven Winners Bloomerang Lilac
Trees
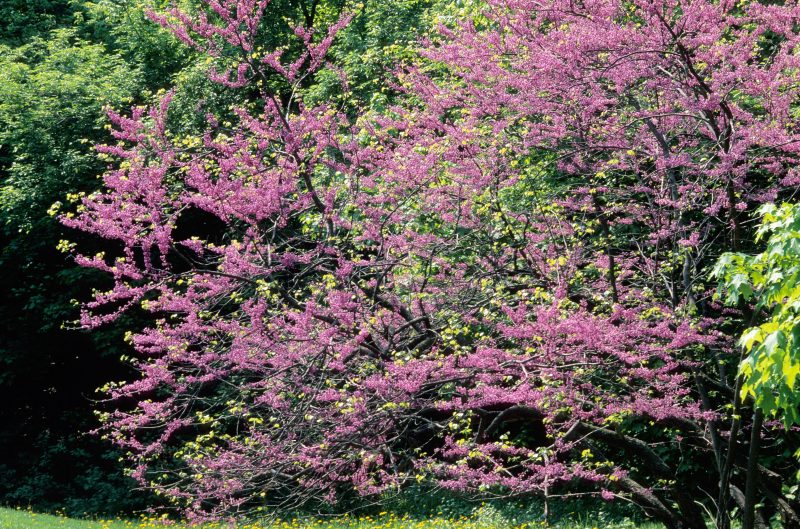
Trees will always catch our eye because of their size and the easiest to notice around town in spring arrives. The bright pinks, reds, and whites lining the streets show us that warmer days are ahead and everything is waking from dormancy.
TREES FOR SPRING BLOOMS:
Redbud – Blooms fuschia colored flowers in the spring and brilliant yellow foliage in the fall. Shown: MN Strain Redbud
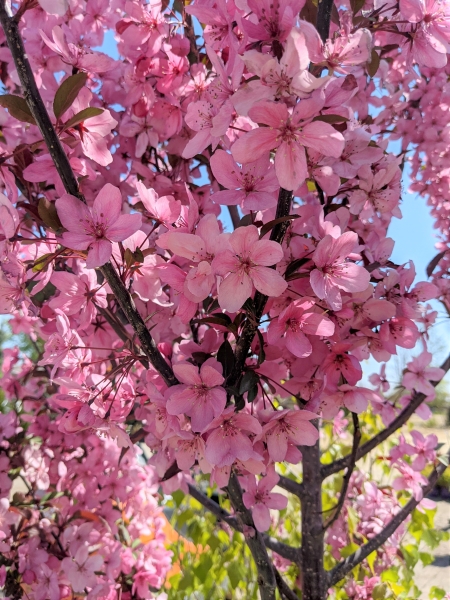
Crabapple – Variety bloom colors include white, pink, and reddish purple. There are varieties that are fruitless as well. Shown: Show Time Crabapple
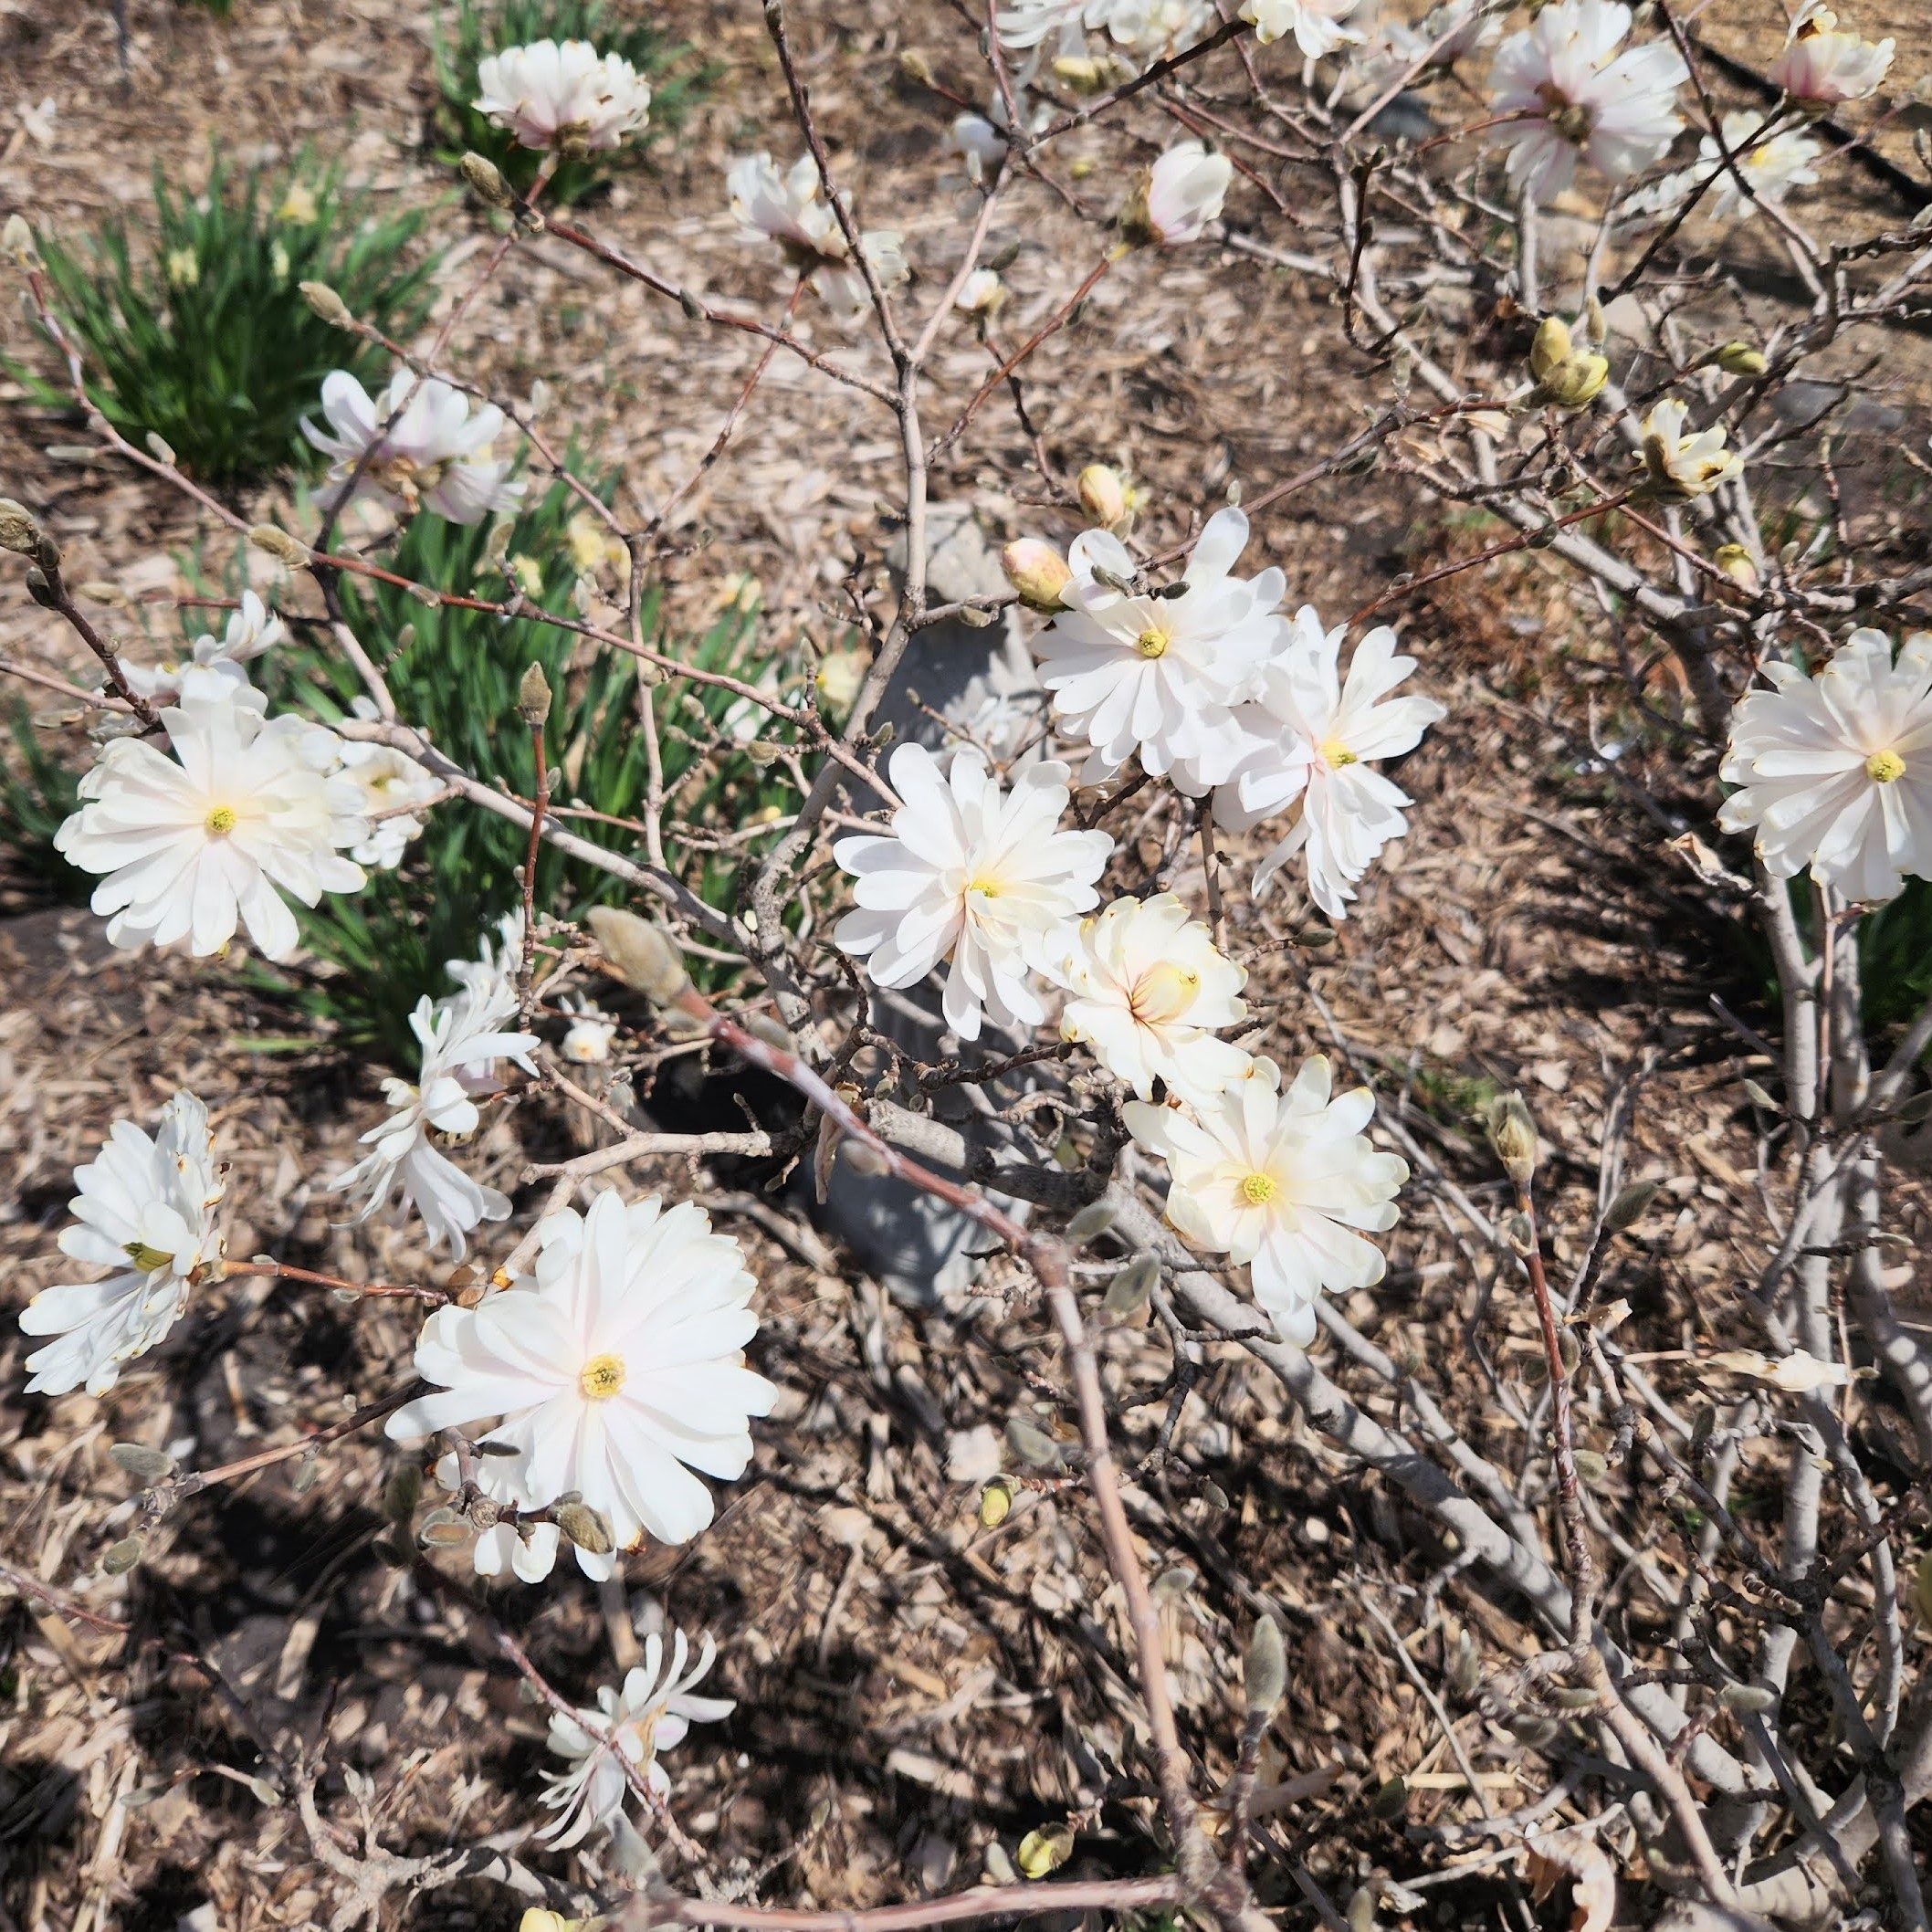
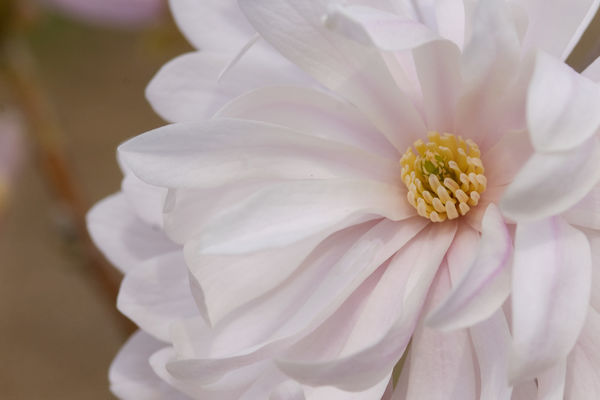
Magnolia- Variety Blooms are in this light pink or white. First Editions Centennial Blush and Royal Star are the Zone4 hardy magnolia trees. Shown: First Editions Centennial Blush
Please note that many of the trees and shrubs shown are sold quickly in the spring due to their colorful show and may not be available later in the season. We recommend starting a wish list so you know what to grab, even when it’s not blooming. Visiting Drummers Garden Center and Floral in the spring through fall will give you the best ideas for how your plants will transition and create a perfect yard all season long.
Plants improve your space!
Plants are a wonderful addition to our lives because they connect us with nature, which improves our mental health. Here are the top 5 reasons that plants improve your space.
1. Breathe Easier
Indoor plants will improve air quality by removing carbon dioxide, benzene, and up to 90% of formaldehyde. Formaldehyde can be found in household products such as glues, household soaps and cleaners, paints and coatings, lacquers and finishes, building materials, pet products, and more.
2. Relax and Refocus
If you are having a stressful time and need some help, put a plant nearby. Plants can help lower your blood pressure and reduce stress. This can help you reduce overall tension and refocus on the tasks you need to complete.
3. Help with Transition
Moving can be a stressful time, especially if you are moving away from home as a college student, to a different state, or for the first time! Many experts agree that plants can give you the same benefits as having a pet. If you already have plants, make sure to bring at least one with you. Plant owners feel less alone, better able to deal with stress, and hopefully feel more optimistic!
4. Friendly Flora
Not all bacteria is bad! Houseplants can increase the beneficial bacteria and microbial diversity in your indoor environment, which benefits our health while indoors. Experts do say playing in dirt helps our immune system so we are bringing that beneficial bacteria inside with us. No, that doesn’t mean you need to spread soil all around.
5. Aesthetically Pleasing
They are purely just pleasing to the eye. It doesn’t need to help us heal, accelerate output, boost our energy, or improve creativity, which plants can do! We can add plants just because it bring us joy and it creates the space that makes us feel more comfortable. That’s really the only reason you need to add plants. Your space is sacred and you make it into what you want!
Head to our Houseplants and Tropical Plant page to read more about the houseplants we offer and for link to plant care search through Costa Farms.
Late Summer through Fall Garden and Landscape Tasks
It’s late summer and fall is around the corner. Slowing down, enjoying time in the garden and eating delicious fresh produce are the reasons this is a fulfilling time of year. If you are wondering what you can do in the garden, here are a few garden and landscape tasks and tips.
PLANT CARE
Watering: Keep watering an inch of water weekly to your plants. For instance, trees and shrubs will soon set their leaf and flower buds for next season as well as keep growing their root structure. If you have fruiting plants, produce from pumpkins to apples are now making the final push to plump and ripen.
Weeding: The weeds are still growing and some may be flowering. Pull those weeds to prevent them from reseeding. Invest in some weeding tools to prevent hand fatigue and easily pull prickly weeds like thistles that you may be skipping without gloves or a weeder.
Fertilization: If your lawn is not in dormancy from drought, you can use a fall lawn fertilizer like Max Lawn Fall Lawn Food Winterizer to give your lawn a boost of nutrients before winter dormancy and have green grass in the spring.
You can also fertilize your trees, shrubs, and perennials with a fertilizer that is higher in Phosphate and lower in Nitrogen to promote more root growth before winter freeze. This boosts plant health going into winter and for the next season.
Pruning: If you have any woody plants or perennials to prune, the 3rd or 4th week of August should be the last week for these tasks. You don’t want to prune too late in the season because as the days shorten, plants begin the process of hardening off for the winter. Any new growth that doesn’t have time to complete this process may have damaged foliage in the spring.
Plant material cleanup: We recommend to wait until the spring to clean up the dead stems and foliage of your perennials. The foliage and stems help protect the plant roots from extreme cold weather and provide important protection of beneficial insects.
The exception to this recommendation is if you experienced any disease on a plant. In that case, clean up the foliage and dead stems and burn or toss the foliage in the garbage.
REDUCE WINTER DAMAGE
If you have issues with rabbits or deer around, get a hard plastic mesh tree guard. You’ll be happy you did because if animals chew around the entire tree diameter, it’ll cut off nutrients to the tree, which will cause the plant to die. Shrubs and evergreens can also experience animal damage from hungry animals so use a granular or spray animal repellent or fencing.
Here is an extra note about evergreens. It’s very important evergreens have adequate water before ground freeze or you may experience browning of needles the next spring. Evergreens do better when planted early fall instead of late fall to help them take up moisture before freezing. They slowly lose water from their needles over winter and if they are in an area of high winds and/or bright, all day sun, it dries them out quicker.
If you have houseplants outside during the summer, once the temps are consistently 50F or below overnight, it’s time to bring your plants inside. Read our blog on the steps to start a couple weeks before bringing them inside.
CLEAN GARDEN TOOLS
We like this step-by-step guide from The Spruce on how to clean and store tools.
STILL WANT TO DO A BIT OF PLANTING?
Sowing turf grass: Mid-August through mid-September is an ideal time to start new grass from seed. We carry high quality seed from Ramy Seeds in Mankato. If it seems daunting to keep the soil moist to sprout grass this time of year, you can wait until late fall to sow seeds that will start growing in spring with the snow melt and spring rains.
Divide perennials:
Dividing perennials (PDF List of perennials and dividing time): When the days are cooler and your perennials are done flowering, you can divide and replant your perennials if they are crowded or not performing well in their original spot. A good rule of thumb for figuring out if you can split a particular perennial is if it blooms in the late summer or fall, divide in the spring. If the plant blooms in the spring, divide in the fall. It’s very important to boost root growth with Biotone Starter or anything with higher Phosphate and lower in Nitrogen when you transplant. Phosphate promotes root growth over foliage growth which is more important when transplanting in the fall.
Plant helpful cover crops:
Using a cover crop may reduce the need to use compost to prepare your garden soil for next year. 2Cover crops are also an option if you are done with your garden space until next spring or before you plant garlic in late Sept. or Oct. A cover crop is used to slow erosion from wind and rain, improve soil health, smother weeds, help control pests and diseases, break up compacted soil, and increase biodiversity. Plant a quick growing crop like peas, oats, radishes, or buckwheat.
Read our post about Living Soil which covers best practices for healthier soil and head over to the University of MN Extension article with a cover crops selector tool to choose a cover crop for your soil goals. For example: If you fertilize with liquid fertilizers you probably have excess nitrogen in your soil or if you grew peas ( nitrogen fixers) in an area then you’d choose a cover crop that adds other nutrients and provides other benefits.
Step-by-Step Amaryllis Bulb Planting
Amaryllis bulb planting is super simple and one of the easiest houseplants to take care of after they are done blooming. Watch our quick video on how to plant a single Amaryllis bulb or read the steps below!
Find the after blooming care instructions on he bottom of this post.
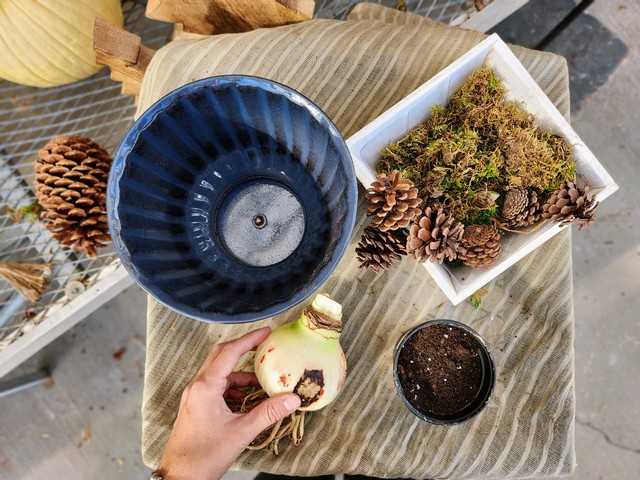
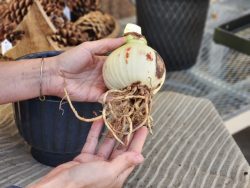
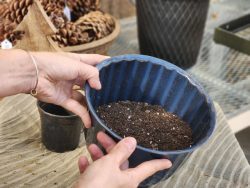
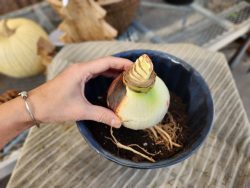
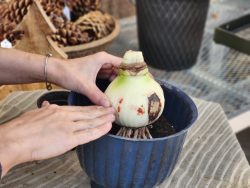
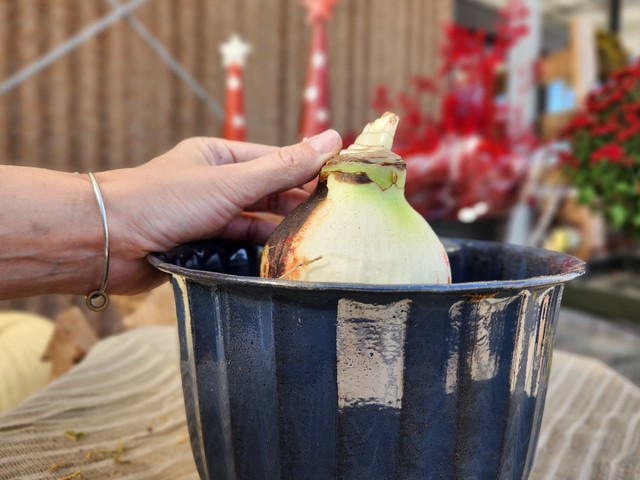
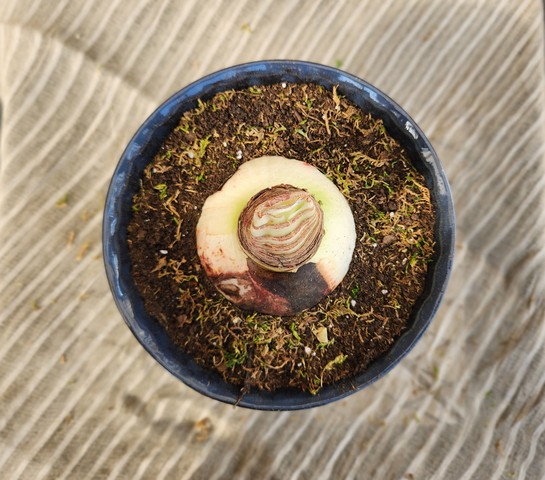
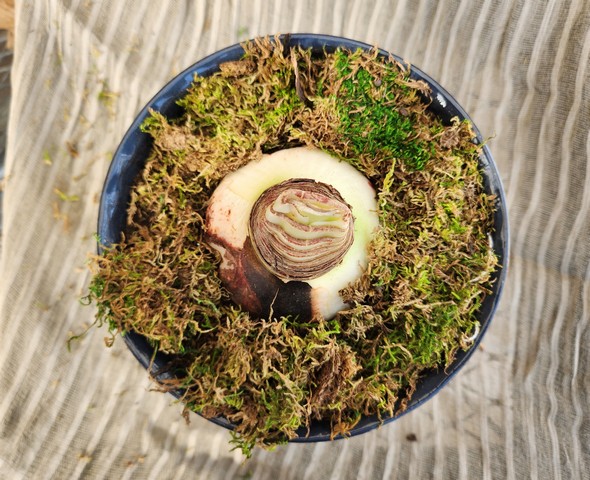
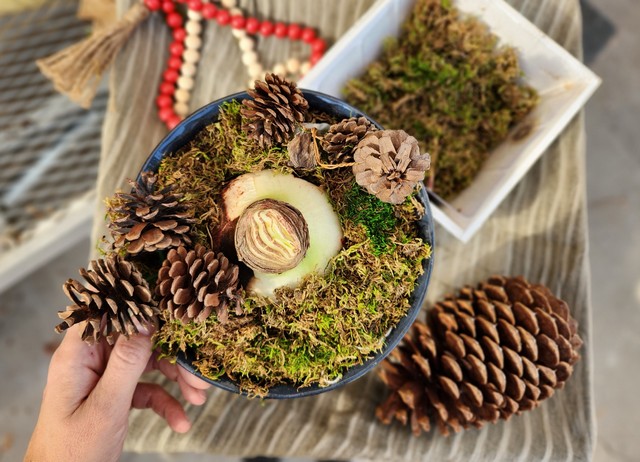
Gather all materials for planting your Amaryllis bulbChoose a pot that is at least 6″ deep and about an inch wider on all sides from your AmaryllisMake sure you pot has drainageChoose an Amaryllis bulb that is firm and not mushy or rottingFill your pot half way up with well-draining potting soilPlace bulb on soil and line up to the center of the potBulb should stick half way up over soil once fullSide view of pot to show bulb placementFill soil around the roots and bulbTap the soil down so the bulb will stay in placeWater in well and then add decorative mulch if you’d likeAdd additional decor like pine cones,figurines, twigs, etc
Select firm bulbs – the biggest you can find. The larger the bulb, the more blooms it can have. Use any pot, ideally at least 6″ deep, with drainage and about 1 to 2 inches wider than the bulb. Try a larger container with several amaryllis. Plant bulbs an inch apart, if planting more than one.
Plant or restart your bulb 8-10 weeks in advance of when you want it to bloom. If you want blooms during Christmas and New Year, plant your bulb at the beginning of November.
Fill the pot 1/2 full with all-purpose well draining potting soil. Set the bulb on top of soil and then fill the pot with soil so the 1/3 to 1/2 of the bulb is exposed. The soil can be topped with the moss, rocks, or other decorations.
Water well to settle the soil then water sparingly until active growth is visible. Around one fourth cup of water a week is usually adequate. You don’t want the soil to get bone dry but avoid it being soggy.
Place the pot in a warm sunny (indirect bright light is best) spot and you’ll start to see it growing its flower stalk soon. If the bloom stalk is leaning towards the light, rotate your pot one fourth turn every week. You’ll have blooms in about two months.
You can then move the pot wherever you’d like indoors to enjoy after they are in bloom.
After Blooming Care:
Once the blooms are done, Amaryllis will grow long leaves. Keep your plant in direct to indirect bright light and fertilize about once a month if there is active growth. Once the temps are 50F or above outdoors, acclimate your plant outside to the bright sun. Keep your plant outside all summer until the temps drop again. This is the best way to get blooms next year since they need to store a lot of energy for blooms the next winter.
Fertilize your plant every other week and water when the top couple inches of soil is dry.
In the fall, once the temps drop to around 50F bring your plant into a dark cool area and stop watering to induce dormancy.
Once the leaves yellow and die, cut them off about an inch above the bulb.
Leave your plant in a cool dark place for 2-3 months.
Once you start to see a bloom bud coming, take out of dark area and water your pot. Placing your pot in a sink filled with water for about 10 mins is the best way to get water around the roots of the bulb when you are initially taking it out of dormancy.
Follow the above care instructions starting at #5.
As you can see, Amaryllis bulb planting is super easy and is well worth the effort to have the colorful blooms during the cold winter months.