Early spring bulb planting varieties to start this spring

From Indoors to Outdoors: Maximizing Summer Blooms with Early Spring Bulb Planting

Planting spring bulbs indoors before transferring them outdoors can be a smart strategy for gardeners aiming to enjoy earlier blooms of spring planted bulbs in summer. As the weather warms up, transitioning these pre-planted bulbs outside can expedite the growth process, leading to vibrant and colorful flowers.

Embracing Early Spring Bulb Planting

The Importance of Early Spring Bulb Planting

Planting spring bulbs at the right time is crucial for gardeners who want to see their garden flourish. Starting early, particularly in the spring, gives bulbs a significant advantage. It allows them to establish their root systems when the ground is still too cold. This early start to planting spring-planted bulbs, can lead to blooms earlier in the summer.

Indoor Preparation: Starting Your Bulbs Inside

Beginning the growth process indoors is a strategic move for cultivating a successful flower garden. Starting bulbs inside allows you to manage the conditions closely, providing consistent temperatures and controlled watering that might be challenging to maintain outdoors. This protects the bulbs from late frosts and other unpredictable weather patterns that could hinder their development.

For indoor preparation, select a well-draining potting mix and containers with adequate drainage holes to prevent waterlogging, which can cause bulb rot. Place the bulbs with their tips upward and give them enough space to grow without overcrowding. It’s essential to keep the soil moist but not waterlogged. By providing these optimal conditions, you can expect a robust root system and sprouts ready to thrive once they’re moved to the garden. This head start is invaluable for gardeners aiming for an early and prolonged display of spring planted flowers.

Successfully Transitioning Bulbs from Indoors to Outdoors

When the risk of frost has passed, it’s time to transition your sprouted bulbs outdoors to benefit from the natural elements. This process, known as “hardening off,” involves gradually introducing indoor-started plants to the outside environment. Begin by placing the bulbs outdoors for a few hours each day in a sheltered area, gradually increasing their time outside over a week or so. This helps the plants acclimatize to the sun, wind, and temperatures they will face in the garden.

Before planting, choose a spot in your garden that receives adequate sunlight and has good soil drainage. Carefully remove the bulbs from their indoor containers, being mindful not to damage the roots or shoots. Plant them at the same depth they were growing indoors, and water them well after planting to help settle the soil around the roots. With careful attention during this critical phase, your bulbs will seamlessly adapt to their new outdoor home, setting the stage for a bountiful flower garden.

Ensuring Summer Blooms: Caring for Transplanted Bulbs

After transitioning your bulbs to the outdoor garden, ongoing care is essential to ensure a beautiful bloom in the summer. Regular watering is important, especially during dry spells, to keep the soil moist and encourage continued growth. However, avoid overwatering, which can lead to bulb rot.

Fertilization is another key component of care. A balanced, slow-release fertilizer, like Bulb Tone by Epsoma, applied at planting and again during the growing season according to the instructions. Additionally, mulching around the plants can help retain moisture, suppress weeds, and keep the root zone cool.

A Gardeners Guide to Spring Planted Flowers Varieties

Choosing the right varieties is crucial for a gardener looking to create a diverse and vibrant flower garden. Among the popular spring bulbs are dahlias, lilies, and gladiolus, which come in a range of colors and sizes. Note that some spring planted bulbs do need to be dug up in the fall after blooming as they are not cold hardy in our zone. If you are looking to start a cut-flower garden, spring planted bulb flowers are some of the popular choices for their long-lasting blooms.

By selecting a mix of varieties that bloom at different times, you can create a succession of color that lasts throughout early to late summer months, keeping your garden lively and dynamic.

Maximizing Blooms with Fall Bulbs: An Additional Tip for Gardeners

For gardeners looking to extend their blooming season, incorporating fall bulbs into their planting strategy is a wise move. Fall-planted bulbs such as tulips, daffodils, and alliums are planted in autumn but bloom in spring, offering an early burst of color. By planting these in conjunction with spring-planted flowers, you can create a seamless transition of blooms in your garden.

When planting fall bulbs, choose a sunny location with good drainage to prevent water from pooling around the bulbs, which can cause rot. Plant the bulbs at a depth three times their height, and water them thoroughly after planting to encourage root growth before the ground freezes. With the addition of fall bulbs, you can enjoy an extended display of color that begins in early spring and lasts through the summer months, ensuring your garden remains a vibrant and inviting space.

Grape Hyacinth in bloom

Planting Fall Bulbs for Spring Blooms

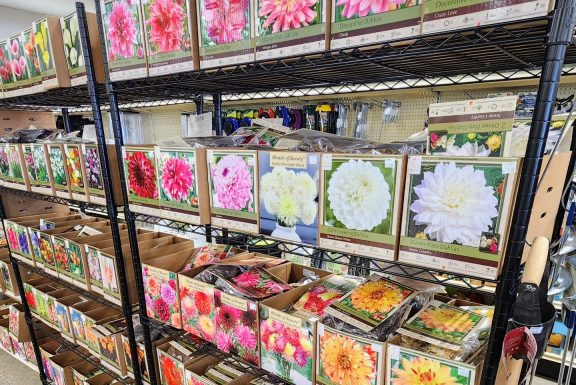
By planting fall bulbs now, you’ll be greeted with a warm and blooming welcome that will take your breath away. The anticipation of watching your garden come to life with spring blooms is simply thrilling.

When to Plant

Plant your fall bulbs when overnight temperatures start dropping to around 40° F overnight or 6-8 weeks before the ground freezes. Store your fall bulbs around 60° to 65° F and in a dry area before being planted.

Bloom Time

fall bulb planting bloom times and depths
Bloom times will be indicated on the package of the bulbs. Plant multiple varieties with different bloom times to give you the longest duration of early spring blooms or plant varieties that bloom at the same time for an array of colors!

Where to Plant

Wherever you want to plant, make sure the soil is well-draining. Bulbs don’t like wet feet or else they may rot. Add amendments like compost or topsoil to ensure proper drainage. Try not to plant in low-lying areas where water pools and stays soaking wet. Add Bulb Tone from Espoma to your soil when you plant to give them proper nutrients before and after blooming.

Plant bulbs in full to part sun. Check the bulb packaging to see sun requirements as some can take shady areas.

Layout

Bulbs look best in groups. Consider adding them to areas where you already have perennial plants to fill in bare spots. They will brighten that area in spring and then the foliage will be camouflaged by other herbaceous perennials and shrubs as they fill out.

It’s called “naturalizing” when you plant bulbs in sporadic groups throughout your garden to make it look like a meadow.

Bloom Colors

You may like a certain color repeated throughout your yard or if you want to dive into color combinations you can go back to what we learned in art class and use color schemes! Analogous, complementary, monochromatic, and split complementary colors are color schemes that you can build with flowers and other plants!

Common Fall Bulbs at Drummers

Allium – purple pom poms atop wand-like stems.
Crocus – very early color. Some even bloom in snow!
Daffodil (Narcissus) – sunny yellows and white. These are great in groups. Great for forcing.
Grape Hyacinth (Muscari) – purple or pink.
Hyacinth – the fragrance that will stop you in your tracks! White, pink, purple. Great for forcing.
Tulip – Huge variety of colors, sizes, and bloom times. Great for forcing indoors for indoor bulb gardens.
Snowdrops – small white flowers that hang like a bell.

Cornell University actually did tests with planting bulbs with other perennials to see how they looked. Click here to see the results!

while and pink amaryllis blooming

Step-by-Step Amaryllis Bulb Planting

Amaryllis bulb planting is super simple and one of the easiest houseplants to take care of after they are done blooming. Watch our quick video on how to plant a single Amaryllis bulb or read the steps below!

Find the after blooming care instructions on he bottom of this post.

  1. Select firm bulbs – the biggest you can find. The larger the bulb, the more blooms it can have. Use any pot, ideally at least 6″ deep, with drainage and about 1 to 2 inches wider than the bulb.  Try a larger container with several amaryllis. Plant bulbs an inch apart, if planting more than one.
  2. Plant or restart your bulb 8-10 weeks in advance of when you want it to bloom. If you want blooms during Christmas and New Year, plant your bulb at the beginning of November.
  3. Fill the pot 1/2 full with all-purpose well draining potting soil. Set the bulb on top of soil and then fill the pot with soil so the 1/3 to 1/2 of the bulb is exposed.  The soil can be topped with the moss, rocks, or other decorations.
  4. Water well to settle the soil then water sparingly until active growth is visible. Around one fourth cup of water a week is usually adequate. You don’t want the soil to get bone dry but avoid it being soggy.
  5. Place the pot in a warm sunny (indirect bright light is best) spot and you’ll start to see it growing its flower stalk soon. If the bloom stalk is leaning towards the light, rotate your pot one fourth turn every week. You’ll have blooms in about two months.
  6. You can then move the pot wherever you’d like indoors to enjoy after they are in bloom.

After Blooming Care:

  1. Once the blooms are done, Amaryllis will grow long leaves. Keep your plant in direct to indirect bright light and fertilize about once a month if there is active growth. Once the temps are 50F or above outdoors, acclimate your plant outside to the bright sun. Keep your plant outside all summer until the temps drop again. This is the best way to get blooms next year since they need to store a lot of energy for blooms the next winter.
  2. Fertilize your plant every other week and water when the top couple inches of soil is dry.
  3. In the fall, once the temps drop to around 50F bring your plant into a dark cool area and stop watering to induce dormancy.
  4. Once the leaves yellow and die, cut them off about an inch above the bulb.
  5. Leave your plant in a cool dark place for 2-3 months.
  6. Once you start to see a bloom bud coming, take out of dark area and water your pot. Placing your pot in a sink filled with water for about 10 mins is the best way to get water around the roots of the bulb when you are initially taking it out of dormancy.
  7. Follow the above care instructions starting at #5.

As you can see, Amaryllis bulb planting is super easy and is well worth the effort to have the colorful blooms during the cold winter months.