We're sorry, but all tickets sales have ended because the event is expired.
Event Phone: 507-388-4877
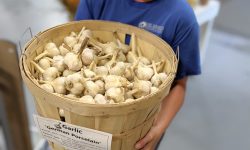
Garlic is one of the easiest plants to grow in your garden and you plant it in the fall!
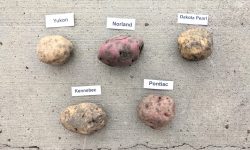
Growing Potatoes, Onions, & Other Root Crops
April 2, 2022
11:30 am - 12:30 pm
We're sorry, but all tickets sales have ended because the event is expired.
Potato and onion sets will be in the store end of March so it’s a great time to learn more about growing these delicious and easily stored vegetables! Sweet potato starters arrive later in the spring since they need warm soil temps when planting. Veggie Deb will cover the basics of planting these vegetables as (more…)
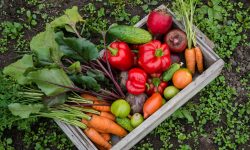
Vegetable Gardening 101 with Veggie Deb!
Vegetable Gardening 101
April 2, 2022
10:00 am - 11:00 am
We're sorry, but all tickets sales have ended because the event is expired.
Learn about starting your own vegetable garden or ask your questions if your garden hasn’t thrived in years past.
Early Spring Yard and Garden Tasks
The desire to start gardening and enjoy outside is hard to suppress. Each spring will bring us new weather patterns and it’s best to take Nature’s cues when it comes to accomplishing these yard and garden tasks
YARD AND GARDEN TASKS:
1. Wait to clean up dead perennial matter until temps are consistently around 55F-60F. Beneficial insects will be in their dormant state in leaf litter and dead perennial matter. You should wait to clean up dead plant material as late as possible into the spring.
You can top dress with compost as well as mulch around the root zone of your plants when you see perennials emerging.
2. Clean and sanitize your outdoor containers, bird baths, bird feeders, and garden tools. Check out the new garden decor and tools in store!
3. Prune off dead/damaged branches on shrubs and trees. Late winter/early spring is the best time to prune trees, before their buds are formed. Refer to our pruning guide in regards to shrubs and trees.
4. Clean debris from your vegetable garden and top dress the soil with compost at least two weeks before you plant. Avoid compaction of the soil by using designated walkways. Compaction of the soil will reduce the level of oxygen available for plant roots. Lightly till in compost if you notice your soil is compacted.
5. Early to Mid-April, depending on weather and ground temperature, is the best time to put down new grass seed or ground covers like clover. Wait to scatter seed until day temps are 60F+ consistently before spreading seed. Most seeds, including grass won’t germinate until the soil is 55F+. We carry bulk or bagged grass seed from Ramy Seed in Mankato. If you want to forego a conventional grass lawn, get a wildflower seed mix and scatter the seed in mid to late April.
Please note, if you want to do a weed killer in the same area you want new grass, you will have to wait to over-seed grass until summer or fall. If seeding is more important – forgo the crabgrass or weed killer and just use a lawn food
6. Apply crabgrass killer and weed pre-emergents just before we have consistent 60F days. Most products last 6-8 weeks and timing the application with the weather is important or you may need to reapply. Weeds germinate when soil is 55F. There are many turf products, likes Maxlawn Weed and Feed, that contain fertilizer as well as weed killers so you can accomplish both tasks if you have weeds throughout your lawn. Our staff can help you decide what is best depending on what you want to accomplish!
If you don’t mind weeds, use a lawn fertilizer around the time you have to mow for the first time.
Plant summer bulbs when the soil has warmed to above 40F and the soil isn’t soggy. Usually early April through mid May depending on the spring weather. The soil should be rich and well-draining to avoid bulb rot if cooler temps come back.
Find growing instructions in the store!
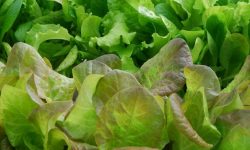
Cool Season Hardy and Semi-Hardy Vegetables:
Seed Starting
Smell the soil and see the plants grow new leaves! You can experience new life by starting seeds, also known as sowing, indoors this winter! Each plant packet will tell you when to sow the seeds but most will be started late winter through early spring.
Reasons to start your own plants from seed:
Save money over the long run – The initial investment into growing gear may be seem like a lot but you can use trays, pots, lights, etc for multiple years.
If you have a plant that dies, it’s ok! Sow extra seeds so you can avoid total loss. That one plant loss will be a low-cost loss than an already grown starter plant. If all else fails, we have starter plants to make sure you grow what you want to!
Seeds will last longer than the packet expiration date. There may be lower germination rate so plant one or two extra seeds per hole.
You can grow a lot of plants and a diverse variety! Garden centers, like us, grow a lot of different varieties but we can’t grow them all.
Next, we will cover seed packet info to take note of, supplies you will need to start seeds indoors, caring for seedlings, and hardening off seedlings.
Important seed packet info to get to know the plants you are growing:
The best time to plant ( Weeks before or after frost) The last frost date for Southern MN is projected as May 1- May 15th. See examples in the next section of sowing times before transplanting outdoors.
Indoor or direct sowing recommendations
How deep to plant the seeds
Days to germination gives an idea of how long it takes the seed to sprout
Days to maturity = the number of days from planting to harvest
Seedling thinning & spacing directions
Check if it’s perennial (must be zone 4 to be S.MN hardy) or annual (only grows one season)
Start seeds indoors or directly sow them in the garden or planter?
Use the “date to maturity” as a guide for your produce. This will let you know about the time you should be harvesting and if you will need to sow in the winter. Some plants have a LONG growing season and should be started indoors around Feb/Mar to reach maturity. ( ex. peppers, celery, tomatoes, cole crops, lemongrass, and rosemary)
Some plants have sensitive roots and mature fast enough in our climate to be directly sown. Examples are corn, cucumbers, potatoes, carrots, sunflowers, nasturtium, beans, radishes, peas, dill, and radishes.
**Hardy perennials may require cold stratification or scarification for proper germination. Read more about starting seeds outdoors in the winter, which is needed for zone 4 and 5 perennial seeds.
AVOID using soil from your yard/garden if possible! It is an easy way to introduce unwanted pests and disease problems for little seedlings. *Most at-home compost piles do not get hot enough to kill harmful pathogens.
Recommended for seeds – Seed Starting Mix. It is a fine textured, soilless medium that is sometimes heat sterilized. It contains no nutrients and is intended for germination only.
When potting up seedlings into containers – Standard Potting Mix. Any potting mix will do! Some may contain nutrients to start feeding your plants but if you have them planted in containers you will have to supplement the soil with fertilizers as they get bigger.
Supplies needed to start seeds indoors:
Plug tray, soil pellets or seed starting potting soil, open flat, humidity dome, pots, watering can, heat mat, fertilizer, grow light, and a fan.
Let’s dig into each of these materials and why you need them.
Plug Trays – Provides a controlled environment for proper germination
When choosing a size of plug tray, ask yourself how many plants you want to grow. Some plug trays come with smaller plugs and can fit more plants and vice versa. The smaller the plug, the sooner you will need to pot up into larger plug trays or pots.
Soil Pellets
Usually, these pellets are made of coco coir. To expand the pellets, soak them in water and place the seed in the soil.
Open Flats
With drainage holes: Fill with seeding mix and scatter seeds. Divide and up-pot or plant outside when they are ready.
Without drainage holes: Use under plug trays to catch the water/soil.
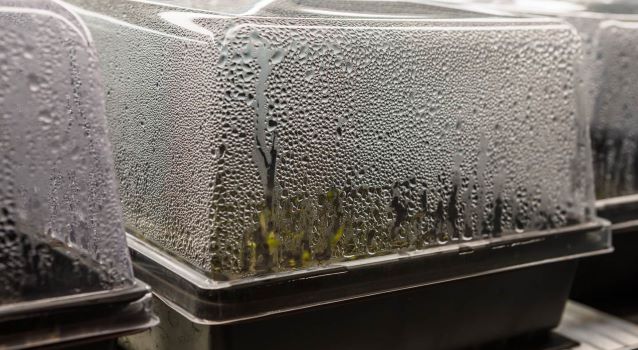
Humidity Dome – Keeps moisture in and helps germination of seeds.
Fits over most plug trays and open flats. A short dome is for seed starting, and a tall dome is for propagating cuttings. Domes will need to be taken off after the seedlings are a couple of inches tall.
Pots – Plastic, Coco Coir, Biodegradable options
Use various sizes to start seeds if desired. Pots are good for when you need to divide plants in plug trays and up-pot. Choose the right-sized pot when up-potting! Too big and it may not dry out fast enough, causing root rot.
Watering Can/Spray Bottle – For keeping the soil moist and not disturbing the soil around seedlings.
Heat Mat – Most homes are not warm enough for proper germination
Raises soil temp 10-20 degrees above room temperature which will speed up the germination process and reduce chances of seeds rotting. The heat mat does not need to be on once all the seedlings have sprouted.
Lights & Timer – Supplemental light is essential to growing happy seedlings indoors!
Plants need strong light so supplemental light prevents weak and leggy plants. Get full spectrum/daylight bulbs. There are T8 & T5 fluorescent, Standard Bulbs, and LED options.
Use a timer to make life easier! 14 hrs. of light per day is the standard after seeds germinate.
There is no need to have a light on before seedlings emerge unless the seed packet says “light germinated”.
Fans
A light breeze helps grow strong plant stems. The movement of the stem will strengthen it. It will also help prevent fungal diseases from too much humidity.
Fertilizer
Seedlings do not need nutrients right away. Wait until they have a few sets of true leaves before adding fertilizers.
A half-strength, balanced fertilizer works well for most plants. We recommend looking up proper fertilization for specific plants grown.
Caring for seedlings:
Proper watering is essential. Keep soil evenly moist until germination.
Allow tap water to sit out overnight to dechlorinate when possible. Avoid using soft water.
Know your plant’s specific watering and fertilization needs by reading their packet or researching online.
Find a routine and water early in the day if possible.
After germination, allow the soil to dry slightly between watering. This encourages root growth! Avoid “loving your plants to death”, aka overwatering.
Hardening Off – Allows your plants time to adjust to light, temperature, and environmental changes
Start putting your potted plants in the shade on a calm day, for an hour or two. Slowly increase time by 1 to 2 hours outside and sun exposure over several days. It usually takes 7-14 days to fully acclimate. Reduce sun exposure again if you see signs of sun-scorched foliage. Make sure you check the soil moisture once or twice a day, depending on pot size.
We carry grow lights, seed starting kits, seedling potting soil, fertilizer, and seeds. Later in the spring, we will have vegetables and herbs that we have grown for you to purchase if you don’t get to start your seedlings.