Bulb Planting/Care
September 24, 2020
5:30 pm - 6:15 pm
We're sorry, but all tickets sales have ended because the event is expired.
Learn about planting fall bulbs, care, and design in your landscape!
Planting Fall Bulbs for Spring Blooms
By planting fall bulbs now, you’ll be greeted with a warm and blooming welcome that will take your breath away. The anticipation of watching your garden come to life with spring blooms is simply thrilling.
When to Plant
Plant your fall bulbs when overnight temperatures start dropping to around 40° F overnight or 6-8 weeks before the ground freezes. Store your fall bulbs around 60° to 65° F and in a dry area before being planted.
Bloom Time
Bloom times will be indicated on the package of the bulbs. Plant multiple varieties with different bloom times to give you the longest duration of early spring blooms or plant varieties that bloom at the same time for an array of colors!
Where to Plant
Wherever you want to plant, make sure the soil is well-draining. Bulbs don’t like wet feet or else they may rot. Add amendments like compost or topsoil to ensure proper drainage. Try not to plant in low-lying areas where water pools and stays soaking wet. Add Bulb Tone from Espoma to your soil when you plant to give them proper nutrients before and after blooming.
Plant bulbs in full to part sun. Check the bulb packaging to see sun requirements as some can take shady areas.
Layout
Bulbs look best in groups. Consider adding them to areas where you already have perennial plants to fill in bare spots. They will brighten that area in spring and then the foliage will be camouflaged by other herbaceous perennials and shrubs as they fill out.
It’s called “naturalizing” when you plant bulbs in sporadic groups throughout your garden to make it look like a meadow.
Bloom Colors
You may like a certain color repeated throughout your yard or if you want to dive into color combinations you can go back to what we learned in art class and use color schemes! Analogous, complementary, monochromatic, and split complementary colors are color schemes that you can build with flowers and other plants!
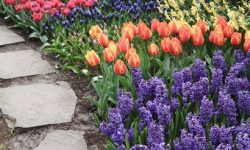
Common Fall Bulbs at Drummers
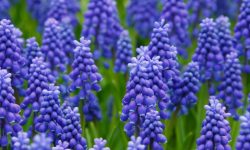
Allium – purple pom poms atop wand-like stems. Crocus – very early color. Some even bloom in snow! Daffodil (Narcissus) – sunny yellows and white. These are great in groups. Great for forcing. Grape Hyacinth (Muscari) – purple or pink. Hyacinth – the fragrance that will stop you in your tracks! White, pink, purple. Great for forcing. Tulip – Huge variety of colors, sizes, and bloom times. Great for forcing indoors for indoor bulb gardens. Snowdrops – small white flowers that hang like a bell.
Cornell University actually did tests with planting bulbs with other perennials to see how they looked. Click here to see the results!
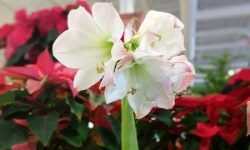
Step-by-Step Amaryllis Bulb Planting
Amaryllis bulb planting is super simple and one of the easiest houseplants to take care of after they are done blooming. Watch our quick video on how to plant a single Amaryllis bulb or read the steps below!
Find the after blooming care instructions on he bottom of this post.
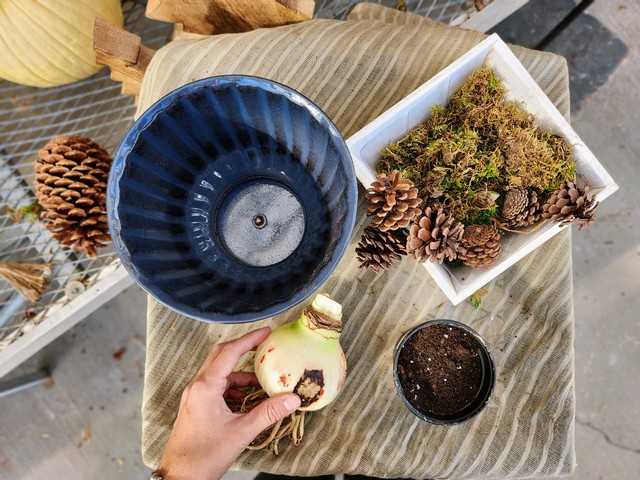
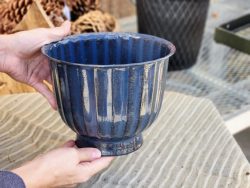
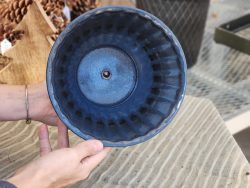
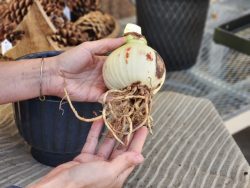
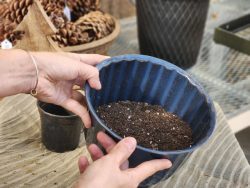
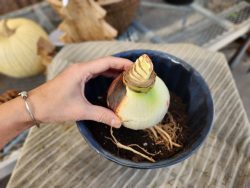
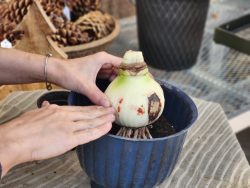
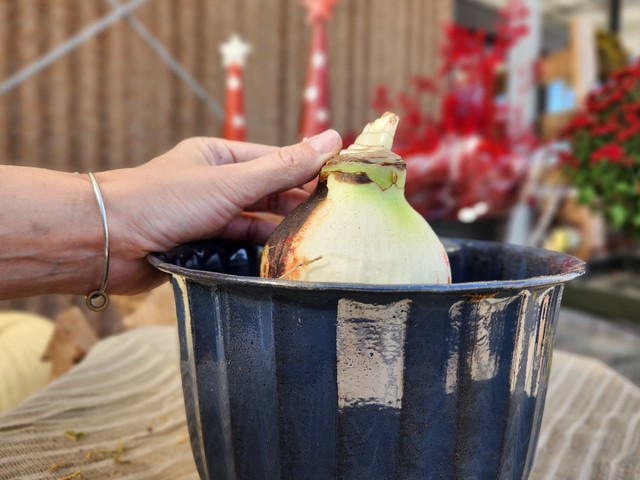
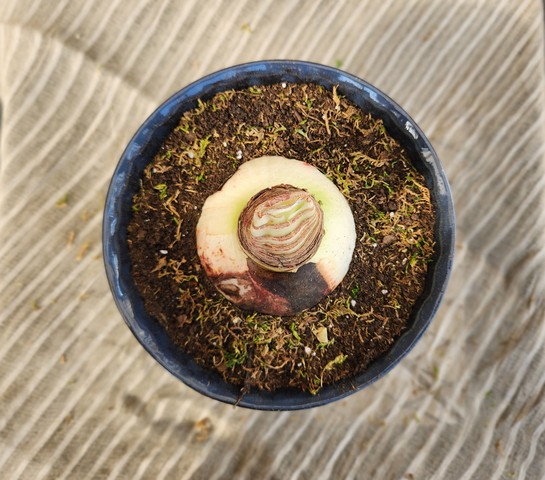
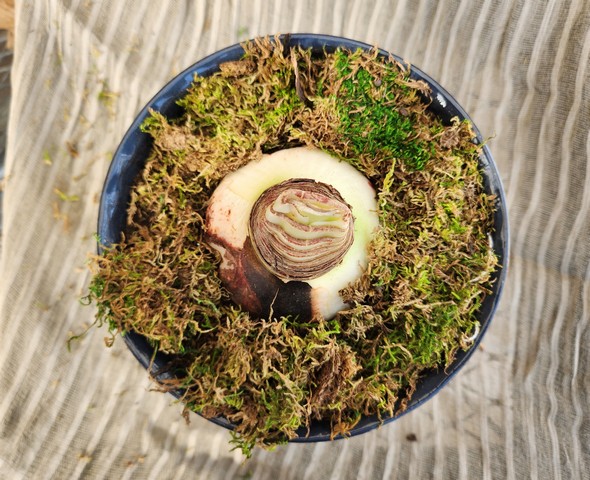
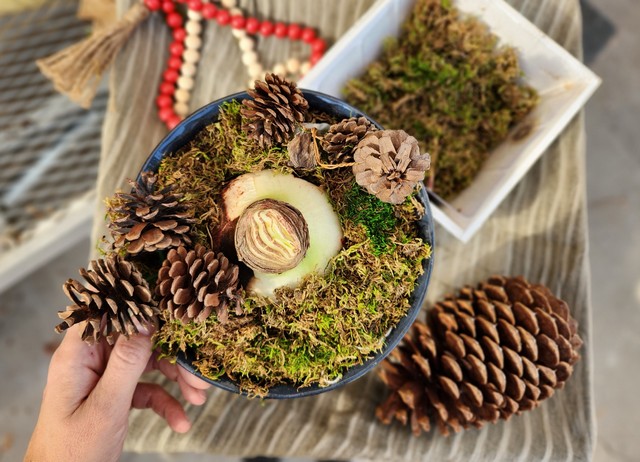
Gather all materials for planting your Amaryllis bulbChoose a pot that is at least 6″ deep and about an inch wider on all sides from your AmaryllisMake sure you pot has drainageChoose an Amaryllis bulb that is firm and not mushy or rottingFill your pot half way up with well-draining potting soilPlace bulb on soil and line up to the center of the potBulb should stick half way up over soil once fullSide view of pot to show bulb placementFill soil around the roots and bulbTap the soil down so the bulb will stay in placeWater in well and then add decorative mulch if you’d likeAdd additional decor like pine cones,figurines, twigs, etc
Select firm bulbs – the biggest you can find. The larger the bulb, the more blooms it can have. Use any pot, ideally at least 6″ deep, with drainage and about 1 to 2 inches wider than the bulb. Try a larger container with several amaryllis. Plant bulbs an inch apart, if planting more than one.
Plant or restart your bulb 8-10 weeks in advance of when you want it to bloom. If you want blooms during Christmas and New Year, plant your bulb at the beginning of November.
Fill the pot 1/2 full with all-purpose well draining potting soil. Set the bulb on top of soil and then fill the pot with soil so the 1/3 to 1/2 of the bulb is exposed. The soil can be topped with the moss, rocks, or other decorations.
Water well to settle the soil then water sparingly until active growth is visible. Around one fourth cup of water a week is usually adequate. You don’t want the soil to get bone dry but avoid it being soggy.
Place the pot in a warm sunny (indirect bright light is best) spot and you’ll start to see it growing its flower stalk soon. If the bloom stalk is leaning towards the light, rotate your pot one fourth turn every week. You’ll have blooms in about two months.
You can then move the pot wherever you’d like indoors to enjoy after they are in bloom.
After Blooming Care:
Once the blooms are done, Amaryllis will grow long leaves. Keep your plant in direct to indirect bright light and fertilize about once a month if there is active growth. Once the temps are 50F or above outdoors, acclimate your plant outside to the bright sun. Keep your plant outside all summer until the temps drop again. This is the best way to get blooms next year since they need to store a lot of energy for blooms the next winter.
Fertilize your plant every other week and water when the top couple inches of soil is dry.
In the fall, once the temps drop to around 50F bring your plant into a dark cool area and stop watering to induce dormancy.
Once the leaves yellow and die, cut them off about an inch above the bulb.
Leave your plant in a cool dark place for 2-3 months.
Once you start to see a bloom bud coming, take out of dark area and water your pot. Placing your pot in a sink filled with water for about 10 mins is the best way to get water around the roots of the bulb when you are initially taking it out of dormancy.
Follow the above care instructions starting at #5.
As you can see, Amaryllis bulb planting is super easy and is well worth the effort to have the colorful blooms during the cold winter months.