A Step-by-Step Guide to Planting Asparagus Roots in Your Home Garden

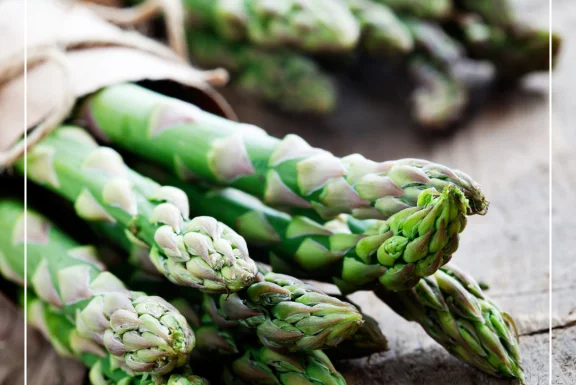
Introduction: Asparagus is a perennial favorite among garden enthusiasts, known for its delicious spears and early spring harvest. Planting asparagus roots, or crowns, might seem daunting at first, but with the right guidance, you can establish a thriving patch that will produce for years to come. Here’s how to get started on your journey to growing fresh asparagus right in your backyard.

Step 1: Choose the Right Time The best time to plant asparagus crowns is in the early spring, as soon as the soil can be worked. Asparagus thrives in cooler temperatures, making early season planting ideal.

Step 2: Select a Suitable Site Asparagus needs full sun and well-drained soil. Choose a location that receives at least 6-8 hours of sunlight daily. Avoid areas where water tends to pool after heavy rains. Since asparagus is a long-term crop (it can produce for up to 20 years), ensure the site is somewhere you can dedicate to asparagus for the long haul.

Step 3: Prepare the Soil Asparagus prefers nutrient-rich, slightly alkaline soil with a pH of about 7.0 to 7.2. Prepare your garden bed by digging about 12-18 inches deep and mixing in ample amounts of organic matter like compost or well-rotted manure. This will improve the soil’s structure, drainage, and nutrient content.

Step 4: Plant the Crowns Purchase one-year-old asparagus crowns from a reputable nursery like Drummers Garden Center and Floral. Dig trenches about 6 inches deep and 12 inches wide. Place the crowns in these trenches about 18 inches apart, spreading the roots out uniformly. Cover the roots with 2-3 inches of soil. As the asparagus grows, continue to fill in the trench with soil until it is level with the rest of your garden.

Step 5: Watering and Mulching Water the newly planted asparagus well to settle the soil around the roots. Keep the area moist but not waterlogged. Mulching with straw or shredded leaves can help retain soil moisture and suppress weeds.

Step 6: Care and Maintenance During the first year, focus on allowing the plants to establish themselves. Avoid harvesting asparagus spears during this time. Keep the bed weed-free and well-watered. In subsequent years, you can start harvesting spears sparingly in early spring when they are about 6-8 inches tall.

Step 7: Fertilize Annually Each spring, apply a balanced fertilizer to encourage vigorous growth. Alternatively, a top dressing of compost can provide slow-release nutrients over the season.

Conclusion: Planting asparagus might require patience and care initially, but the payoff is tremendously rewarding. With proper preparation and maintenance, your asparagus bed will produce delicious spears each spring for decades. Stop by Drummers Garden Center and Floral for all the supplies you need and expert advice on how to start your asparagus garden today. Happy gardening!

potatoes and onions

Digging Into the World of Spring Planted Vegetables: Potatoes and Onions

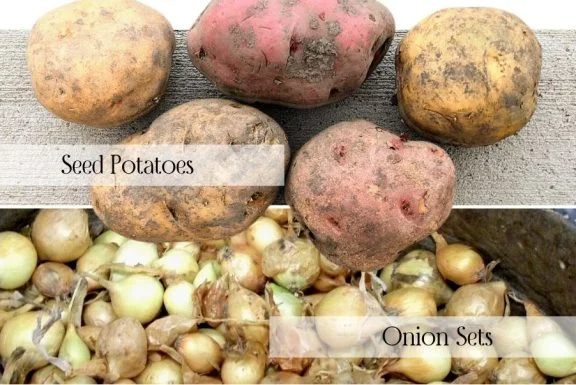
Whether you are a beginner looking to start your gardening journey or an enthusiast seeking to expand your knowledge, this informative guide will walk you through different potato varieties, onion options, and essential tips for a fruitful vegetable garden this spring. See the potato and onion varieties we commonly carry at the end of the article!

Introduction to Spring Vegetable Gardening


Understanding the Importance of Early Spring Planting

Early spring presents a unique opportunity for gardeners. It’s a time when the soil begins to warm up, offering ideal conditions to plant certain vegetables, like potatoes and onions. Starting your vegetable garden early can lead to stronger root development, fulfill required growing time, and a more robust harvest. Potatoes and onions, in particular, are hardy crops that can withstand the cooler temperatures of early spring. By understanding the importance of early spring planting, you increase the chances of enjoying a successful and productive garden.

Unearthing the Potential of Potatoes


Exploring Diverse Potato Varieties

Potatoes come in an array of varieties, each with its unique flavor, texture, and culinary use. Understanding the differences is key to choosing the right types for your garden. The most common categories are russets, reds, yellows, and whites. Russets, like Burbank, are known for their thick skin and starchy interior, making them perfect for baking and frying. Red potatoes have a smooth, thin skin and are excellent for soups and salads due to their firm texture. Yellow varieties, like the Yukon Gold, offer a buttery flavor, creamy texture and are versatile in the kitchen, suitable for roasting and mashing. White potatoes are less starchy and hold their shape well, making them ideal for boiling. Additionally, there are fingerling and purple potatoes, like Purple Majesty. which can add a gourmet touch to your dishes. By exploring diverse potato varieties, you can enrich your garden and kitchen with a range of flavors and textures.

Fundamentals of Planting Potatoes

Planting potatoes requires attention to detail to ensure a bountiful harvest. Cut larger seed potatoes into chunks with at least one or two eyes per piece. Before planting, some gardeners prefer to let the cut pieces cure for a day or two, which can help prevent rot. When it’s time to plant, prepare a sunny spot in your garden with well-drained, loose and fertile soil. Plant the potato pieces about three to four inches deep and twelve inches apart, with rows spaced roughly three feet apart. As the potatoes grow, mound soil around the base of the plants to cover the stems and support new tuber development. This process, called hilling, is crucial as it prevents the potatoes from being exposed to sunlight, which can cause them to turn green and become toxic. Regular watering, once the top few inches of soil are dry, particularly during tuber formation, is essential for a healthy potato crop.

Harvesting and Storing Potatoes

Harvesting potatoes at the right time is important for both taste and storage longevity. New potatoes can be harvested early when the plants begin to flower, while maincrop varieties should be left until the foliage starts to yellow and die back. To harvest, gently dig around the plants with a garden fork, being careful not to pierce the tubers. After removing the potatoes from the soil, let them dry for a few hours before cleaning off any dirt. For long-term storage, cure the potatoes for about two weeks in a cool, humid place away from direct sunlight to toughen up their skin. Once cured, store them in a dark, cool, and well-ventilated area. Properly stored, most potato varieties can last several months. Avoid storing potatoes near onions or fruits that produce ethylene gas, as this can cause them to spoil quicker. With these steps, your potatoes will be well-preserved for future use.

Understanding the Intricate World of Onions


Discovering Different Onion Varieties

Onions vary widely in shape, color, and flavor, with each type lending itself to different culinary uses. Yellow onions, like Texas Legend, are the most common and boast a balance of astringency and sweet flavor when cooked, making them highly versatile for both raw and cooked dishes. Red onions, like Red Candy Apple, with their vibrant color and mild flavor, are perfect for fresh salads and salsas. White onions, like Ringmaster, are often used in Mexican cuisine, have a sharper, more pungent flavor and are ideal for grilling and sautéing.

Apart from these, there are specialty onions like shallots and leeks. Shallots are favored for their delicate, slightly sweet flavor, and are a staple in fine dining recipes. Leeks, offer a fresh, mild taste and are commonly used in soups. Exploring these different onion varieties can enhance the flavors of your dishes and add diversity to your vegetable garden.

Vital Steps in Planting Onions

Successful onion cultivation begins with selecting the right variety for your region. Onions are day-length sensitive, so choose between short-day, intermediate-day, or long-day varieties based on your geographic location. Start with onion sets or plants for the best results. Plant the onions in a well-drained garden bed that receives plenty of sunlight. The soil should be rich in organic matter, with a slightly acidic to neutral pH.

Plant the bulbs or plants about an inch deep into the soil, spacing them about 4 to 6 inches apart to give them room to expand. If you’re planting rows, keep them about 12 to 18 inches apart. Water the onions regularly, especially during the drier periods, as consistent moisture is crucial for onion development and a full flavor. Be mindful of weeds, as onions don’t compete well with them. With these steps, your onions will be well on their way to a healthy growing season.

Tips for Harvesting and Storing Onions

When onions start to mature, their tops will begin to fall over. At this point, reduce watering to encourage drying. Once most of the tops are down, you can harvest by gently pulling or digging the onions from the ground on a sunny day. Allow them to dry in the sun for a day or two to cure, turning them to ensure even drying. If the weather isn’t cooperating, cure them under cover in a well-ventilated area.

After the outer skins have dried and the necks are tight, trim the roots and cut back the tops to about an inch above the bulb. Store the onions in a cool, dry place with good air circulation. Avoid storing them in plastic bags as moisture can accumulate and promote rot. Mesh bags or crates work well for storage. With proper care, your onions can last for several months, providing you with a long-lasting supply for your culinary needs.

Embrace Vegetable Gardening This Spring


Cultivating a Thriving Vegetable Garden

To cultivate a thriving vegetable garden, start by planning your space wisely. Consider the amount of sunlight, the type of soil, and the water drainage of your plot. Amend the soil with organic matter like compost to provide the nutrients your vegetables will need. When designing your garden, group plants with similar needs together and practice crop rotation to prevent soil depletion and reduce the risk of disease.

Be mindful of the spacing between plants to ensure they have room to grow without competing for resources. Regularly check for pests and diseases and address any issues promptly to protect your garden. Water your plants consistently, particularly during dry spells, and mulch to retain soil moisture and suppress weeds. With these simple yet effective steps, your vegetable garden can flourish, providing fresh produce and the satisfaction of growing your own food, with tasty results!

Potato Varieties We Commonly Carry:
Red:
Red Lasoda
Red Pontiac
Red Norland
Viking

White/Yellow:
Burbank (Russet)
Gold Rush (Russet)
Norkotah (Russet)
Cascade
Kennebec
Dakota Pearl
Yukon Gold

Specialty:
Amarosa fingerling
Purple Majesty
All Blue

Onion Varieties We Commonly Carry:
Yellow:
Texas Legend
Candy
Walla Walla
Highlander
Yellow Spanish
Yellow Granex

Red:
Redwing
Red Candy Apple

White:
Ringmaster
Super Star
White Bermuda

Specialty:
Alisa Craig (Yellow)
Patterson (Yellow)
Red Zeppelin (Red)
Leeks

tomato

Blight Resistant Tomatoes and Prevention

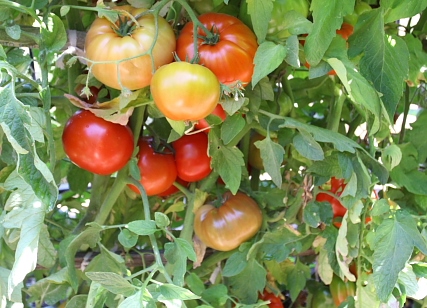
All fresh tomatoes are great but those of you who are looking for tomatoes that are blight resistant, look no further!

Brief description of blight:

Blight causes sudden yellowing, wilting, spotting, or browning of new leaf growth, fruit, stems, or the whole plant, depending on the severity. It spreads by fungal spores that are carried by wind, water, tools, and insects from infected plants, and then deposited on the plant or dead plant matter on the soil. The disease requires moisture to progress, so when moisture or rain comes in contact with fungal spores, they reproduce. The spores thrive in humidity and the spores can then be transmitted through the wind easily.

Blight can infect many different plants, i.e.  apples, potatoes, and cucumbers, and can be caused by various fungal strains like Alternaria solani, a.k.a. Early Blight, or Phytophthora infestans, a.k.a. Late Blight.

Prevention is key, even for blight resistant tomatoes. Copper fungicide, or Fung-onil can help slow the growth once you see signs of blight or spray on the plant prior (about 2 weeks) before predicted hot and humid weather.

earl blight on tomato leaf

Example of early blight on a tomato leaf. Source: Univ. of MN Extension

Best practices to prevent blight:

  • Healthy plants are less effected by blight. Provide proper water and nutrients. Tomatoes are heavy feeders. Tomato Tone or Plant Tone are good options when you are first planting your tomatoes. If you get a lot of foliage growth, fertilize with less nitrogen and more phosphorus, 5-10-5.
  • Mulch around your plant to prevent soil from splashing up onto the foliage.
  • Water your plant at the base and avoid the foliage. Morning is best so it can dry throughout the day.
  • Provide proper spacing between plants and air flow but using cages.
  • Sanitize all garden tools between plants
  • Clean up any dead infected foliage around the plant and either burn or put into the trash. Do not compost!
  • Prune the lower branches of tomatoes a foot above the ground to help reduce water splashing on the leaves.  Prune further if you see any disease spots on lower leaves.

Don’t let diseases deter you from certain plants since many plants can get blight without proper care, prevention, or crop rotation. If you have been effected by blight, we understand the frustration, so try one of these blight resistant varieties listed below. If we have especially hot and wet weather, we recommend having a fungicide on hand so if you start seeing blight, you can treat a.s.a.p.

BLIGHT RESISTANT TOMATOES

Variety

 Best Used For

Location*

Growth Habit

Beefmaster Slicer Garden Indeterminate
Better Boy Slicer Garden Indeterminate
Big Boy Slicer Container Determinate
Big Daddy Slicer Garden Indeterminate
Heirloom Brandywine Slicer Garden Indeterminate
Brandywine Yellow Slicer Garden Indeterminate
Champion II Slicer Garden Indeterminate
Cherokee Purple Slicer Garden Indeterminate
Early Girl Slicer Garden Indeterminate
Rutgers Slicer Garden Determinate
Supersteak Slicer Garden Indeterminate
Gladiator Slicer/Paste Garden Indeterminate
Juliet Snacking Garden Indeterminate
Sunsugar Snacking Garden Indeterminate
SuperSweet 100 Snacking Garden Indeterminate
Yellow Pear Snacking Garden Indeterminate
Big Beef Salsa Garden Indeterminate
La Roma Paste Container Determinate
San Marzano Canning/Chopped Garden Indeterminate


*All listed container plants will also do well in the ground. These tomato plants tend to have a more compact size.

Determinate = Plant grows to a certain size and stops, bearing most of it’s fruit within a one month period. Great for small spaces or containers. Some will grow tall and still need tomato cages.

Find pictures to help identify blight, from University of Minnesota Extension, as well as more management information.

carrots held by gardening with soil on them.

Starting a Vegetable Garden & Resources

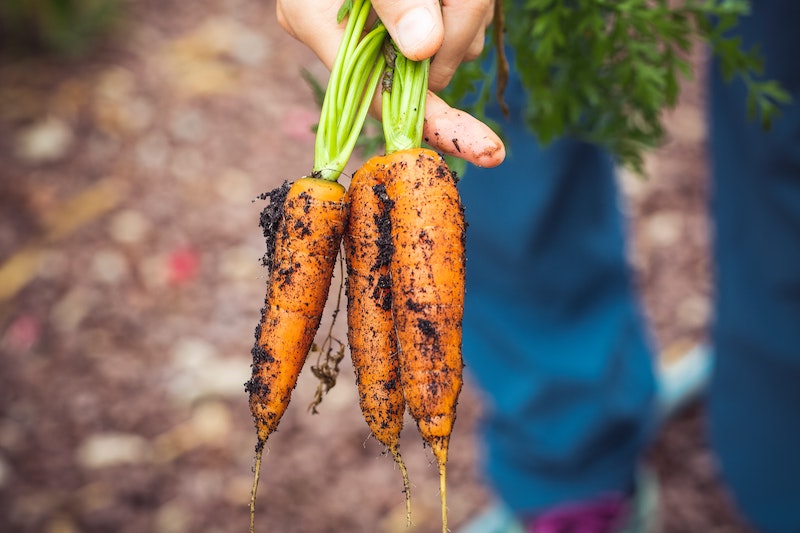
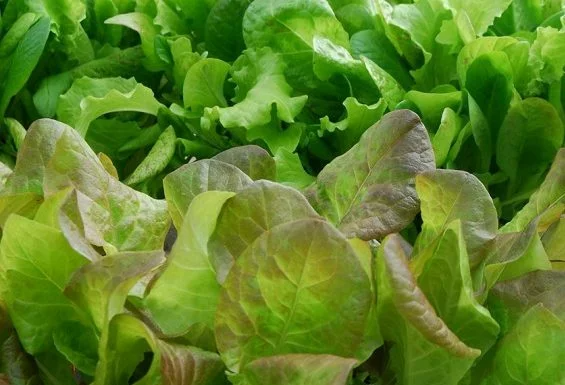
Congrats on starting your vegetable garden journey!

There has been a huge increase of people wanting to grow their own food as well as flowers, pollinator plants and converting lawns to native species so you’ll find a large community, including us, that can help you with all your trials and celebrate your successes.

This post is for bringing the basic info together to start you off. We are always here to answer your questions if you have any if you can’t find what you are looking for email us! Feel free to call or stop in!

Info sheets we like to handout in store for all vegetable gardeners:

Vegetable Gardening Estimated Sowing Dates/Planner (PDF)

Seed Starting Indoors (PDF)

You can also read our post about seed starting supplies and steps.

Additional Resources:

We’d also like to direct you to our Resources page for additonal gardening information.

We like getting our plant and gardening information from multiple sources, just like you do, so we found this webpage that helps you decide on where to plant, soil health, and more information. These steps are not only for vegetable gardens but perennial gardens and landscaping!

Don’t forget to follow us on the Facebook, Instagram and subscribe on YouTube for plant and gardening tips!

Video link

Seeds you need to start in March and April and what you need!
lettuce

Seed Starting

Smell the soil and see the plants grow new leaves! You can experience new life by starting seeds, also known as sowing, indoors this winter! Each plant packet will tell you when to sow the seeds but most will be started late winter through early spring.

Reasons to start your own plants from seed:

  1. Save money over the long run – The initial investment into growing gear may be seem like a lot but you can use trays, pots, lights, etc for multiple years.
  2. If you have a plant that dies, it’s ok! Sow extra seeds so you can avoid total loss. That one plant loss will be a low-cost loss than an already grown starter plant. If all else fails, we have starter plants to make sure you grow what you want to!
  3. Seeds will last longer than the packet expiration date. There may be lower germination rate so plant one or two extra seeds per hole.
  4. You can grow a lot of plants and a diverse variety! Garden centers, like us, grow a lot of different varieties but we can’t grow them all.

Next, we will cover seed packet info to take note of, supplies you will need to start seeds indoors, caring for seedlings, and hardening off seedlings.

Bonus info about sowing seeds outdoors in the winter is included! It is a must-see if you want to sow perennial plants.

Important seed packet info to get to know the plants you are growing:

  • The best time to plant ( Weeks before or after frost) The last frost date for Southern MN is projected as May 1- May 15th. See examples in the next section of sowing times before transplanting outdoors.
  • Indoor or direct sowing recommendations
  • How deep to plant the seeds
  • Days to germination gives an idea of how long it takes the seed to sprout
  • Days to maturity = the number of days from planting to harvest
  • Seedling thinning & spacing directions
  • Check if it’s perennial (must be zone 4 to be S.MN hardy) or annual (only grows one season)

Start seeds indoors or directly sow them in the garden or planter?

Use the “date to maturity” as a guide for your produce. This will let you know about the time you should be harvesting and if you will need to sow in the winter. Some plants have a LONG growing season and should be started indoors around Feb/Mar to reach maturity. ( ex. peppers, celery, tomatoes, cole crops, lemongrass, and rosemary)

Some plants have sensitive roots and mature fast enough in our climate to be directly sown. Examples are corn, cucumbers, potatoes, carrots, sunflowers, nasturtium, beans, radishes, peas, dill, and radishes.

**Hardy perennials may require cold stratification or scarification for proper germination. Read more about starting seeds outdoors in the winter, which is needed for zone 4 and 5 perennial seeds.

What type of growing medium is best?

AVOID using soil from your yard/garden if possible! It is an easy way to introduce unwanted pests and disease problems for little seedlings. *Most at-home compost piles do not get hot enough to kill harmful pathogens.

Recommended for seeds – Seed Starting Mix. It is a fine textured, soilless medium that is sometimes heat sterilized. It contains no nutrients and is intended for germination only.

When potting up seedlings into containers – Standard Potting Mix. Any potting mix will do! Some may contain nutrients to start feeding your plants but if you have them planted in containers you will have to supplement the soil with fertilizers as they get bigger.

Supplies needed to start seeds indoors:

Plug tray, soil pellets or seed starting potting soil, open flat, humidity dome, pots, watering can, heat mat, fertilizer, grow light, and a fan.

Let’s dig into each of these materials and why you need them.

Plug Trays – Provides a controlled environment for proper germination

When choosing a size of plug tray, ask yourself how many plants you want to grow. Some plug trays come with smaller plugs and can fit more plants and vice versa. The smaller the plug, the sooner you will need to pot up into larger plug trays or pots.

Soil Pellets

Usually, these pellets are made of coco coir. To expand the pellets, soak them in water and place the seed in the soil.

Open Flats

With drainage holes: Fill with seeding mix and scatter seeds. Divide and up-pot or plant outside when they are ready.

Without drainage holes: Use under plug trays to catch the water/soil.

Humidity Dome – Keeps moisture in and helps germination of seeds.

condensation inside a dome with a tray of plants inside.

Fits over most plug trays and open flats. A short dome is for seed starting, and a tall dome is for propagating cuttings. Domes will need to be taken off after the seedlings are a couple of inches tall.

Pots – Plastic, Coco Coir, Biodegradable options

Use various sizes to start seeds if desired. Pots are good for when you need to divide plants in plug trays and up-pot. Choose the right-sized pot when up-potting! Too big and it may not dry out fast enough, causing root rot.

Watering Can/Spray Bottle – For keeping the soil moist and not disturbing the soil around seedlings.

Heat Mat – Most homes are not warm enough for proper germination

Raises soil temp 10-20 degrees above room temperature which will speed up the germination process and reduce chances of seeds rotting. The heat mat does not need to be on once all the seedlings have sprouted.

Lights & Timer – Supplemental light is essential to growing happy seedlings indoors!

Plants need strong light so supplemental light prevents weak and leggy plants. Get full spectrum/daylight bulbs. There are T8 & T5 fluorescent, Standard Bulbs, and LED options.

Use a timer to make life easier! 14 hrs. of light per day is the standard after seeds germinate.

There is no need to have a light on before seedlings emerge unless the seed packet says “light germinated”.

Fans

A light breeze helps grow strong plant stems. The movement of the stem will strengthen it. It will also help prevent fungal diseases from too much humidity.

Fertilizer

Seedlings do not need nutrients right away. Wait until they have a few sets of true leaves before adding fertilizers.

A half-strength, balanced fertilizer works well for most plants. We recommend looking up proper fertilization for specific plants grown.

Caring for seedlings:

Proper watering is essential. Keep soil evenly moist until germination.

Allow tap water to sit out overnight to dechlorinate when possible. Avoid using soft water.

Know your plant’s specific watering and fertilization needs by reading their packet or researching online.

Find a routine and water early in the day if possible.

After germination, allow the soil to dry slightly between watering. This encourages root growth! Avoid “loving your plants to death”, aka overwatering.

Hardening Off – Allows your plants time to adjust to light, temperature, and environmental changes

Start putting your potted plants in the shade on a calm day, for an hour or two. Slowly increase time by 1 to 2 hours outside and sun exposure over several days. It usually takes 7-14 days to fully acclimate. Reduce sun exposure again if you see signs of sun-scorched foliage. Make sure you check the soil moisture once or twice a day, depending on pot size.

We carry grow lights, seed starting kits, seedling potting soil, fertilizer, and seeds. Later in the spring, we will have vegetables and herbs that we have grown for you to purchase if you don’t get to start your seedlings.

bloomstruck hydrangea

Acidic Soil Loving Plants


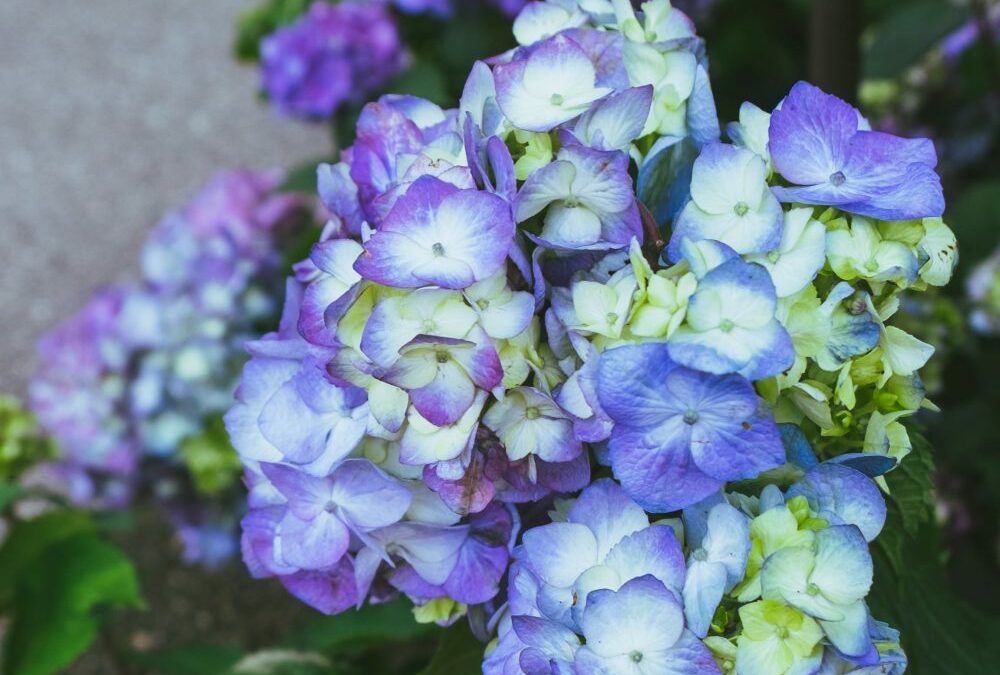
Three Plant Needs

Water, Sun, and Soil (Nutrients).

Where does soil pH level come in?

Plants need nutrients and have a balanced relationship with elements in the soil which will contribute to the health of plants.

Plants also have pH level preferences. The soil pH level can affect the uptake of nutrients. Depending on the plant, if the soil pH is not ideal then you may have a stunted and unhealthy plant and it’s not because there isn’t nutrients in the soil.

Put Away the Fertilizer For Now

If you are noticing any issues like yellowing leaves, no fruit production, growth seems stunted, and not blooming, checking the pH is highly recommended first before using fertilizers.

For example, you may add fertilizer to your garden but it still has little effect on your plant health if for some reason your soil pH is off. Too much fertilizer can also inhibit nutrient uptake because of soil nutrient imbalances. In addition, nitrogen and phosphorous runoff is a huge environmental pollutant, especially to our waterways and lakes.

Testing your soil nutrients is good gardening practice and could save you money in the long run. If you know your soil pH is within the proper range and your plant is showing nutrient deficiency symptoms, use a slow release fertilizer (like Bio-tone) for in-ground plants to avoid excessive nutrients and run-off.

What is Acidic Soil?

The range of pH is from 0-14. Acidic soil is considered anything below 7.

Acidity ranges:
Slight  6.0
Strong  5.5
Very Strong 5.0
Extremely 4.5

Many plants like to grow within the 6-7.5 pH range for optimal nutrient uptake.

In Southern MN, you may notice a lot of clay soil with lime, which tends to be more alkaline 7 pH or above. Water coming from hoses in this area are usually more basic, which increases soil alkalinity.

Other factors that affect soil acidity are rainfall, nitrogen fertilizers, plants (like pines), and subsoil acidity. The best way to know your soil acidity level is a quick home test.

Acidic Soil Loving Plants

Plants that prefer slight acidity, 6.0-7.0 range:

Most plants! Each plant has a pH range it can tolerate and many plants can handle down to 6.0.

Plants that prefer strong acidity, 5.5:

Trees and Shrubs: 
Raspberry 5.5-7.0, Pears 5.5-7.0, Peaches 5.5-7.0

Vegetable and Fruits:
Potato 5.5, Squash 5.5, Garlic 5.5-8.0, Carrot 5.5-7.0, Sweet Peppers 5.5-7.0, Tomatoes 5.5-7.5, Cauliflower 5.5-7.5, Cucumber, 5.5-7.0, Pumpkin 5.5-7.0, Eggplant 5.5-6.5, Sweet Potatoes 5.2-6.0, Rhubarb 5.5-7.0

Flowers:
Begonia 5.5-7.0, Black-Eyed Susan 5.5-7.0, Clematis 5.5-7.0, Marigold 5.5-7.5, Nasturtium 5.5-7.5, Pansy 5.5-6.5, Snapdragon 5.5-7.0, Zinnia 5.5-7.0, Fox Gloves 5.5-6.5, Cyclamen 5.5-6.5

Plants that prefer very strong acidity, 5.0:

Trees and Shrubs:
Spruce 5.0-6.0, Juniper 5.0-6.0, Blackberry 5.0-6.0, Apple, 5.0-6.5, Serviceberry 5.0-6.0, Fothergilla 5.0-6.0, Magnolia 5.0-6.0

Fruits:
Strawberries 5.5-6.5, Grapes 5.5-7.0

Flowers:
Coneflowers 5.0-7.5, Cosmos 5.0-8.0, Gladiolus 5.0-7.0, Lupine 5.0-6.5

Plants that prefer extremely strong acidity, 4.5:

Trees and Shrubs:
Azalea 4.5-6, Blueberry 4.5-6, Hydrangea-Blue flowered 4.0-5.0, White Pine 4.5-6.0, Rhododendron 4.5-6
Flowers – Lily-of-the-Valley 4.5-6.0

Plants have a range of pH that they will grow in and thrive. Those plants that have very strong and an extremely strong acidic soil needs, may need additional amendments to keep soil pH down.

Changing Soil pH

The best way to improve soil pH is through addition of amendments and adding organic material. To increase acidity add sulfur and to decrease acidity add lime. Add both of these amendments in small stages and increments as to not shock the plant if it’s already planted. Read the instructions on any product you use to properly adjust the pH.

Favorite supplements to adjust the soil pH that will not shock the plants
if used as directed:

Epsoma Soil Acidifer – Organic, Safe, long-lasting, and won’t burn the plants if used as directed. Repeat in 60 day intervals if needed.

Epsoma Berry Tone for Berries – Organic, Good if you need to slightly increase acidity, Use early and late spring, Use on blueberries, strawberries, and raspberries, Will help produce bigger plants and more berries.

Adjust Soil pH with Organic Matter

Add any type of compost to your garden beds. This is best to do in the fall since it takes more time to adjust the soil pH using this method but feel free to feed plants with top dressing of compost during the growing season. Reach for compost first when wanting to add nutrients, improving soil aeration, improving water retention, and adjusting pH.

Modifying your soil’s pH will take some time. Depending on the type of soil you are working with, the addition of supplements and organic material may be needed year-after-year.

If you test your soil and notice you’re having troubles with keeping your soil more acidic, don’t fight it! Choose plants that will tolerate more neutral or alkaline soils. There are plenty out there!