honey bee gathering nectar from a lavender plant

Pollinator Paradise: Creating a Garden Haven for Bees, Butterflies, and Birds

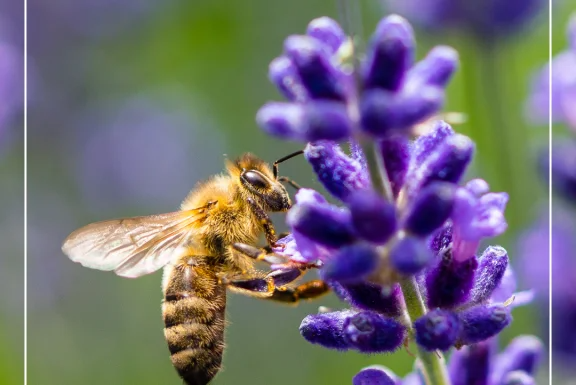
Introduction: In the bustling world of a garden, there are unsung heroes that often go unnoticed – pollinators. Bees, butterflies, and birds play a crucial role in the ecosystem by pollinating flowers and ensuring the reproduction of plants. Creating a pollinator-friendly garden not only supports these vital creatures but also adds vibrancy and life to your outdoor space. In this blog post, we’ll explore the importance of pollinator-friendly gardening practices and provide tips for attracting bees, butterflies, and birds to your garden sanctuary.

The Importance of Pollinator-Friendly Gardening Practices: Pollinators are essential for the reproduction of many flowering plants, including those that produce fruits, vegetables, and seeds. Without pollinators, these plants would struggle to reproduce and ultimately decline in population. By creating a pollinator-friendly garden, you’re not only supporting the health of your local ecosystem but also ensuring a bountiful harvest of fruits and vegetables for yourself and your community.

Tips for Attracting Bees, Butterflies, and Birds:

  1. Choose Native Plants: Native plants are adapted to your local climate and soil conditions, making them attractive and accessible to local pollinators. Research native plant species in your area and incorporate them into your garden design.

Examples include:

  • Wild Bergamot (Monarda fistulosa): Also known as bee balm, this native perennial features clusters of pink to lavender flowers atop tall stems. It blooms from mid- to late summer and attracts a variety of pollinators, including bees, butterflies, and hummingbirds.
  • Black-eyed Susan (Rudbeckia hirta): This cheerful native annual or short-lived perennial boasts bright yellow daisy-like flowers with dark brown centers. It blooms from mid-summer to early fall and is a favorite of bees and butterflies.

Purple Coneflower (Echinacea purpurea): This native perennial produces vibrant purple flowers with prominent orange centers. It blooms from mid-summer to early fall and is a favorite among bees and butterflies.

Wild Lupine (Lupinus perennis): This native perennial produces tall spikes of blue to purple flowers in late spring to early summer. It is the primary host plant for the endangered Karner blue butterfly and attracts other pollinators as well.

  • Provide a Variety of Flowers: Different pollinators are attracted to different types of flowers, so aim to create a diverse range of blooms in your garden. Include flowers with varying colors, shapes, and bloom times to attract a wide array of pollinators throughout the growing season.
  • Spring Blooms: Dutch Crocus (Crocus vernus), Snowdrop (Galanthus nivalis), Pasque Flower (Pulsatilla vulgaris)
  • Early Summer Blooms: Wild Columbine (Aquilegia canadensis), Blue Flag Iris (Iris versicolor), Butterfly Milkweed (Asclepias tuberosa)
  • Mid-Summer Blooms: Joe Pye Weed (Eutrochium maculatum), Swamp Milkweed (Asclepias incarnata), Black-eyed Susan (Rudbeckia hirta)
  • Late Summer to Fall Blooms: New England Aster (Symphyotrichum novae-angliae), Goldenrod (Solidago spp.), Sneezeweed (Helenium spp.)

Crocus

Wild Columbine

Joe Pye Weed

  1. Plant in Clusters: Grouping flowers together in clusters makes it easier for pollinators to find and access them. Aim for large patches of the same flower species to create visual impact and maximize pollinator visits.
  2. Offer Shelter and Water: Provide shelter for pollinators in the form of trees, shrubs, and other vegetation where they can rest and seek refuge from predators. Additionally, include a shallow water source such as a birdbath or small pond to provide pollinators with access to clean drinking water.
  3. Avoid Pesticides: Pesticides can be harmful to pollinators, so opt for natural pest control methods whenever possible. Integrated pest management techniques, such as attracting natural predators or using insecticidal soaps, can help control pests without harming beneficial insects.
  4. Create Habitat Diversity: Incorporate a variety of habitats into your garden, including open spaces, meadows, and wooded areas, to attract a diverse range of pollinators. Consider leaving some areas of your garden wild to provide nesting sites for bees and other insects.

Conclusion: In a world where pollinators are facing increasing threats from habitat loss, climate change, and pesticide use, creating a pollinator-friendly garden is more important than ever. By following these tips and embracing pollinator-friendly gardening practices, you can transform your outdoor space into a haven for bees, butterflies, and birds while supporting the health of your local ecosystem. So, roll up your sleeves, dig in the dirt, and let’s create a pollinator paradise together!

potatoes and onions

Digging Into the World of Spring Planted Vegetables: Potatoes and Onions

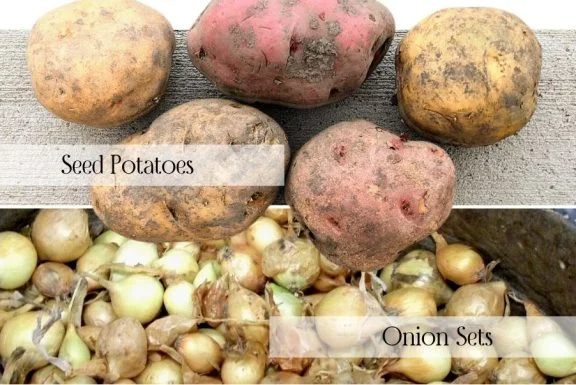
Whether you are a beginner looking to start your gardening journey or an enthusiast seeking to expand your knowledge, this informative guide will walk you through different potato varieties, onion options, and essential tips for a fruitful vegetable garden this spring. See the potato and onion varieties we commonly carry at the end of the article!

Introduction to Spring Vegetable Gardening


Understanding the Importance of Early Spring Planting

Early spring presents a unique opportunity for gardeners. It’s a time when the soil begins to warm up, offering ideal conditions to plant certain vegetables, like potatoes and onions. Starting your vegetable garden early can lead to stronger root development, fulfill required growing time, and a more robust harvest. Potatoes and onions, in particular, are hardy crops that can withstand the cooler temperatures of early spring. By understanding the importance of early spring planting, you increase the chances of enjoying a successful and productive garden.

Unearthing the Potential of Potatoes


Exploring Diverse Potato Varieties

Potatoes come in an array of varieties, each with its unique flavor, texture, and culinary use. Understanding the differences is key to choosing the right types for your garden. The most common categories are russets, reds, yellows, and whites. Russets, like Burbank, are known for their thick skin and starchy interior, making them perfect for baking and frying. Red potatoes have a smooth, thin skin and are excellent for soups and salads due to their firm texture. Yellow varieties, like the Yukon Gold, offer a buttery flavor, creamy texture and are versatile in the kitchen, suitable for roasting and mashing. White potatoes are less starchy and hold their shape well, making them ideal for boiling. Additionally, there are fingerling and purple potatoes, like Purple Majesty. which can add a gourmet touch to your dishes. By exploring diverse potato varieties, you can enrich your garden and kitchen with a range of flavors and textures.

Fundamentals of Planting Potatoes

Planting potatoes requires attention to detail to ensure a bountiful harvest. Cut larger seed potatoes into chunks with at least one or two eyes per piece. Before planting, some gardeners prefer to let the cut pieces cure for a day or two, which can help prevent rot. When it’s time to plant, prepare a sunny spot in your garden with well-drained, loose and fertile soil. Plant the potato pieces about three to four inches deep and twelve inches apart, with rows spaced roughly three feet apart. As the potatoes grow, mound soil around the base of the plants to cover the stems and support new tuber development. This process, called hilling, is crucial as it prevents the potatoes from being exposed to sunlight, which can cause them to turn green and become toxic. Regular watering, once the top few inches of soil are dry, particularly during tuber formation, is essential for a healthy potato crop.

Harvesting and Storing Potatoes

Harvesting potatoes at the right time is important for both taste and storage longevity. New potatoes can be harvested early when the plants begin to flower, while maincrop varieties should be left until the foliage starts to yellow and die back. To harvest, gently dig around the plants with a garden fork, being careful not to pierce the tubers. After removing the potatoes from the soil, let them dry for a few hours before cleaning off any dirt. For long-term storage, cure the potatoes for about two weeks in a cool, humid place away from direct sunlight to toughen up their skin. Once cured, store them in a dark, cool, and well-ventilated area. Properly stored, most potato varieties can last several months. Avoid storing potatoes near onions or fruits that produce ethylene gas, as this can cause them to spoil quicker. With these steps, your potatoes will be well-preserved for future use.

Understanding the Intricate World of Onions


Discovering Different Onion Varieties

Onions vary widely in shape, color, and flavor, with each type lending itself to different culinary uses. Yellow onions, like Texas Legend, are the most common and boast a balance of astringency and sweet flavor when cooked, making them highly versatile for both raw and cooked dishes. Red onions, like Red Candy Apple, with their vibrant color and mild flavor, are perfect for fresh salads and salsas. White onions, like Ringmaster, are often used in Mexican cuisine, have a sharper, more pungent flavor and are ideal for grilling and sautéing.

Apart from these, there are specialty onions like shallots and leeks. Shallots are favored for their delicate, slightly sweet flavor, and are a staple in fine dining recipes. Leeks, offer a fresh, mild taste and are commonly used in soups. Exploring these different onion varieties can enhance the flavors of your dishes and add diversity to your vegetable garden.

Vital Steps in Planting Onions

Successful onion cultivation begins with selecting the right variety for your region. Onions are day-length sensitive, so choose between short-day, intermediate-day, or long-day varieties based on your geographic location. Start with onion sets or plants for the best results. Plant the onions in a well-drained garden bed that receives plenty of sunlight. The soil should be rich in organic matter, with a slightly acidic to neutral pH.

Plant the bulbs or plants about an inch deep into the soil, spacing them about 4 to 6 inches apart to give them room to expand. If you’re planting rows, keep them about 12 to 18 inches apart. Water the onions regularly, especially during the drier periods, as consistent moisture is crucial for onion development and a full flavor. Be mindful of weeds, as onions don’t compete well with them. With these steps, your onions will be well on their way to a healthy growing season.

Tips for Harvesting and Storing Onions

When onions start to mature, their tops will begin to fall over. At this point, reduce watering to encourage drying. Once most of the tops are down, you can harvest by gently pulling or digging the onions from the ground on a sunny day. Allow them to dry in the sun for a day or two to cure, turning them to ensure even drying. If the weather isn’t cooperating, cure them under cover in a well-ventilated area.

After the outer skins have dried and the necks are tight, trim the roots and cut back the tops to about an inch above the bulb. Store the onions in a cool, dry place with good air circulation. Avoid storing them in plastic bags as moisture can accumulate and promote rot. Mesh bags or crates work well for storage. With proper care, your onions can last for several months, providing you with a long-lasting supply for your culinary needs.

Embrace Vegetable Gardening This Spring


Cultivating a Thriving Vegetable Garden

To cultivate a thriving vegetable garden, start by planning your space wisely. Consider the amount of sunlight, the type of soil, and the water drainage of your plot. Amend the soil with organic matter like compost to provide the nutrients your vegetables will need. When designing your garden, group plants with similar needs together and practice crop rotation to prevent soil depletion and reduce the risk of disease.

Be mindful of the spacing between plants to ensure they have room to grow without competing for resources. Regularly check for pests and diseases and address any issues promptly to protect your garden. Water your plants consistently, particularly during dry spells, and mulch to retain soil moisture and suppress weeds. With these simple yet effective steps, your vegetable garden can flourish, providing fresh produce and the satisfaction of growing your own food, with tasty results!

Potato Varieties We Commonly Carry:
Red:
Red Lasoda
Red Pontiac
Red Norland
Viking

White/Yellow:
Burbank (Russet)
Gold Rush (Russet)
Norkotah (Russet)
Cascade
Kennebec
Dakota Pearl
Yukon Gold

Specialty:
Amarosa fingerling
Purple Majesty
All Blue

Onion Varieties We Commonly Carry:
Yellow:
Texas Legend
Candy
Walla Walla
Highlander
Yellow Spanish
Yellow Granex

Red:
Redwing
Red Candy Apple

White:
Ringmaster
Super Star
White Bermuda

Specialty:
Alisa Craig (Yellow)
Patterson (Yellow)
Red Zeppelin (Red)
Leeks

johanna and deb looking at display landscape

Landscape Design Using Perennials

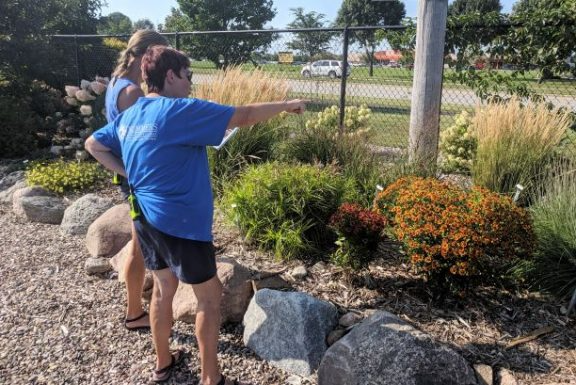
In this Elements of Landscape Design Series post we are focusing on landscape design using perennials to accomplish your landscape vision.

Incorporating perennials into a garden is a wonderful way to add beauty, diversity, and longevity to your outdoor space. Perennials are plants that live for more than two years, returning year-after-year, and they come in a wide variety of colors, sizes, and textures. Here are some steps to help you successfully incorporate perennials into your garden:

Assess your garden

Before choosing perennials, take a close look at your garden to determine its conditions. Observe the amount of sunlight different areas receive, the soil type, the moisture levels, and area dimensions. This information will help you select perennials that are well-suited to your specific garden conditions and have the best outcome.

Determine your design goals

Consider the overall aesthetic you want to achieve in your garden. Are you aiming for a cottage garden with a romantic, informal feel? Pastel colors are the go-to for a cottage garden. Or perhaps a modern garden with clean lines and bold colors? Understanding your design preferences will guide your choice of perennials and their arrangement.

Think into the future

As perennials mature they will fill in the space and one of the hardest things to do when planting perennials is to consider the spacing between the plants when they are at their mature size. Being impatient and filling out the space right away is going to cause problems in the future, as well as increased chances of fungal and disease issues.

Maintenance and care

As with any garden, perennials require regular maintenance. Be sure to provide proper watering, mulching, and fertilization based on the specific needs of each plant. Regularly deadhead spent blooms and remove any diseased or damaged foliage to promote healthy growth.

Plan for seasonality

Perennials can provide blooms and interest throughout the year. When selecting plants, pay attention to their flowering times to ensure you have a mix of perennials that bloom in different seasons. This way, you’ll have a continuous display of color and texture from spring to fall.

Choose a variety of heights and textures

Incorporate perennials with varying heights and textures to create visual interest and depth in your garden. Combine tall, vertical plants like delphiniums or hollyhocks with mid-height flowers such as coneflowers or salvias, and add low-growing groundcovers like creeping thyme or sedum for a layered effect. Depending on the viewing angle, place tall behind mid-height and then low groundcovers.

Consider foliage

While flowers are often the main attraction, don’t forget about foliage. Perennials with interesting foliage, such as ferns, coral bells, or ornamental grasses, can add texture and color even when not in bloom. Incorporating a mix of foliage types can provide year-round appeal in your garden.

Group plants according to their needs

Group perennials with similar growing requirements together. Consider their preferred light levels, moisture needs, and soil conditions. This will make it easier to care for the plants and ensure they thrive. For example, place sun-loving plants in areas with full sun and moisture-loving plants in areas that retain more moisture.

Create focal points

Use perennials to create focal points or anchor areas in your garden. Select a few standout plants, like ornamental grasses, tall flowering perennials, or shrubby varieties like hardy hibiscus, and place them strategically to draw the eye and add drama to your landscape. Small Hydrangea trees are another great focal point option!

Incorporate native species

Consider including native perennials in your garden. Native plants are adapted to the local climate and require less maintenance, making them an eco-friendly choice. They also provide habitat and food for native wildlife, helping to support biodiversity. Incorporate native species: Consider including native perennials in your garden. Native plants are adapted to the local climate and require less maintenance, making them an eco-friendly choice. They also provide habitat and food for native wildlife, helping to support biodiversity.

Remember that gardening is a dynamic process, and as your perennials mature and spread, you may need to divide or relocate them to maintain the desired look and prevent overcrowding. With time and attention, your garden will flourish, and you’ll enjoy the beauty and resilience of your perennial plants for years to come.

Read Landscape Design using Evergreens to incorporate the elegant, structural, and continuous color element to your landscape

Summer Plant Care & To-Dos

Pest Control:

Be on the lookout for signs of pest damage, such as holes in leaves or wilting plants, and address the issues promptly. Japanese Beetle damage is usually seen starting end of June, which looks like your leaves have turned to lace.

Like to do your own research? Get additional help identifying insects, weeds, and diseases at U of M Extension “Diagnose A Problem“.

Fertilizing Containers:

The frequency of fertilizing your annual plant containers can vary depending on several factors, including the type of plants, the quality of the soil, and the type of fertilizer you are using. However, as a general guideline, it is recommended to fertilize annual plant containers every two to four weeks during the growing season. Choose a fertilizer that is specifically formulated for flowering plants or general-purpose fertilizers with balanced ratios of nitrogen (N), phosphorus (P), and potassium (K). This will provide the necessary nutrients for healthy growth and vibrant blooms.

Watering and Maintenance:

Check the soil around your plants, especially newly planted ones, to ensure they are getting enough water in the summer heat. If they are dry a few inches down, water early in the morning or late in the evening to reduce evaporation. Remove any weeds that might have sprouted to prevent further spread of unwanted plants. Use a hand trowel or a garden fork to gently loosen the soil around the weeds and carefully remove them, making sure to get the roots out as well.

Harvesting:

If you have a vegetable or fruit garden, now is a great time to harvest ripe produce. Pick ripe fruits and vegetables such as tomatoes and berries. Regular harvesting encourages continuous production and ensures your plants stay healthy. If you have birds or other critters eating your raspberries, consider netting your berries while they ripen.

Pruning and Deadheading Annuals:

Regular pruning and deadheading of annual plants promotes healthy growth and flowering of your annual plants. Use sharp and clean pruning shears to remove the excess growth. We recommend to only prune 1/3rd of the plant size. Additionally, deadhead any faded or spent flowers to encourage new blooms. This will not only keep your garden looking tidy but also stimulate the growth of more vibrant flowers.


Think of your fall vegetable garden in July!

In the month of July, it’ll be time to start broccoli, cauliflower, brussel sprouts, and cabbage seedlings for fall planting. Many frost tolerant annuals should be started 6-10 weeks before first predicted frost date. In Zone 4, that is September 21st-October 7th.

Remember, specific tasks might vary depending on your location, climate, and the types of plants you have in your garden. Always adapt your gardening tasks to suit the unique needs of your plants and the current season.


Read Beneficial Bugs
Not all insects are cause for worry. In fact, many insects are beneficial. Attract the beneficial bugs with plants to help mitigate the non-beneficial bugs. This is a must read if you want to cut back on insecticides and create a balanced ecosystem.
Read TOP 5 TIPS for Summer Plantings
The hot weather and drought conditions may give gardeners pause before they add to their gardens and landscape. With these top 5 tips you can make summer garden planting successful
forget-me-not pink floweres

Spring Flowering Perennials

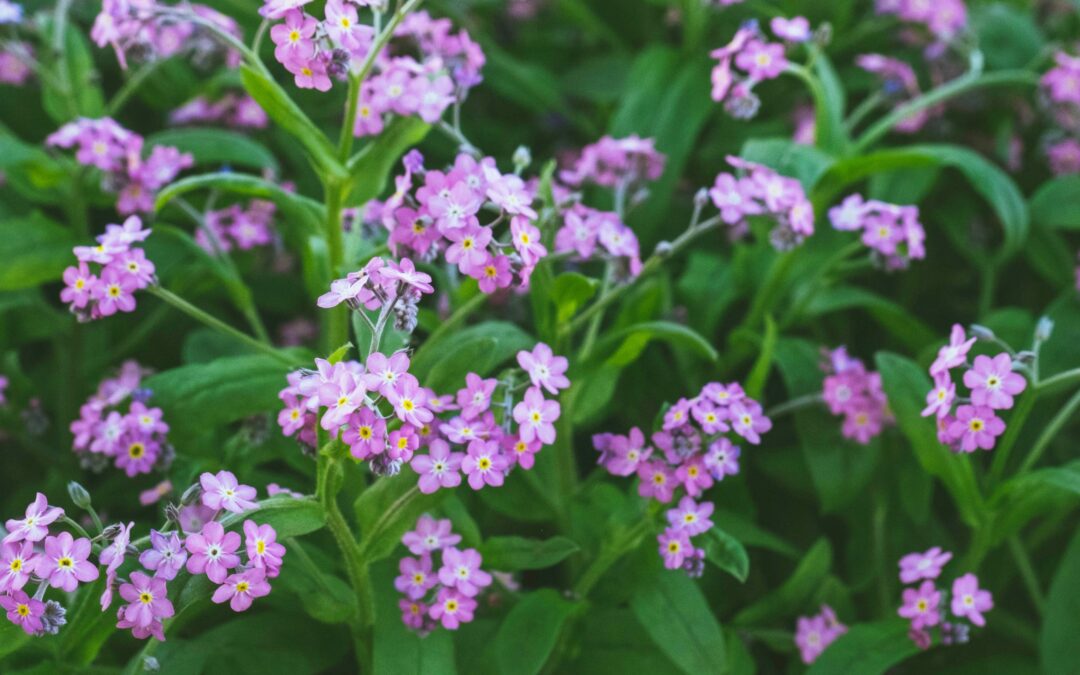
These perennials bloom during the early growing season and are a welcome sight after a long-cold winter. Mix these spring flowering perennials in with your summer and fall-blooming flowers for a show of sequential blooms all gardening season. These early blooming perennials can also help pollinators get food before the trees start blooming and also attract pollinators to your fruiting trees. If you are interested in adding more pollinator friendly plants, see two garden designs that can help you plan your new garden spaces.

spring flowering perennial Purple Bergenia a.k.a pigsqueak with cluster of purple flowers.
Bergenia a.k.a Pigsqueak

Bloom time is April and May. This plant is called Pigsqueak because if you rub two leaves together it makes a squeaking sound. Bergenia love shade or dappled sunlight and a great alternative to the hosta.
Hellebores

Best to plant these in raised beds, on slopes, or front of the garden to see their downward facing blooms, Hellebores can bloom very early spring into mid-May.
spring flowering perennial Pink heart-shaped flowers hanging from outstretched stem of a bleeding heart perennial plant.
Bleeding Heart

These hearts bloom mid-May to June. Heart-shaped pink flowers that dangle from outstretched stems.
Cool-moist areas are best with morning sun.
spring flowering perennial, ajuga, with pikes of purplish-blue small flowers
Ajuga a.k.a Bugleweed.

These flowers bloom early May through June. It’s an aggressive spreading ground cover that helps choke out weeds. Commonly used for hard-to-grow shady area, erosion control or under Black Walnut trees since it’s resistant to Juglone.
close up of a red bloom of the spring flowering perennial, fernleaf peony,
Fernleaf Peony

Deep red large flowers grow on fine-textured fern-like foliage that grows in a 1′-2′ foot mound.
Provide 6 hrs of sun and they will bloom in late-spring. May need stem support to prevent drooping.
pink forget me nots
Forget-Me-Not

They start blooming in May and can re-bloom later in the season.
Pink or blue flowers of Forget-Me-Not create a blanket of small flowers over a short 5 inch to 12 inch plant. Used as a ground-cover in landscapes, this perennial is biennial and reseeds itself. Deadhead blooms to prevent re-seeding if you want to inhibit spreading.
Yellow daily like flowers shoot up over glossy leaf of a squaw weed.
Squaw Weed a.k.a Round-Leaved Ragwort

Blooms late-spring to early-summer. Excellent ground cover with sea of long-lasting yellow flowers. Will
flower in full sun to part shade and spreads slowly and easy to contain.
Blue and pink columbine flowers mixed together in the morning sun.
Columbine

Blooms mid-spring. Blue, pink, or purple bell-shaped flowers great for part shade and woodland areas. Native Columbine
has smaller red and yellow flowers that tend to have slightly more nodding in the flowers.
White flowers of sweet woodruff plant bloom above umbrella shaped leaves.
Sweet Woodruff

Forms thick mats of foliage with small white flowers blooms April and May. Best grown in moist, shady areas.
Can handle dry shade but won’t grow as prolific.
yellow and orange poppy flowers.
Poppy

Poppies can bloom in cooler weather April through June. A shorter lived plant that easily reseeds itself for year-after-year blooms.
These delicate flowers love growing in full-sun.
Geum

This is a member of the rose family that loves full morning sun and afternoon shade.
Mid-spring flowers perch atop fuzzy stems. Long-blooming flowers that butterflies adore!
Dead-head old flowers to push more blooms.
Bright yellow bracts surrounding tiny yellow flowers of a cushion spurge plant.
Cushion Spurge

The tiny yellows flowers are insignificant but the bright yellow bracts surrounding the blooms
is what makes this cushion-shaped plant a lovely spring perennial. The leaves will also turn orange in the fall.
Grow in full sun to avoid legginess. As part of the Eupohorbia family, it can handle drought once established.
Lungwort

This early spring bloomer is a low growing plant with fuzzy white speckled leaves. Creates a clump of textured foliage with flower stalks that rise above the foliage. Great for shady locations and deer resistance.
Dark lilac blooms peek out from glossy dark green leaves of a vinca minor plant.
Vinca Minor

Prolific bloomer with deep lilac color flowers. Vining habitat that creates a blanket of gorgeous glossy
dark leaves. Shade tolerant but produces more blooms in mostly sunny locations.
Colorful red  and blue flowers of primerose plant.
Primerose

These extremely colorful flowers that come in multiple colors will bloom early to mid spring. They are
perfectly happy blooming before deciduous shrubs leaf out. Great for moist, partly shady garden areas!

When searching for perennials to enhance your landscape this season, be sure to keep an eye out for the ones mentioned above, as well as the additional spring flowering perennials listed below in our nursery.

Pasque Flower
Foam Flower
Lupine
Brunnera
Geranium

If you are looking for more perennials to add to your garden, especially ones that can handle drought, give Top 8 Tough as Nails Perennials a read!

wild blue phlox flowers

Pollinator Planting Guides

Support for pollinators is a joint effort a partnership.

As of July 2022 Monarchs are now at critically low populations. As a flagship pollinator one that attracts attention because of it’s beautiful colors and easier tracking methods this news is a wake up call that we are losing pollinators at a fast rate. We need to add pollinator plants to our landscapes every year.

What We Need to Do Now

  1. Add plants into our landscapes so there is a succession of blooms spring through fall. You can use pollinator friendly annuals, perennials, shrubs, and trees to accomplish this.
  2. Reduce or eliminate the use of insecticides. Organic insecticides still kill beneficial insects. There are now studies that find that even if the plant isn’t blooming, pollinators will drink dew off of plant foliage. If it’s treated with insecticides it will kill them. If you do need to spray, avoid bloom time.
  3. Plant ecologically sound landscapes. Add a diverse mix of native plants into your landscape to bring in beneficial insects, birds, and pollinators. Predatory birds and insects are a great way to control damaging insects without the use of insecticides.

Plants to Add for Monarchs

Name – Bloom Time

Pale Purple Coneflower – Early-summer
Butterflyweed – Mid-summer
Milkweed – Mid-summer – Emphasis on Common Milkweed since they lay their eggs on it.
Black-eyed Susan – All summer
Joe Pye Weed – Late-summer
Blazing Star – Late-summer
Aster – Late-summer to fall
Monarda fistulosa – Late-summer to fall
Goldenrod – Late-summer to fall

Download image of Drummers “Plants that Attract Butterflies”

Pollinator Planting Guides

Click on a map to download the Ecoregional Planting Guide. Each guide will give you information on specific plant traits that pollinators prefer ( color, odor, pollen, nectar, flower shape ) as well as a list of plants to support pollinators in that region. There are many overlaps in plant varieties in these guides. We wanted to include specific regions because we have customers that are from nearby areas that may live in a different zone.

Mankato is zone 5a (was 4b) and in the Prairie Parkland Temperate Province.

Don’t have room for an in-ground pollinator garden? Check out the portable pollinator garden list from National Garden Bureau.

Prairie Parkland Temperate Province Ecoregional Pollinator Planting Guide Regional  Map
Eastern Broadleaf Forest Continental   Province Ecoregional Pollinator Planting Guide

Sources: Pollinator Partnership. Selecting Plants for Pollinators, Prairie Parkland, Temperate Province. Published by Pollinator Partnership, San Francisco

Pollinator Partnership. Selecting Plants for Pollinators, Eastern Broadleaf Forest, Continental Province. Published by Pollinator Partnership, San Francisco, USA. https://www.pollinator.org/guides#about

ABOUT POLLINATOR PARTNERSHIP MISSION

“Birds, bats, bees, butterflies, beetles, and other small mammals that pollinate plants are responsible for bringing us one out of every three bites of food.

They also sustain our ecosystems and produce our natural resources by helping plants reproduce.

Without the actions of pollinators agricultural economies, our food supply, and surrounding landscapes would collapse.”

Learn more

Top 8 ‘Tough as Nails’ Perennials

When it comes to plants, reliable is a characteristic we love! This is our top 8  ‘tough as nails’ perennials that will come back every year and tolerate a wide array of conditions. We would like to mention, even though they are tough, it doesn’t mean they can be completely neglected of nutrients, sun, and water. These plants, after their first couple years of more watchful care, will definitely catch your attention with their beauty, tenacity and reduced level of care once established.


Yarrow

achillea-yarrow-garden

Yarrow Vintage Rose with Salvia in the background.

Achillea millefolium is a Native American plant. Yarrow adds light texture to a garden and one of the best low care perennials for adding a burst of color.  It grows tall ( can be up to 3′-4′) with showy clusters of fragrant white, red, pink, or yellow flowers, depending on the variety. It does well in hot and dry spots and resistant to pests.  Their blooms typically last from early summer through early fall and are a wonderful cut flower! 


Feather Reed Grass

feather reed grass

Feather Reed Grass

Calamagrostis x acutiflora is an upright clump forming ornamental grass, with multiple varieties, that adds architecture, movement, and the seed heads add floating fluffy textures in the fall through winter.  It does best in moist, rich soil but can handle poor, dry soils as well. This is the perfect grass for urban areas and tough to grow sunny areas. In addition to its high tolerance for multiple conditions, it is pest and disease resistant. Prune down foliage to a couple inches above soil before new growth in the spring and add  organic fertilizer if it’s in poor soil if you want to give it a boost and that’s it!


Phlox

flame coral phlox paniculata

Phlox paniculata Coral Flame.

There are so many varieties of phlox it’s impossible to describe them all but they come in low, medium, and tall growing forms to fit in just about any garden. It’s one of the most versatile and colorful plants that have been used in gardens for over 100 yrs and for good reason. Most are long-blooming, often fragrant, and tall varieties don’t require staking. They prefer moist, rich soil and full sun, but depending on the variety, some don’t mind poor, rocky soils or part-sun. Flower colors range from pure white to red, with nearly every shade of pink, lavender, salmon and purple and some multi-colored petals. With proper planting, you can avoid most disease issues, such as powdery mildew.


Daylily

handwriting on the wall daylily bloom

Handwriting on the Wall Daylily.

Hemerocallis means “beauty for a day”because daylily  buds blooms only one day but has successive blooms over 4-5 weeks. Some daylily varieties are labeled rebloomers since they perform a couple times in the season with successive blooms. The Daylily is considered “a perfect perennial” because it’s drought tolerant, can grow in almost any kind of soil, can grow in full or part-sun, offers an array of early season to late season blooming varieties, has showy vibrant colors, are pest and disease resistant, and attracts birds, bees, and butterflies. Can be grown on hillsides, around the city, or in a traditional garden with very little care needed.


Sedum

Sedum Pure Joy by Proven Winners paired with coneflower

Pure Joy Sedum with coneflowers.

Sedum, also called stonecrop, have thick succulent like leaves that form clusters of small colorful flowers (white,red,pink,or yellow) in late summer and fall that bees love! There are low-growing and tall varieties that love full sun and can handle drought conditions. Once these plants are established they require almost no care. Sedums are easy to split in spring and fall if they get too big for their space. These perennials can grow quickly! Foliage of the fleshy leaves are not only green but there are varieties with varying foliage colors. For example, Sedum Dragon’s Blood Tricolor has white and green foliage with pink edges or deep purple leaves like Sedum Dark Magic. Just make sure these plants have well-draining soil because they can succumb to root rot in prolonged wet soil.


Coneflower

pow wow wild berry echinacea- coneflower

Pow Wow Wild Berry Coneflower.

Echinacea, comonly known as Coneflower are bright, upright, and tough perennials! They can take the heat and drought conditions once established ,deer resistant, and trouble free! Echinacea purpurea is the native coneflower to North America but there are varieties with many different bloom colors. These flowering perennials can have blooms that last from mid-summer though fall! Give coneflowers full sun and avoid other plants shading them. They don’t need much in regards to fertilizer if you mix in plenty of compost into the soil when planting. They attract bees and butterflies and if you leave the flowers on in the fall, birds like to eat the seeds. Prune off dead flowers in summer to promote more blooms for fall.


Russian Sage

denim n lace russian sage

Denim N’ Lace Russian Sage. 2020 PW Perennial of the Year.

Perovskia atriplicifolia, commonly known as Russian sage is a must have plant to add to your garden! Russian sage has grey-green leaves that are very aromatic with bluish-purple flowers that bloom mid-summer through fall. It can tolerate clay soil, dry soil, street salt, and are deer and rabbit resistant. It’s also disease and pest resistant! It really is a tough plant! They can fill up a 3′-4’x3’x4′ space in your garden quickly. Birds, bees, and hummingbirds will appreciate this valuable addition as well! 


Hyssop

blue fortune hyssop

Blue Fortune Hyssop. Photo Courtesy of Monrovia.

Agastache, or commonly known as Hyssop or Butterfly Mint, have very fragrant foliage and flowers that attract bees and butterflies. The flowers bloom late summer through fall to add color when other perennials are winding down. Most hyssop varieties are native to North America and not only like compost rich soil but also lean, dry soil. They prefer a “tough love” approach so they don’t need much water once established and be sure not to over-fertilize. Only top-dress with compost in spring if you want. Hyssop prefer full sun but can tolerate part sun areas.


Download our Drought Tolerant Plants List!

marigolds

Digging Deeper – Late Spring Gardening

“What is one to say about June, the time of perfect young summer, the fulfillment of the promise of the earlier months, and with as yet no sign to remind one that its fresh young beauty will ever fade.”
–  Gertrude Jekyll, On Gardening

This post is about late spring/early summer gardening tips and things to look for that may be showing up soon in your garden.

  1. Fertilizer

    Don’t forget water soluble fertilizers for container plants. Container plants are in a potting soil that do not contain enough nutrients for all season.  Depending on the plant, you will need to add fertilizer to the water or use a slow release fertilize like Osmocote. Follow directions of product and individual plant needs for fertilization. Top dressing containers with compost can also be done to add some nutrients.

  2. Boost for New & Established Plants

    Most in-ground soils will benefit from adding organic material like compost and a starting fertilizer like Biotone Starter before planting or Plant Tone after planting. Top dressing the established perennials/shrubs with compost in the spring will give them an extra boost of nutrients. Plants like butterfly bush, delphinium, and clematis like if you put a mound of compost around their root ball.

  3. Watering

    Newly planted plants in the ground need deep watering so their roots reach down and establish themselves before winter and reduces stress on the plants. Water deeply a couple times a week. If it rains a little (pay attention to how many inches you get with a rain gauge), you can water around your new plants a little more to get water deep into the soil. It helps you conserve water and save time watering. 1″ of water per week is the recommended amount of water. Pay attention to the soil and if it is wet looking, hold off for another day. Best method is to stick your finger in the soil and if it’s dry a couple inches down, it’s time to water.

  4. Weeding

    Remove weeds now while they are small, as they grow quickly. Weeding is easy when soil is damp since it’s easier to pull the whole plant including the roots. Be careful not to walk on soil around your plants to avoid compaction of the soil.

  5. Prevent Fungal Diseases

    With rain and warming weather you need to be proactive about fungal diseases. It’s best to prevent it, instead of treating it because once it starts, you can’t get rid of it completely. Treat your plants that have a higher chance of fungal issues with a fungicide before you see signs of it.  For example, tomatoes usually get blight so best to treat with Bonide Revitalize or Copper Fungicide before it starts. Make sure to water your plants at the base and water in the morning when possible so the water can dry before it cools off at night. Mulch around your plants as well to help prevent fungus from the soil splashing on your plants.

  6. Insect damage is going to start. Keep an eye on your plants for damage to their foliage. It’s important to remember, a little bit of insect damage is not bad and if you see an insect, it doesn’t mean they are bad. We need to move passed the thought that bugs are icky and nuisance. There are very important insects that are good for the garden and actually improve plant health.

    Look for these invasive species instead:
    Japanese Beetles: Metallic looking green/bronze beetles flying or munching on landscape plants. They love roses, hollyhock, cherry trees, plums, grapes, blackberries, and linden trees. They can be found snacking on other plants as well. Read more about them hereIncorporate plants that repel Japanese beetles such as catnip, chives, garlic, nasturtium, and white geranium around your susceptible plants. Jumping Worms: Although we haven’t had any recordings of jumping worms in our area, these can be very detrimental to lawns and gardens. There are sightings of these worms in the Minneapolis/St. Paul area so if you are doing any transplanting of plants from that area, purchases of mulches and soils, or any plant swap around our area. Read more about them here so you can know what to do to avoid them or if you see them, how to alert the U of MN Garden Extension. There are no proven ways to eradicate these worms yet.

Getting rid of insects isn’t always easy and great care should be taken if you choose to spray with insecticides, even ones labeled organic. It’s still an insecticide made to kill insects.

*Quick side note about fungus since we have been having cool springs the last couple years. With cool/wet weather you may encounter anthracnose on your plants. If you are seeing brown spots on trees and shrubs early in the spring it may be this.

carrots held by gardening with soil on them.

Starting a Vegetable Garden & Resources

Congrats on starting your vegetable garden journey!

There has been a huge increase of people wanting to grow their own food as well as flowers, pollinator plants and converting lawns to native species so you’ll find a large community, including us, that can help you with all your trials and celebrate your successes.

This post is for bringing the basic info together to start you off. We are always here to answer your questions if you have any if you can’t find what you are looking for email us! Feel free to call or stop in!

Info sheets we like to handout in store for all vegetable gardeners:

Vegetable Gardening Estimated Sowing Dates/Planner (PDF)

Seed Starting Indoors (PDF)

You can also read our post about seed starting supplies and steps.

Additional Resources:

We’d also like to direct you to our Resources page for additonal gardening information.

We like getting our plant and gardening information from multiple sources, just like you do, so we found this webpage that helps you decide on where to plant, soil health, and more information. These steps are not only for vegetable gardens but perennial gardens and landscaping!

Don’t forget to follow us on the Facebook, Instagram and subscribe on YouTube for plant and gardening tips!

Video link

Seeds you need to start in March and April and what you need!
all purpose grass seed

Early Spring Yard and Garden Tasks

The desire to start gardening and enjoy outside is hard to suppress. Each spring will bring us new weather patterns and it’s best to take Nature’s cues when it comes to accomplishing these yard and garden tasks

YARD AND GARDEN TASKS:

1. Wait to clean up dead perennial matter until temps are consistently around 55F-60F. Beneficial insects will be in their dormant state in leaf litter and dead perennial matter. You should wait to clean up dead plant material as late as possible into the spring.

You can top dress with compost as well as mulch around the root zone of your plants when you see perennials emerging.

2. Clean and sanitize your outdoor containers, bird baths, bird feeders, and garden tools. Check out the new garden decor and tools in store!

3. Prune off dead/damaged branches on shrubs and trees. Late winter/early spring is the best time to prune trees, before their buds are formed. Refer to our pruning guide in regards to shrubs and trees.

4. Clean debris from your vegetable garden and top dress the soil with compost at least two weeks before you plant. Avoid compaction of the soil by using designated walkways. Compaction of the soil will reduce the level of oxygen available for plant roots. Lightly till in compost if you notice your soil is compacted.

5. Early to Mid-April, depending on weather and ground temperature, is the best time to put down new grass seed or ground covers like clover. Wait to scatter seed until day temps are 60F+ consistently before spreading seed. Most seeds, including grass won’t germinate until the soil is 55F+. We carry bulk or bagged grass seed from Ramy Seed in Mankato. If you want to forego a conventional grass lawn, get a  wildflower seed mix and scatter the seed in mid to late April.

Please note, if you want to do a weed killer in the same area you want new grass, you will have to wait to over-seed grass until summer or fall. If seeding is more important – forgo the crabgrass or weed killer and just use a lawn food

6. Apply crabgrass killer and weed pre-emergents just before we have consistent 60F days. Most products last 6-8 weeks and timing the application with the weather is important or you may need to reapply. Weeds  germinate when soil is 55F. There are many turf products, likes Maxlawn Weed and Feed, that contain fertilizer as well as weed killers so you can accomplish both tasks if you have weeds throughout your lawn. Our staff can help you decide what is best depending on what you want to accomplish!

If you don’t mind weeds, use a lawn fertilizer around the time you have to mow for the first time.

PLANT THESE in your GARDEN EARLY TO MID-SPRING:

Summer blooming bulbs, potatoes, asparagus, strawberries, cold vegetable crops, and onion plants.

Plant summer bulbs when the soil has warmed to above 40F and the soil isn’t soggy. Usually early April through mid May depending on the spring weather. The soil should be rich and well-draining to avoid bulb rot if cooler temps come back.

Find growing instructions in the store!

Cool Season Hardy and Semi-Hardy Vegetables:

list of cold season hardy and semi-hardy veggie crops

lettuce

Seed Starting

Smell the soil and see the plants grow new leaves! You can experience new life by starting seeds, also known as sowing, indoors this winter! Each plant packet will tell you when to sow the seeds but most will be started late winter through early spring.

Reasons to start your own plants from seed:

  1. Save money over the long run – The initial investment into growing gear may be seem like a lot but you can use trays, pots, lights, etc for multiple years.
  2. If you have a plant that dies, it’s ok! Sow extra seeds so you can avoid total loss. That one plant loss will be a low-cost loss than an already grown starter plant. If all else fails, we have starter plants to make sure you grow what you want to!
  3. Seeds will last longer than the packet expiration date. There may be lower germination rate so plant one or two extra seeds per hole.
  4. You can grow a lot of plants and a diverse variety! Garden centers, like us, grow a lot of different varieties but we can’t grow them all.

Next, we will cover seed packet info to take note of, supplies you will need to start seeds indoors, caring for seedlings, and hardening off seedlings.

Bonus info about sowing seeds outdoors in the winter is included! It is a must-see if you want to sow perennial plants.

Important seed packet info to get to know the plants you are growing:

  • The best time to plant ( Weeks before or after frost) The last frost date for Southern MN is projected as May 1- May 15th. See examples in the next section of sowing times before transplanting outdoors.
  • Indoor or direct sowing recommendations
  • How deep to plant the seeds
  • Days to germination gives an idea of how long it takes the seed to sprout
  • Days to maturity = the number of days from planting to harvest
  • Seedling thinning & spacing directions
  • Check if it’s perennial (must be zone 4 to be S.MN hardy) or annual (only grows one season)

Start seeds indoors or directly sow them in the garden or planter?

Use the “date to maturity” as a guide for your produce. This will let you know about the time you should be harvesting and if you will need to sow in the winter. Some plants have a LONG growing season and should be started indoors around Feb/Mar to reach maturity. ( ex. peppers, celery, tomatoes, cole crops, lemongrass, and rosemary)

Some plants have sensitive roots and mature fast enough in our climate to be directly sown. Examples are corn, cucumbers, potatoes, carrots, sunflowers, nasturtium, beans, radishes, peas, dill, and radishes.

**Hardy perennials may require cold stratification or scarification for proper germination. Read more about starting seeds outdoors in the winter, which is needed for zone 4 and 5 perennial seeds.

What type of growing medium is best?

AVOID using soil from your yard/garden if possible! It is an easy way to introduce unwanted pests and disease problems for little seedlings. *Most at-home compost piles do not get hot enough to kill harmful pathogens.

Recommended for seeds – Seed Starting Mix. It is a fine textured, soilless medium that is sometimes heat sterilized. It contains no nutrients and is intended for germination only.

When potting up seedlings into containers – Standard Potting Mix. Any potting mix will do! Some may contain nutrients to start feeding your plants but if you have them planted in containers you will have to supplement the soil with fertilizers as they get bigger.

Supplies needed to start seeds indoors:

Plug tray, soil pellets or seed starting potting soil, open flat, humidity dome, pots, watering can, heat mat, fertilizer, grow light, and a fan.

Let’s dig into each of these materials and why you need them.

Plug Trays – Provides a controlled environment for proper germination

When choosing a size of plug tray, ask yourself how many plants you want to grow. Some plug trays come with smaller plugs and can fit more plants and vice versa. The smaller the plug, the sooner you will need to pot up into larger plug trays or pots.

Soil Pellets

Usually, these pellets are made of coco coir. To expand the pellets, soak them in water and place the seed in the soil.

Open Flats

With drainage holes: Fill with seeding mix and scatter seeds. Divide and up-pot or plant outside when they are ready.

Without drainage holes: Use under plug trays to catch the water/soil.

Humidity Dome – Keeps moisture in and helps germination of seeds.

condensation inside a dome with a tray of plants inside.

Fits over most plug trays and open flats. A short dome is for seed starting, and a tall dome is for propagating cuttings. Domes will need to be taken off after the seedlings are a couple of inches tall.

Pots – Plastic, Coco Coir, Biodegradable options

Use various sizes to start seeds if desired. Pots are good for when you need to divide plants in plug trays and up-pot. Choose the right-sized pot when up-potting! Too big and it may not dry out fast enough, causing root rot.

Watering Can/Spray Bottle – For keeping the soil moist and not disturbing the soil around seedlings.

Heat Mat – Most homes are not warm enough for proper germination

Raises soil temp 10-20 degrees above room temperature which will speed up the germination process and reduce chances of seeds rotting. The heat mat does not need to be on once all the seedlings have sprouted.

Lights & Timer – Supplemental light is essential to growing happy seedlings indoors!

Plants need strong light so supplemental light prevents weak and leggy plants. Get full spectrum/daylight bulbs. There are T8 & T5 fluorescent, Standard Bulbs, and LED options.

Use a timer to make life easier! 14 hrs. of light per day is the standard after seeds germinate.

There is no need to have a light on before seedlings emerge unless the seed packet says “light germinated”.

Fans

A light breeze helps grow strong plant stems. The movement of the stem will strengthen it. It will also help prevent fungal diseases from too much humidity.

Fertilizer

Seedlings do not need nutrients right away. Wait until they have a few sets of true leaves before adding fertilizers.

A half-strength, balanced fertilizer works well for most plants. We recommend looking up proper fertilization for specific plants grown.

Caring for seedlings:

Proper watering is essential. Keep soil evenly moist until germination.

Allow tap water to sit out overnight to dechlorinate when possible. Avoid using soft water.

Know your plant’s specific watering and fertilization needs by reading their packet or researching online.

Find a routine and water early in the day if possible.

After germination, allow the soil to dry slightly between watering. This encourages root growth! Avoid “loving your plants to death”, aka overwatering.

Hardening Off – Allows your plants time to adjust to light, temperature, and environmental changes

Start putting your potted plants in the shade on a calm day, for an hour or two. Slowly increase time by 1 to 2 hours outside and sun exposure over several days. It usually takes 7-14 days to fully acclimate. Reduce sun exposure again if you see signs of sun-scorched foliage. Make sure you check the soil moisture once or twice a day, depending on pot size.

We carry grow lights, seed starting kits, seedling potting soil, fertilizer, and seeds. Later in the spring, we will have vegetables and herbs that we have grown for you to purchase if you don’t get to start your seedlings.

Grape Hyacinth in bloom

Planting Fall Bulbs for Spring Blooms

By planting fall bulbs now, you’ll be greeted with a warm and blooming welcome that will take your breath away. The anticipation of watching your garden come to life with spring blooms is simply thrilling.

When to Plant

Plant your fall bulbs when overnight temperatures start dropping to around 40° F overnight or 6-8 weeks before the ground freezes. Store your fall bulbs around 60° to 65° F and in a dry area before being planted.

Bloom Time

fall bulb planting bloom times and depths
Bloom times will be indicated on the package of the bulbs. Plant multiple varieties with different bloom times to give you the longest duration of early spring blooms or plant varieties that bloom at the same time for an array of colors!

Where to Plant

Wherever you want to plant, make sure the soil is well-draining. Bulbs don’t like wet feet or else they may rot. Add amendments like compost or topsoil to ensure proper drainage. Try not to plant in low-lying areas where water pools and stays soaking wet. Add Bulb Tone from Espoma to your soil when you plant to give them proper nutrients before and after blooming.

Plant bulbs in full to part sun. Check the bulb packaging to see sun requirements as some can take shady areas.

Layout

Bulbs look best in groups. Consider adding them to areas where you already have perennial plants to fill in bare spots. They will brighten that area in spring and then the foliage will be camouflaged by other herbaceous perennials and shrubs as they fill out.

It’s called “naturalizing” when you plant bulbs in sporadic groups throughout your garden to make it look like a meadow.

Bloom Colors

You may like a certain color repeated throughout your yard or if you want to dive into color combinations you can go back to what we learned in art class and use color schemes! Analogous, complementary, monochromatic, and split complementary colors are color schemes that you can build with flowers and other plants!

Common Fall Bulbs at Drummers

Allium – purple pom poms atop wand-like stems.
Crocus – very early color. Some even bloom in snow!
Daffodil (Narcissus) – sunny yellows and white. These are great in groups. Great for forcing.
Grape Hyacinth (Muscari) – purple or pink.
Hyacinth – the fragrance that will stop you in your tracks! White, pink, purple. Great for forcing.
Tulip – Huge variety of colors, sizes, and bloom times. Great for forcing indoors for indoor bulb gardens.
Snowdrops – small white flowers that hang like a bell.

Cornell University actually did tests with planting bulbs with other perennials to see how they looked. Click here to see the results!

blooming white hydrangea shrubs

TOP 5 TIPS for Summer Plantings

1.MOST IMPORTANT! – WATERING

Proper watering is vital to plant survival. Proper watering doesn’t mean watering everyday. At least 1″ of water a week spring through fall season is the recommended amount. Frequency will vary depending on type of soil you have. For example, clay soils need infrequent yet thorough watering. This is because the water doesn’t percolate quickly through the soil. However in a sandy soil, water percolates easily. This requires thorough and more frequent watering.

Every one to two weeks, a slow stream of hose water for 5-10 min around the root zone should give you a deep thorough watering of trees and shrubs.

Perennials should be watered every 3-7 days depending on soil type and weather.

Check the soil regularly by pushing your finger a couple inches into the soil before you water. If the soil is moist, wait to water. Remember, even drought tolerant plants need a couple of years to become fully established and need deep thorough watering. Searing heat and windy days may require increased watering frequency.

2. PROPER PLANTING TECHNIQUE

Make sure to follow our planting guide (See image below) on the back of our Winter Hardiness Warranty Slip that comes with all trees and shrubs. Mix in compost and slow release fertilizer with beneficial fungi, bacteria, and nutrients, like Bio-Tone, into your native soil to help newly planted shrubs, trees, and perennials get off on a strong start.
shrub and tree planting-guide

3. MULCHING

Use 2-3 inches of mulch around your plants to help retain water and keep soil cool during hot and dry days. Mulch around the root zone and keep the mulch 2 inches away from the stem or trunk of the plant.

4.READ THE LEAVES

Summer-planted plants may wilt regularly if you are under- or over-watering, or from heat stress. Water sensitive plants, especially new perennials with shallow root systems, will tell you if they need more water. If there is slight wilting during the day yet they have moist soil, they may be succumbing to heat/light stress if no other signs of pests or disease are present.

If they are still wilting after the sun is going down, they are most likely under-watered if the soil is dry or the roots have already been stressed from over-watering. The best method to quickly learn how much water you plant needs is to check it regularly. Your plant will start establishing it’s roots and watering frequency may decrease.

5. PLANTING TIME

Planting on a cloudy day is less stressful on new plants. If the cloudy day is followed by a day or two of rain, all the better! You can also plant in the evening. That gives it half a day before it gets blasted with the summer sun.

We also made a video of planting a shrub to show how to properly plant.

Additional landscape plant heat stress remedies:

Mature blue false indigo in the display gardens at Drummers.

Top 10 Perennials 2019

Back in January of this year, the full-time staff went to the Northern Green Conference up in the Twin Cities for continuing education and to see what is new for this year in landscaping and gardening. One of the more popular sit downs was the Top 10 lists of perennials, shrubs, and trees. Since June is Perennial Gardening Month we thought we’d share the Top 10 Perennials of 2019 decided by Mike Heger. Mike has been in the horticultural industry for over 40 yrs and has even written a book on growing perennials in cold climates.  He of course prefaced the list with saying this was a very difficult list to make and was focusing more on natives and pollinators this year. Check out the quick list of his Top Ten Perennials!

Top Ten Perennials 2019

  1. Baptisia Lactea ‘ White False Indigo ‘. Tough, long-lived plant, and tolerates many different soils and light conditions. Great nectar plant. The Blue False Indigo, Baptista ‘ American Goldfinch ‘, and Baptisia Decadence Series are other Baptisia he mentioned.
  2. Calamintha nepeta ‘ Montrose White ‘ (Catmint). Clump forming mint with long bloom time. Great for bees and hummingbirds love it. Considered a zone 5 but could possibly survive our winters in the right spot.
  3. Clematis ‘ Arabella ‘. A rambling ground cover that can have flowers all summer long. Mike said his bloomed 14 weeks! Bees and Hummingbirds enjoy!
  4. Helianthus ‘ Lemon Queen ‘ (Hybrid Sunflower). Blooms late summer and fall and great for all kinds of pollinators. It’s a great tall, background plant. Blooms 2-2.5 months!
  5. Native Liatris ligulistylis ( Meadow Blazing Star ). It blooms from the top down and monarchs and butterflies love it. Tolerant of many soils and high light. Another good native option is Liatris Pycnostachya.
  6. Nepetax faasenii ‘ Purrsian Blue ‘ Catmint. A low maintenance clumping mint with 4-6 mths of color. The ‘Cat’s Pajamas’ is the shorter version with similar qualities. Will see butterflies, moths, bees, and hummingbirds around it!
  7. Origanum ‘ Rosenkuppel ‘ (Ornamental Oregano). Burgundy blooms June-September and even past September at times. It prefers full sun and no wet feet. It is a zone 5 plant so may not survive winters in southern MN.
  8. Salvia nemorosa ‘ Blue Marvel ‘. This perennial sage has violet-blue blooms and the butterflies and bees flock to it. Other forms of Salvia have white, pinks, and purple blooms and there are plenty of varieties to choose from.
  9. Stachys monieri ‘ Hummelo ‘ Boteny. This is the 2019 Perennial of the Year by the Perennial Plant Association. This perennial tolerates many different soil and full sun to light shade.
  10. Vernonia fasiculata ‘ Common Ironweed’. This native perennial can get up to 6′ tall and is a wonderful nectar plant. Painted lady butterflies love them and are a great plant in the back of the garden due to their height. Their blooms are a bright purple and bloom July, August, and September.


bloomstruck hydrangea

Acidic Soil Loving Plants


Three Plant Needs

Water, Sun, and Soil (Nutrients).

Where does soil pH level come in?

Plants need nutrients and have a balanced relationship with elements in the soil which will contribute to the health of plants.

Plants also have pH level preferences. The soil pH level can affect the uptake of nutrients. Depending on the plant, if the soil pH is not ideal then you may have a stunted and unhealthy plant and it’s not because there isn’t nutrients in the soil.

Put Away the Fertilizer For Now

If you are noticing any issues like yellowing leaves, no fruit production, growth seems stunted, and not blooming, checking the pH is highly recommended first before using fertilizers.

For example, you may add fertilizer to your garden but it still has little effect on your plant health if for some reason your soil pH is off. Too much fertilizer can also inhibit nutrient uptake because of soil nutrient imbalances. In addition, nitrogen and phosphorous runoff is a huge environmental pollutant, especially to our waterways and lakes.

Testing your soil nutrients is good gardening practice and could save you money in the long run. If you know your soil pH is within the proper range and your plant is showing nutrient deficiency symptoms, use a slow release fertilizer (like Bio-tone) for in-ground plants to avoid excessive nutrients and run-off.

What is Acidic Soil?

The range of pH is from 0-14. Acidic soil is considered anything below 7.

Acidity ranges:
Slight  6.0
Strong  5.5
Very Strong 5.0
Extremely 4.5

Many plants like to grow within the 6-7.5 pH range for optimal nutrient uptake.

In Southern MN, you may notice a lot of clay soil with lime, which tends to be more alkaline 7 pH or above. Water coming from hoses in this area are usually more basic, which increases soil alkalinity.

Other factors that affect soil acidity are rainfall, nitrogen fertilizers, plants (like pines), and subsoil acidity. The best way to know your soil acidity level is a quick home test.

Acidic Soil Loving Plants

Plants that prefer slight acidity, 6.0-7.0 range:

Most plants! Each plant has a pH range it can tolerate and many plants can handle down to 6.0.

Plants that prefer strong acidity, 5.5:

Trees and Shrubs: 
Raspberry 5.5-7.0, Pears 5.5-7.0, Peaches 5.5-7.0

Vegetable and Fruits:
Potato 5.5, Squash 5.5, Garlic 5.5-8.0, Carrot 5.5-7.0, Sweet Peppers 5.5-7.0, Tomatoes 5.5-7.5, Cauliflower 5.5-7.5, Cucumber, 5.5-7.0, Pumpkin 5.5-7.0, Eggplant 5.5-6.5, Sweet Potatoes 5.2-6.0, Rhubarb 5.5-7.0

Flowers:
Begonia 5.5-7.0, Black-Eyed Susan 5.5-7.0, Clematis 5.5-7.0, Marigold 5.5-7.5, Nasturtium 5.5-7.5, Pansy 5.5-6.5, Snapdragon 5.5-7.0, Zinnia 5.5-7.0, Fox Gloves 5.5-6.5, Cyclamen 5.5-6.5

Plants that prefer very strong acidity, 5.0:

Trees and Shrubs:
Spruce 5.0-6.0, Juniper 5.0-6.0, Blackberry 5.0-6.0, Apple, 5.0-6.5, Serviceberry 5.0-6.0, Fothergilla 5.0-6.0, Magnolia 5.0-6.0

Fruits:
Strawberries 5.5-6.5, Grapes 5.5-7.0

Flowers:
Coneflowers 5.0-7.5, Cosmos 5.0-8.0, Gladiolus 5.0-7.0, Lupine 5.0-6.5

Plants that prefer extremely strong acidity, 4.5:

Trees and Shrubs:
Azalea 4.5-6, Blueberry 4.5-6, Hydrangea-Blue flowered 4.0-5.0, White Pine 4.5-6.0, Rhododendron 4.5-6
Flowers – Lily-of-the-Valley 4.5-6.0

Plants have a range of pH that they will grow in and thrive. Those plants that have very strong and an extremely strong acidic soil needs, may need additional amendments to keep soil pH down.

Changing Soil pH

The best way to improve soil pH is through addition of amendments and adding organic material. To increase acidity add sulfur and to decrease acidity add lime. Add both of these amendments in small stages and increments as to not shock the plant if it’s already planted. Read the instructions on any product you use to properly adjust the pH.

Favorite supplements to adjust the soil pH that will not shock the plants
if used as directed:

Epsoma Soil Acidifer – Organic, Safe, long-lasting, and won’t burn the plants if used as directed. Repeat in 60 day intervals if needed.

Epsoma Berry Tone for Berries – Organic, Good if you need to slightly increase acidity, Use early and late spring, Use on blueberries, strawberries, and raspberries, Will help produce bigger plants and more berries.

Adjust Soil pH with Organic Matter

Add any type of compost to your garden beds. This is best to do in the fall since it takes more time to adjust the soil pH using this method but feel free to feed plants with top dressing of compost during the growing season. Reach for compost first when wanting to add nutrients, improving soil aeration, improving water retention, and adjusting pH.

Modifying your soil’s pH will take some time. Depending on the type of soil you are working with, the addition of supplements and organic material may be needed year-after-year.

If you test your soil and notice you’re having troubles with keeping your soil more acidic, don’t fight it! Choose plants that will tolerate more neutral or alkaline soils. There are plenty out there!

moon in the sky with tree silouettes

Gardening by the Moon – A Fascinating Lore

We have all heard of the moon effecting the water tides but have your heard of it effecting soil moisture?

From The Farmers Almanac, gardening by the moon “is an age-old practice of completing chores around the farm according the the moon phases and that the moon governs moisture.”

Growing in Popularity

It is growing in popularity for various reasons but prominently because people are trying to find ways to stay in touch with nature. If people pay attention to the seasons, weather conditions, and natural patterns they can start to feel more in touch with their environment and surroundings.

There are certain garden centers that plant solely on moon phases and swear by it. We have yet to find current research projects that proves it to be more effective. However, we can find anecdotal evidence of its effectiveness online. To be in touch with your environment and weather conditions is an important part of your gardening success. Even if it is gardening by the moon’s phases or not. On this website , they list some sources of research, anecdotal accounts, and their findings for gardening by the moons phases.

General Rules

The over arching rule is that people plant specific crops based on the phase of the moon. It is also believed there are better times to prune, build fences, wean animals, fish, etc. What do they mean by better? Everything from better yields, increased growth, stronger fences, juicier meat, and even to more flavorful produce.

The general rules, from The Farmers Almanac website, is “the new and first-quarter phases, known as the light of the Moon, are considered good for planting above-ground crops, putting down sod, grafting trees, and transplanting.

From full Moon through the last quarter, or the dark of the Moon, is the best time for killing weeds, thinning, pruning, mowing, cutting timber, and planting below-ground crops.”

Working on your garden and land by the moon does seem like a good way to keep track of when to do certain tasks. If it produces better yields and healthier plants that would be an amazing bonus!

Conditions Are Important

If you choose to plant by the moon please remember that other planting conditions still need to be paid attention to.

  •  Soil temperature
  •  Present and forecasted weather conditions
  •  Moisture levels
  •  Soil type
  •  Specific planting needs of the crops you want to grow


If you have any questions about when to plant something please contact us or stop in and chat about your gardening goals!

DO YOU PLANT BY THE MOON? Email us or message us on our Drummers Facebook page and let us know!

Websites where you can find more information about gardening by the moon:
The Farmers Alamanac
Read about some moon phase gardening research here.

fungal network in soil

Living Soil – What is it?

Living soil is all about diversity. Diversity of fungi, bacteria, protozoa, nematodes, arthropods, and earthworms breaking down organic matter that produces nutrients for plants to use. Who knew it was all of those things that makes a soil healthy…a living soil!

First, let’s talk about healthy fungus and bacteria.

Mycorrhizae isbiotone bacteria and fungi content label “a fungus that grows in association with the roots of a plant in a symbiotic or mildly pathogenic relationship”. Imagine a network of fungi that connects plants to one another and their relationship to eachother as mutually beneficial.

Plants feed the Mycorrhizae and Mycorrhizae help feed the plants. Untamed Science has an article that goes into more depth on Mycorrhizae. Have you heard of how plants have their own internet and can talk to each other? Read about it here from the BBC.

The three different kinds of Bacillus contained in this label on the right all have their own roles in the nutrient uptake of a plant. For example Bacillus megaterium is a phosphate solubilizing bacteria (PSB). As the name suggests it helps the nutrient phosphate become available for the plant. Others are nitrogen solubilizing bacteria and some are potassium solubilizing bacteria. Bacillus and Mycorrhizae will improve the growth of the plant, it’s nutrient uptake capabilities, and boost its immunity to disease.

Hopefully you will read more about these amazing underground webs of fungi and bacteria to better understand what they are doing but sometimes we just need to know…

“How can I ensure my soil is a ‘living soil’?”

1. Test your soil pH and nutrients. We carry SOILKIT, soil testing kit that you send in, with a postage paid envelope included, for them to analyze or you can submit a soil sample to the U of M.

2. When you plant a new plant into the ground use a fertilizer that contains these Bacillus and Myccorrhizae (Ectomycorrhizal Fungi – as seen on the label above). This will help build those highways of networking fungi and bacteria to boost your plants nutrient uptake. See the second image down of the tomatoes grown with and Tomatoes with and without biotone.without Biotone. Incredible difference!

3. Try practicing a low till method of gardening. No-till farming has become a conservation effort for soil and water and low till or no-till gardening experience has shown that tilling the ground can interrupt these networks of fungi beneficial to our plants. If you add organic compost or manure on-top of your soil instead of tilling it in, it will slowly add the nutrients your soil needs. Less hard-work digging up dirt and better for the soil! Win win! You may need to use tilling to break up compacted sod when converting soil for a garden but even then if you lay a thick layer of compost over the sod or try the “black-out” method of covering the sod with newspaper, cardboard, or whatever blocks the sun out until it dies, then putting dirt on top, has worked just fine! Just keep in mind this takes a few years to create the healthiest soil, depending on how deficient or compacted it was before.

4. No bare soil! Keep your soil covered with mulch or a living ground cover. If you have Buckwheat cover crop in bloom and producing buckwheat seeds.dried grass clippings, use that! If you have leaves, use that! It is important to note that any diseased foliage should not be used as mulch.

Any mulch will help reduce evaporation of water (less watering, yah!), stop weeds from growing, and add nutrients to your soil over time as it breaks down. Another method to cover your soil is planting a cover crop or ground cover to stop weeds and to feed the soil! Some examples are oat, field pea, hairy vetch and buckwheat. See the buckwheat cover crop on the image to the right. This piece of soil was very nutrient deficient and needed a nitrogen fixating plant. The plant actually puts nitrogen into the soil! The blooms were great for pollinators also!

5. An added bonus of using a cover crop is it makes your own green manure. When you grow a cover crop you can leave the uprooted or sown crop to die once winter hits and leave it there until spring and lightly work into the soil or use as a natural mulch.

6. Soil aeration is very important. Keep permanent paths to walk on in-between your crop rows. This prevents the soil around your plants from compacting and interrupting the proper water and oxygen balance. Just like us, we need water and oxygen and when soil gets compacted it doesn’t hold the correct percentage (25% of each) of water and oxygen for healthy plants. The compost you added to your soil is also going to help aeration because it adds non-compacted organic matter and brings in earthworms who help aerate soil. If you don’t see earthworms, you know you don’t have enough delicious organic matter for them to eat. Add composted plant material and manure to help bring in the worms!

Soil health is one of the important part of our gardening efforts and understanding what it needs will help grow vigorous, healthy, and productive plants.

Read more about cover crops and green manure from the UMN Extension and check out their cover crop article and selector tool.

All About Soil Gardeners.com

Table of herbs and pepper

What to do with all those Herbs!

We plant a variety of herbs and then we realize we have an over-abundance of herbs towards the end of growing season!

This quick list of ideas might help you when you when we want to try a new cultural dish, add some freshness to cooked or baked dishes, or maybe you want to have all year round use of herbs to enjoy that extra deliciousness without buying from the grocery store.

Pesto in a jar1. Eating Herbs

Of course this is one way to use those herbs! The thing is, we tend to just use a couple sprigs here and there and letting the rest rot or go to waste. Here are a few ideas on how to use more of them.

Take a handful of herbs…yes handfuls…and mix them up in a salad. Make it part of your greens. Try to stick with parsley, cilantro, chervil, tarragon, mint, and dill since they are lighter in flavor. A vinaigrette would pair nicely as not to overwhelm or mask the flavor of the herbs. Add some protein and viola!

Make a summer herb sauce or dish that requires large amounts of herbs. Like Basil Pesto, an Indian Raisto that is great with spicy dishes, falafels, or a chimichurri sauce? Here is a link to a good amount of recipes using herbs! http://www.wbur.org/hereandnow/2014/07/08/kathy-gunst-summer-sauces

I love this recipe!

https://www.bonappetit.com/recipe/creamy-herb-dressing

2. Storing Herbsdrying herbs by loose bundles

For herbs like parsley, basil, mint, and cilantro, a great method of storing them to not degrade the flavor is by freezing. All you have to do is remove the leaves and discard the stem, and chop them according to how you envision using them in the future (soups, stir-frys, etc). Not generally good for fresh eating after thawing so think of a way you could use by cooking or baking.

Another way that you can store herbs is by drying them first. First and foremost, remember to use containers that are clean and dry when storing herbs. An article I found is really helpful on how to dry herbs for storing. https://theherbalacademy.com/6-tips-for-storing-dried-herbs/

There are a few ways of doing this but hanging them in loose bundles in an area that gets good air circulation until crispy dry is a great way to have a little bit of farmhouse feel as well as readily available herbs to use. Slowly drying will help keep the smell and taste integrity over a fast drying method in the oven.

Read more on this Wiki How on how to store herbs.

3. Infusing with Herbs

This is something that I don’t hear many people doing but it’s a great way to change up our coffee, tea, cocktails, dressings, and whatever your herbie heart desires! The two ways I like to do it is by making a simple syrup or infusing an oil. You can make edible oils or just massage oils!

Do not buy a simple syrup in the store ever again! Use this for cocktails, coffee, tea, or something you want to sweeten up and impart the flavor of whatever you infused.

Basic Simple Syrup:

Equal parts sugar ( typically white sugar but try raw or demerara- great for Whiskey drinks) * I have not tried using a sugar substitute but give it a try!*
+Equal parts water

+Now add your flavor! Rosemary, lavender, mint, ALL THREE?! Bring it to a boil and once the sugar is dissolved (will be really quick) take off heat. I like to let it sit with the herbs in there until room temp and then strain into whatever clean container with a snug lid I have. Keep it in the fridge!

Infusing with Oil

You can blend the herbs in the oil (EVOO could be really strong and over power the herb taste so a more neutral oil is best) and then bring to a boil. Sieve out the herbs through coffee filter and store! I always try to keep the oil away from the sun and even chill it in fridge so it lasts longer.

You can also just put herbs in oil and let it sit until the flavor is in the oil. Jojoba oil and olive oils tend to have long shelf lives so its good for making massage oils, hair treatments, salves, etc.

Mountain Rose Herbs has a great article on this!

4. Herbs for teacamomile tea and flowers

Two of our employees have a great business that make herbal teas! Click “Herbs for tea” for a file you can browse to look at few recommendations for annual and perennial herbs to grow and uses for tea!

5. Add herb seed to your spice cabinet.

Cilantro seed is coriander so you can crush or powder to make your own seasoning. Dill seeds are great for pickling! Chive flowers are edible and have a delicious mild onion flavor. Fry them up or eat fresh! If the seeds/flowers are not something you want to eat, then dry the seed pods of your favorite herbs and plant next year.

6. Even if you don’t use them for culinary purpose, don’t forget herbs and their flowers can attract pollinators, and even be a repellent for unwanted pests like mosquitoes.

Basil: repels asparagus beetle and the tomato hornworm. Plant side by side with your tomatoes
Catmint: repels aphids, asparagus beetle, Colorado potato beetle, and, squash bugs. Careful because this can easily spread from flower seeds.

Chives:  repel aphids and Japanese beetles. Flowers attract bees.

Dill: repels cabbage moths and attracts beneficial insects. Flowers attract beneficial pollinators and predators like ladybugs, green lacewings, braconid wasps, tachinid flies, hoverflies, mealybug destroyers, and aphid midges.

Garlic: repels aphids, cabbage moths, and Japanese beetles. Plant under rose bushes to help repel Japanese beetles to their favorite food.

Hyssop: repels cabbage moth and great companion for all cole crops (any plant in the Brassica family…leafy greens, broccoli, kale, cabbage, turnips,bok choy)

Parsley: repels asparagus beetle. Best if you lightly crush the leaves to release the scent.

Sage: repels cabbage moths and carrot rust flies. Flowers attract bees, butterflies, and hummingbirds.

Rosemary: repels cabbage moths, carrot rust flies, and Mexican bean beetles and mosquitos.

Lavender: repels mosquitos. Attracts butterflies and other beneficial insects.

Mint: repels mosquitoes, aphids, cabbage moths, and even ants. Be sure to plant in pots or else this may take over your garden!

Culinary herbs such as mint, thyme, tarragon, oregano, dill, and chives can also be planted throughout the garden to help repel deer.

———

Whatever you want to do with your herbs, go for it! Experiment! If you don’t have time to use them, start giving them away! I love the gift of fresh herbs with some flowers!